Self-Host LiveKit in your Cloud 
Deploy LiveKit in your Kubernetes cluster using Zeet to build scalable, real-time audio and video experiences into your application. LiveKit provides APIs and SDKs to develop interactive and customizable video conferencing, streaming, and communication applications with features like multi-party calls and real-time media processing.
For additional information on LiveKit, please refer to the LiveKit Documentation.
LiveKit Components
LiveKit is comprised of three main components:
- LiveKit Server: Manages rooms, participants, and media streams, and offers a REST API for client interactions.
- Ingress Service: Ingests streams from external workflows, routing them to the LiveKit Server.
- Egress Service: Used by LiveKit to stream and record rooms.
Pre-requisites
Before deploying LiveKit, ensure you have:
- A Kubernetes cluster connected to Zeet.
- SSL certificates for the primary domain and TURN/TLS.
- A Redis instance for running egress/ingress services or multiple LiveKit server replicas. Deploy Redis on Zeet by following the Redis Deployment Guide.
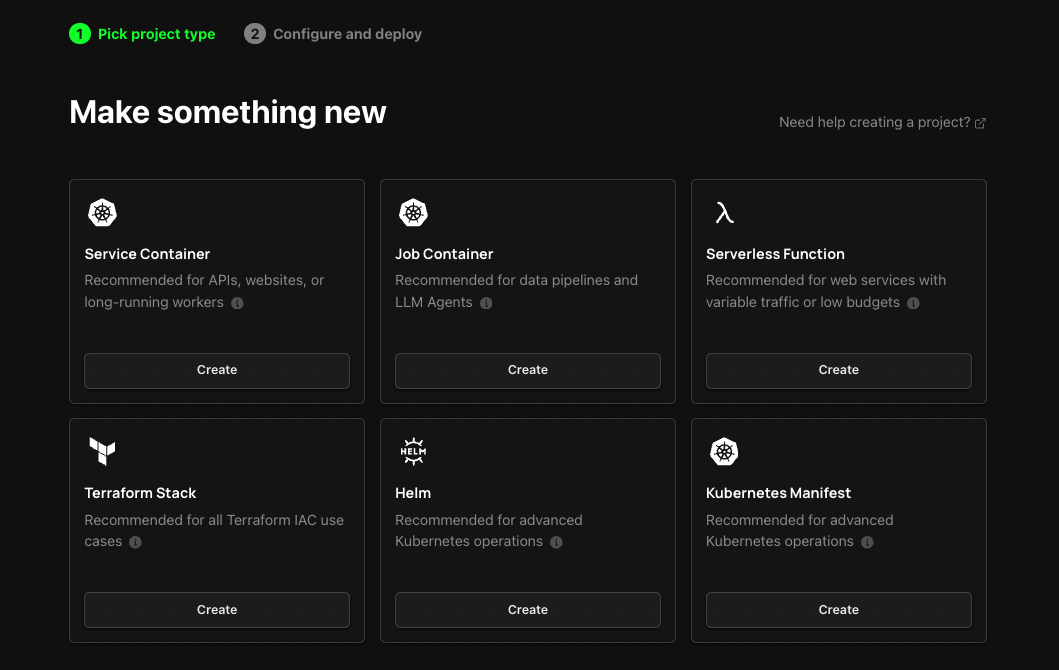
Deploy LiveKit in your Kubernetes Cluster
Deploy LiveKit using Zeet's Helm Project Type:
- Navigate to the Create Project Menu and select Helm Project Type.
- For a comprehensive guide on deploying a Helm Chart, refer to the Helm Project Type Documentation.
Deploy 3 separate projects for each LiveKit component, requiring a Kubernetes cluster connected to Zeet.
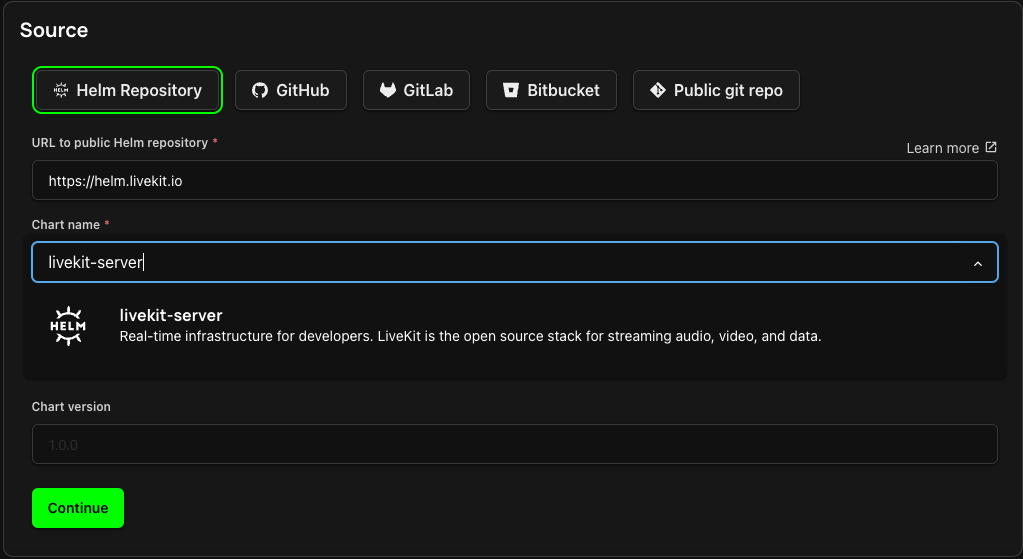
LiveKit Server
For the server, use the following Helm repository details:
Helm Repository Name: https://helm.livekit.io
Chart Name: livekit-server
Select the cluster for deployment and configure any custom chart values as needed.
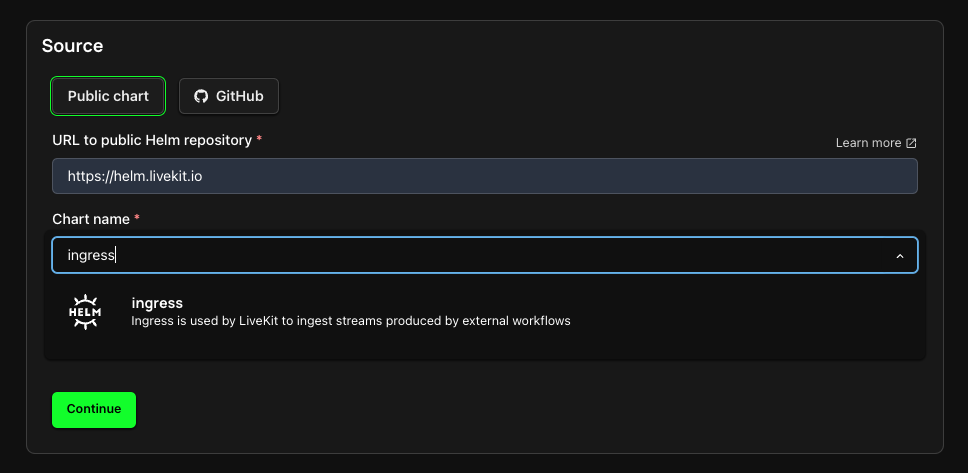
Ingress Service
For the ingress service, provide:
Repository Name: https://helm.livekit.io
Chart Name: ingress
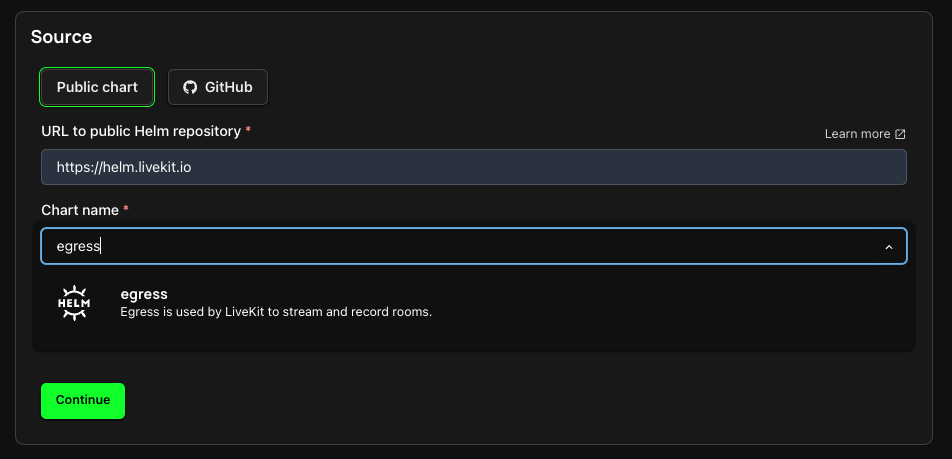
Egress Service
And for the egress service:
Repository Name: https://helm.livekit.io
Chart Name: egress
Additional LiveKit Configurations
Domain, SSL Certificates, and Load Balancer
A secure LiveKit deployment requires a domain and an SSL certificate for that domain. Use this domain as the primary
endpoint for LiveKit clients (e.g., wss://livekit.yourhost.com). Ensure the SSL certificate is signed by a trusted
authority.
Set up HTTPS/SSL termination with a load balancer or reverse proxy. If using TURN, a separate domain and SSL certificate are necessary.
Import your SSL certificate(s) as a Kubernetes Secret for TURN/TLS and HTTPS setup on the load balancer:
kubectl create secret tls <name> --cert <cert-file> --key <key-file> --namespace <namespace>
For more details, see the LiveKit Deployment Documentation. Ensure the secret is created in the same namespace as your deployment.
Networking and Firewall
LiveKit requires direct network access with host networking, meaning LiveKit pods directly handle rtc.udp/tcp ports on nodes. This configuration limits you to one LiveKit pod per node but allows running other workloads on these nodes.
Properly configure your firewall to allow traffic on LiveKit ports. Consult the LiveKit Ports and Firewall Documentation