PostHog
PostHog is an open-source product analytics platform that helps businesses to understand user behavior and improve their products. It offers features such as event tracking, user cohorts, and funnels to help teams analyze user data and gain insights into their customers' behavior.
Here is how you can deploy and set up production-ready PostHog using Zeet Blueprints.
1. Helm Blueprint for PostHog
To get started, head over to the Zeet dashboard and select the Create New option from the menu. Then, choose the Helm Blueprint option and configure the source using the following inputs:
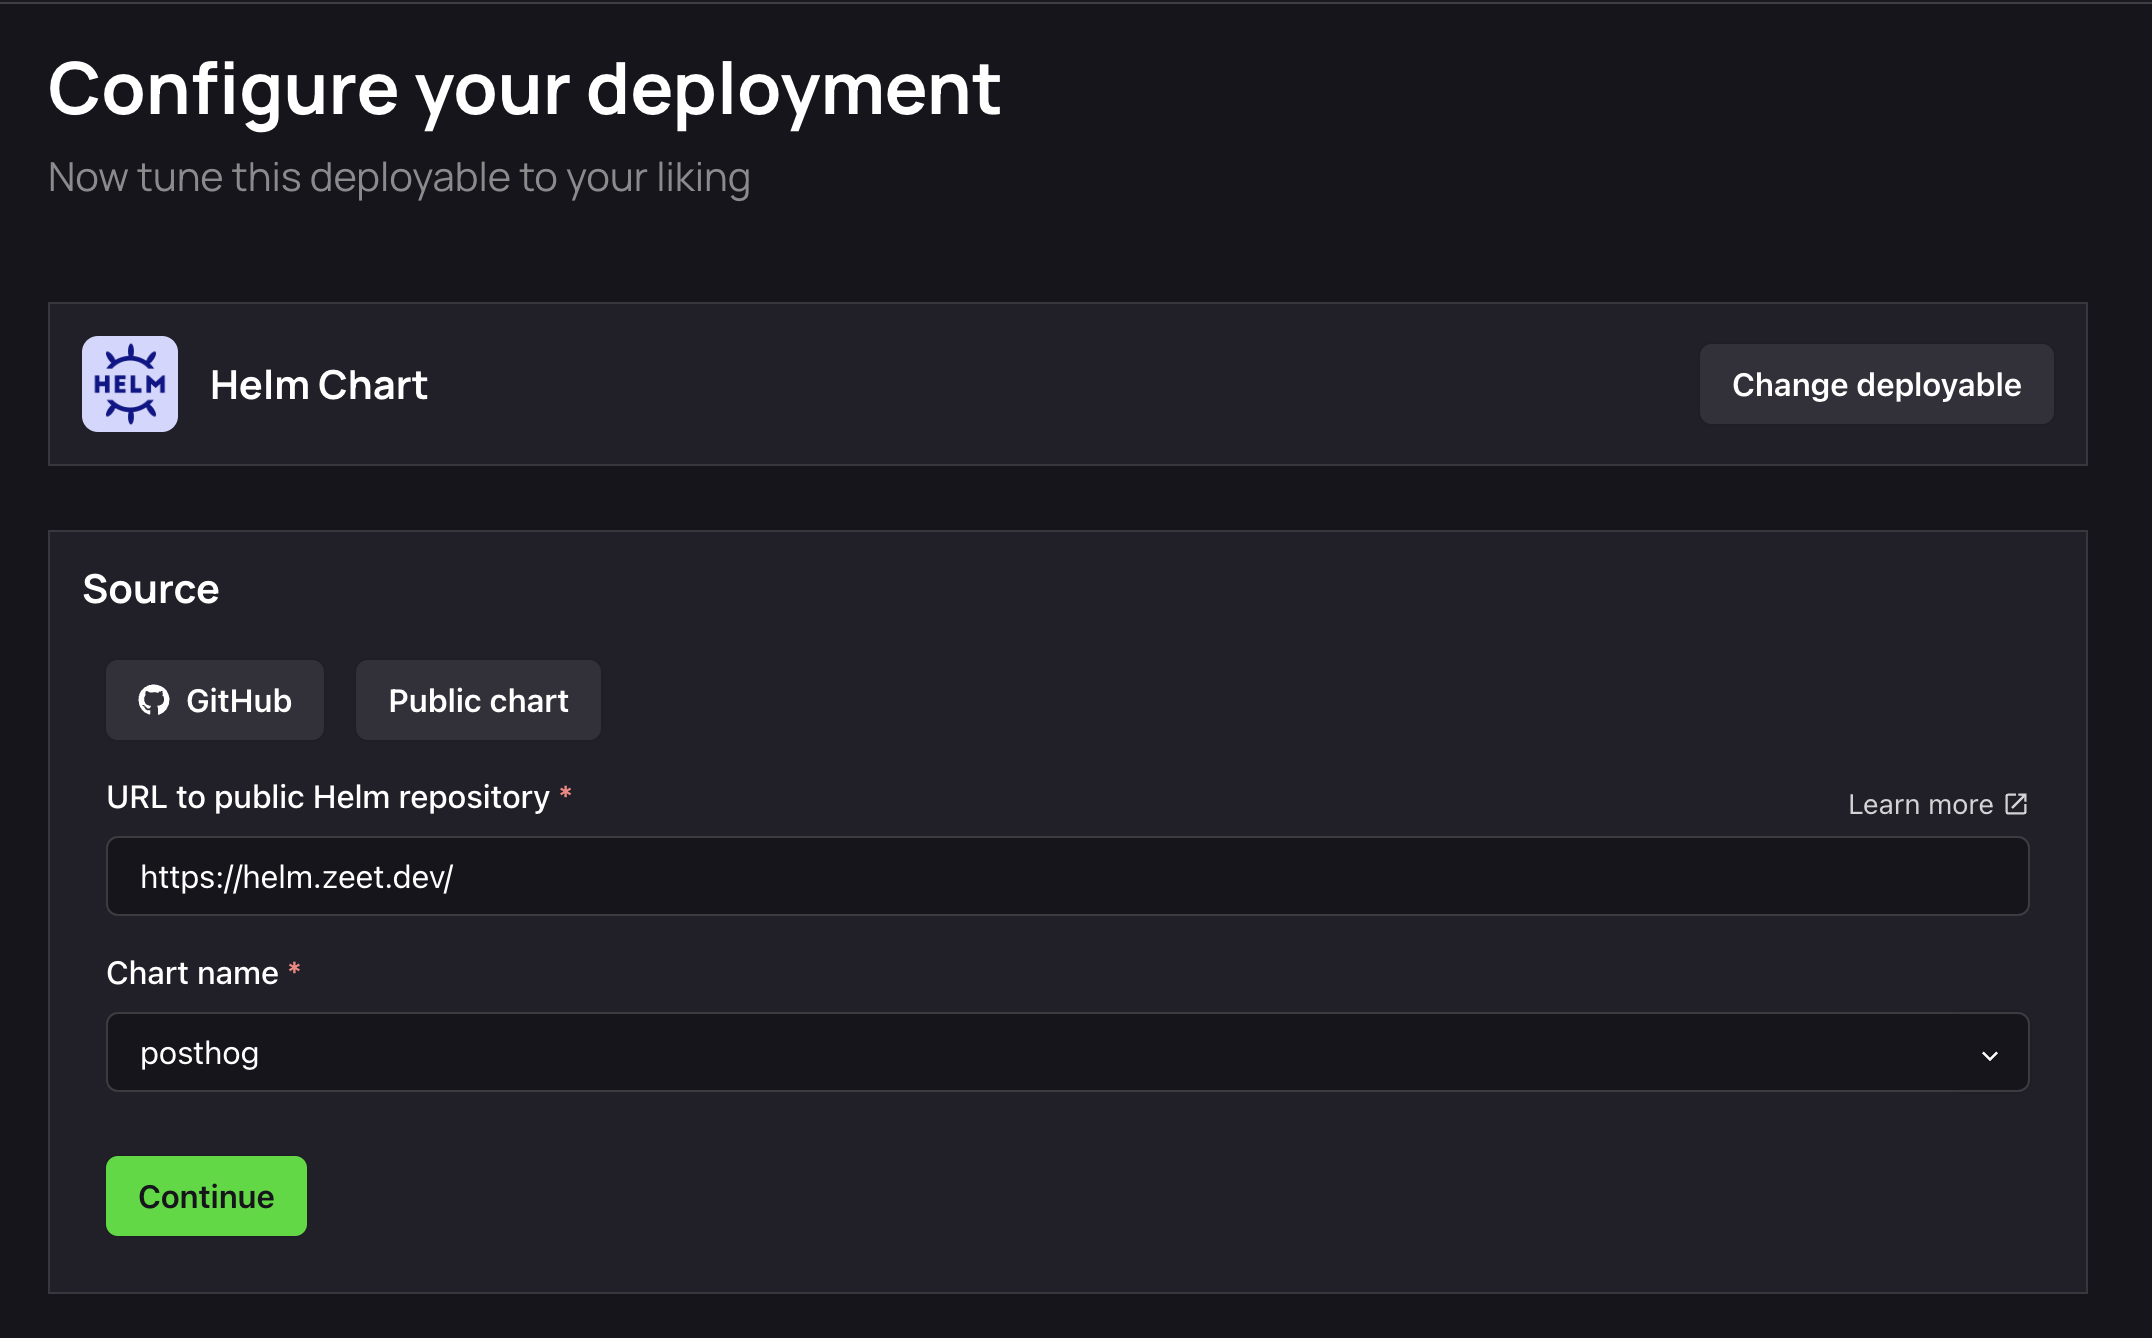
Alternatively, you can use this link to pre-fill these values.
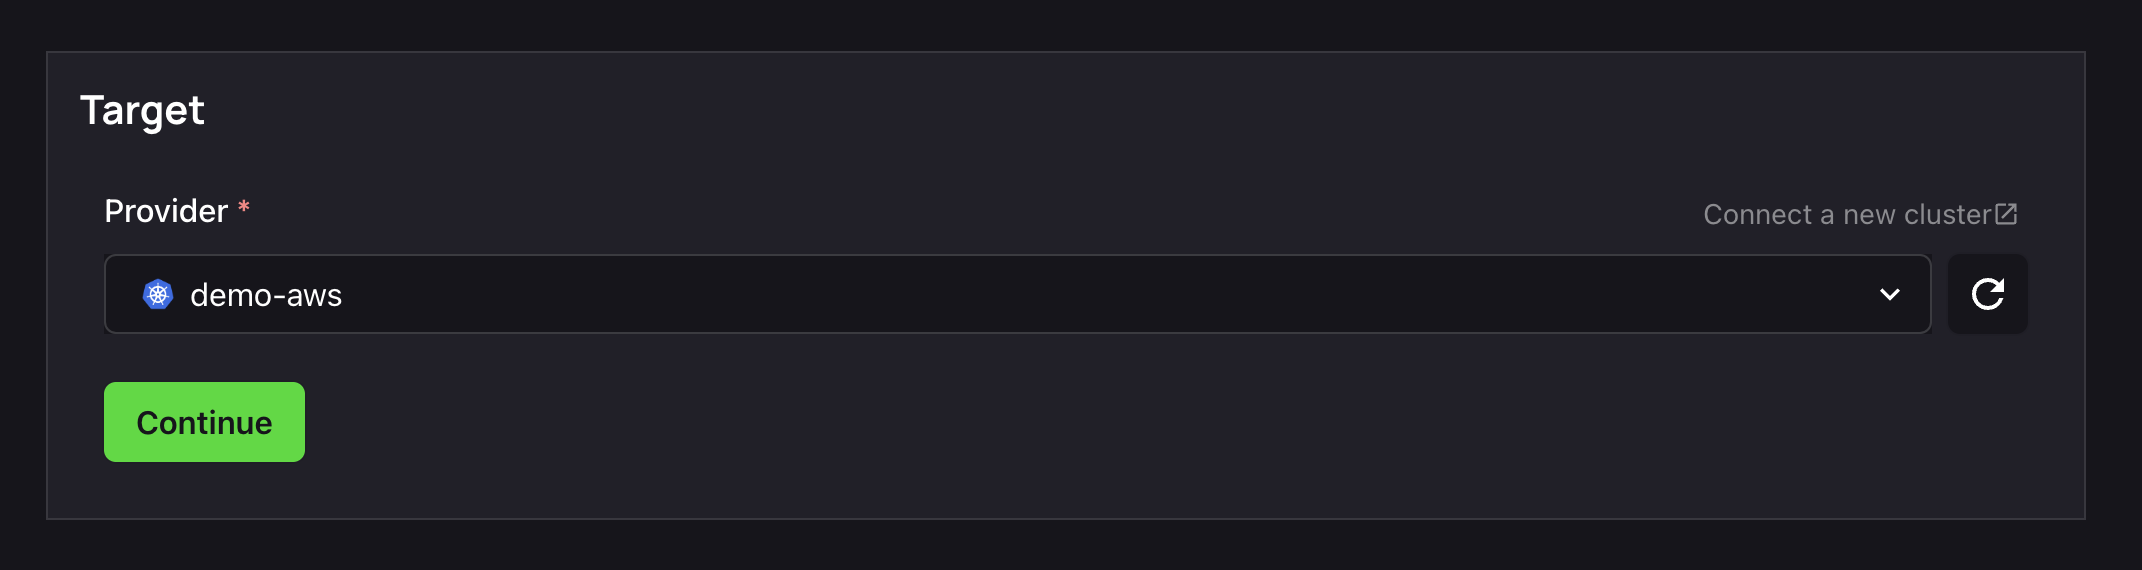
2. Select Target
The next step is to select your Deploy Target. Helm charts are deployed to your cluster. If you don't already have a cluster, you can use the Link in this step to create/ link a new cluster.
3. Configure Inputs
Source, check. Target, check.
It's now time to configure the inputs for your chart to get it running.
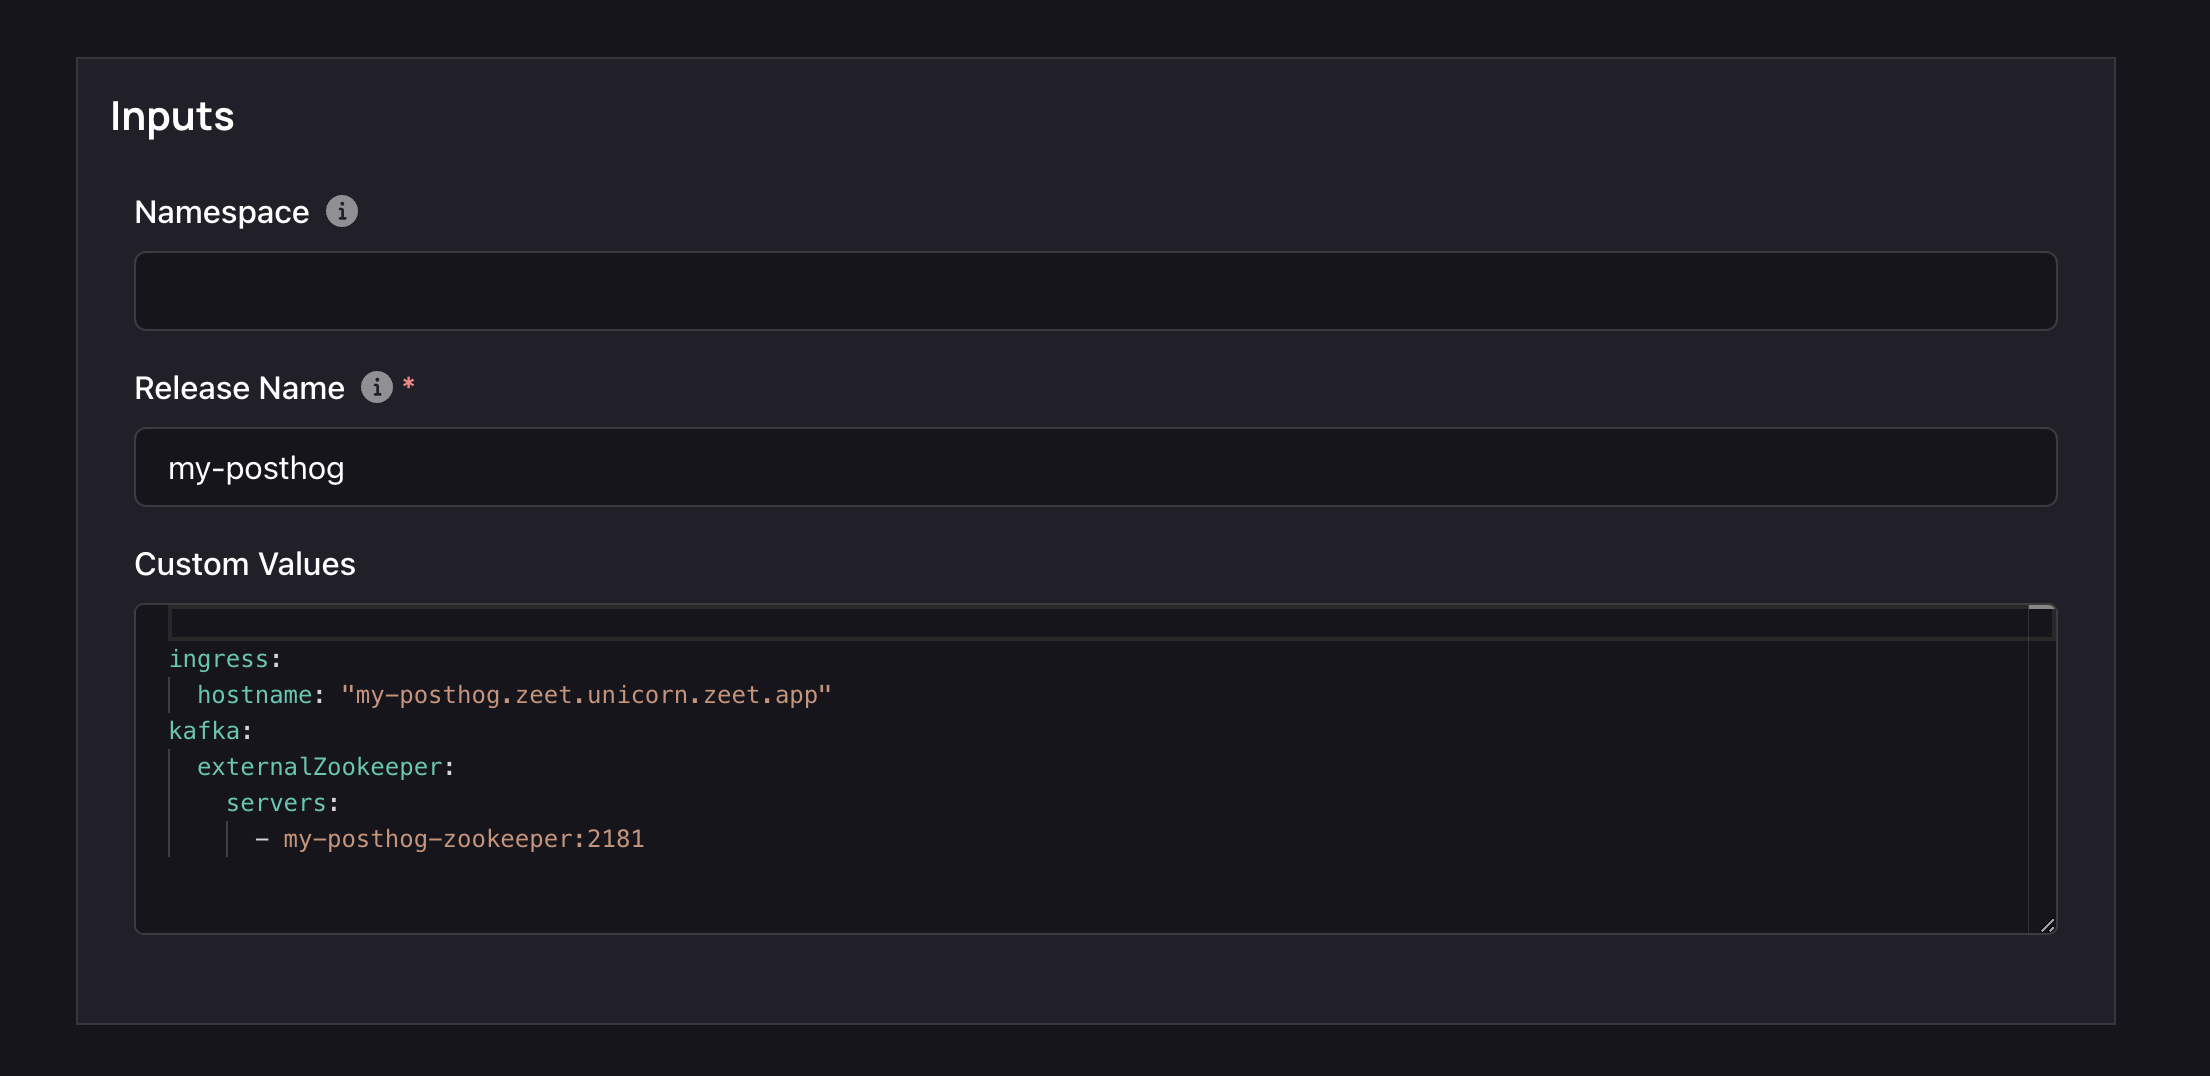
- A Namespace is a Kubernetes object that allows you to organize and isolate resources within a cluster. You can leave this field empty, or assign a custom namespace value.
- The Release name will be referenced as $ZEET_APP_ID below.
- Helm Chart Values are variables that allow you to customize the configuration of your Helm chart. Here is the minimal required configuration to get PostHog running.
ingress:
  hostname: "$ZEET_APP_ID.$ZEET_CLUSTER_DOMAIN"
kafka:
  externalZookeeper:
    servers:
      - $ZEET_APP_ID-posthog-zookeeper:2181
Replace $ZEET_APP_ID and $ZEET_CLUSTER_NAME with your own configuration.
For example if your posthog deployment's name is my-posthog and your cluster's name is zeet-unicorn the correct configuration would be
ingress:
  hostname: "my-posthog.zeet-unicorn.zeet.app"
kafka:
  externalZookeeper:
    servers:
      - my-posthog-posthog-zookeeper:2181
Production Configuration
If you are running PostHog in production with large event volume, we recommend using these settings:
ingress:
  hostname: "${ZEET_APP_ID}.${ZEET_CLUSTER_DOMAIN}"

clickhouse:
  persistence:
    size: 200Gi
  tolerations:
    - effect: NoSchedule
      operator: "Exists"
      key: zeet.co/dedicated
  resources:
    requests:
      cpu: 2
      memory: 12G

postgresql:
  persistence:
    size: 50Gi

kafka:
  externalZookeeper:
    servers:
      - ${ZEET_APP_ID}-posthog-zookeeper:2181
  persistence:
    size: 200Gi
  logRetentionBytes: _150_000_000_000

events:
  hpa:
    enabled: true
  tolerations:
    - effect: NoSchedule
      operator: "Exists"
      key: zeet.co/dedicated
  resources:
    requests:
      cpu: 2
      memory: 6G

pgbouncer:
  hpa:
    enabled: true
  resources:
    requests:
      cpu: 0.5
      memory: 1G

plugins:
  hpa:
    enabled: true
  resources:
    requests:
      cpu: 1
      memory: 2G
web:
  hpa:
    enabled: true
  resources:
    requests:
      cpu: 1
      memory: 2G
worker:
  hpa:
    enabled: true
  resources:
    requests:
      cpu: 1
      memory: 2G
4. Finalize and Deploy!
Once configured, give your new Helm Project a name and a place to belong. Select the Group and Sub-Group your Project should live in, or create new ones here.

After giving it a name and a home, you can Deploy it, or save it as a draft to come back and deploy later. Your Posthog Project will take around 5-10 minutes to finish initializing on the first deploy.
After deployment,
- The posthog instance will be available at
$ZEET_APP_ID.$ZEET_CLUSTER_DOMAIN. - Using the previous example, the posthog url would be
https://my-posthog.zeet-unicorn.zeet.app
You can now continue to setup PostHog!
Custom Domain Name
If you want to make posthog use custom domain name you can simply change ingress.hostname to the following
ingress:
  hostname: "cool-name.cool-company.com"
In your DNS provider you would need to setup the following record:
CNAME cool-name.cool-company.com => $ZEET_CLUSTER_DOMAIN
The value for $ZEET_CLUSTER_DOMAIN would be zeet-unicorn.zeet.app from the previous example.