Job Container
Containers are a standardized and portable way to package software applications and their dependencies, allowing for consistent performance across different computing environments.
Job Containers are designed for short-lived, task-oriented processes within a Kubernetes cluster. Ideal for executing specific jobs or batch processing, Job Containers provide a lightweight and efficient solution for tasks that don't require continuous service.
This guide covers how you can deploy a Job Container to your Kubernetes cluster using Zeet.
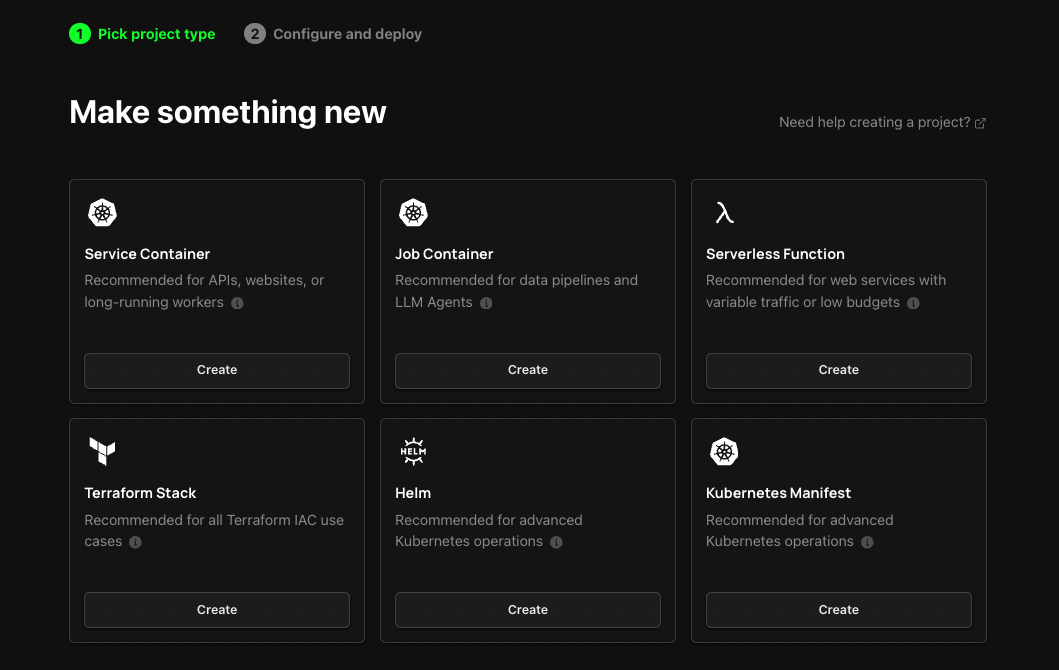
1. Select Job Container Project
To get started, head over to the Zeet dashboard and navigate to the Create New menu. Here, select the Job Container Project Type.
2. Configure Project
1. Pick your Source
The first step in configuring your deployment is to select your Project source. Select a repository from your connected GitHub/ GitLab/ BitBucket account or deploy directly from any public git repository.

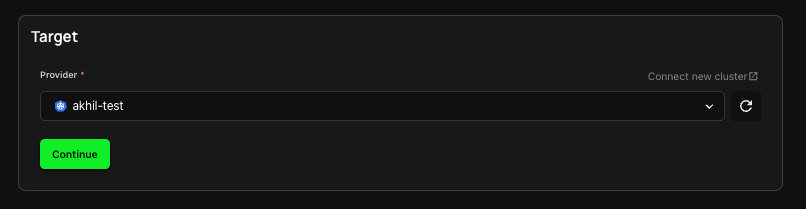
2. Select Target
The next step is selecting your Deploy target. For a Job Containers, this would mean selecting your cluster. If you don't already have a cluster connected, follow the link here to create or link a new Cluster.
3. Configure Inputs
You've got the source and target covered, now it's time to configure the inputs for your Project.
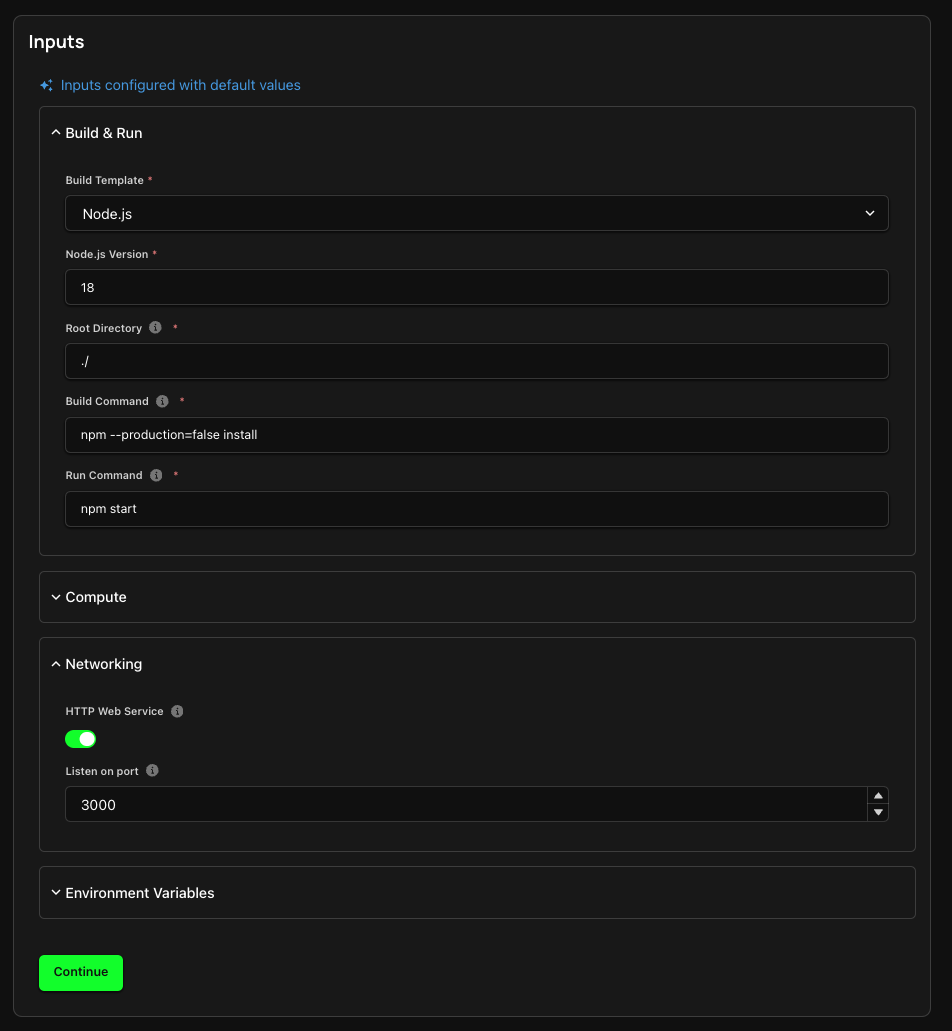
- Here, you can configure your Build & Run settings, including your Build Type, Build and Run commands, and your working directory.
- The Compute section allows you to configure the CPU/ Memory you require for your container. You can also elect to use spot instances here.
- You can also add any Environment variables that your app would require during build-time and run-time.
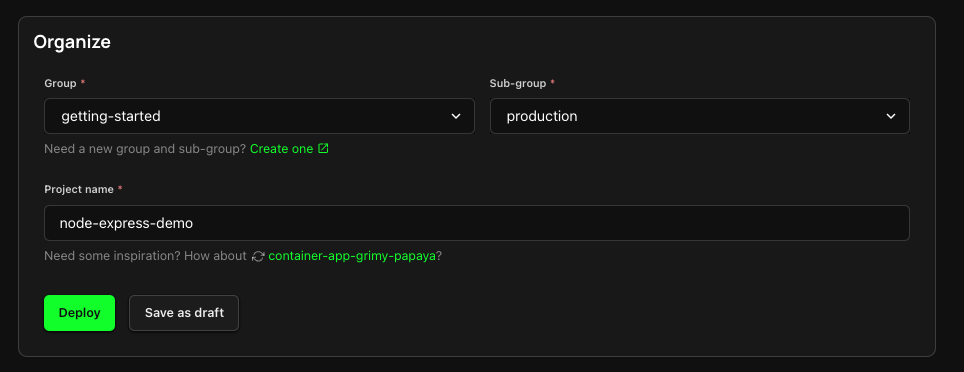
4. Organize
You're almost there! Give your new Project a name and organize it within a Group and Sub-Group. Once organized, Zeet will build your Container so you can trigger an execution when need be.
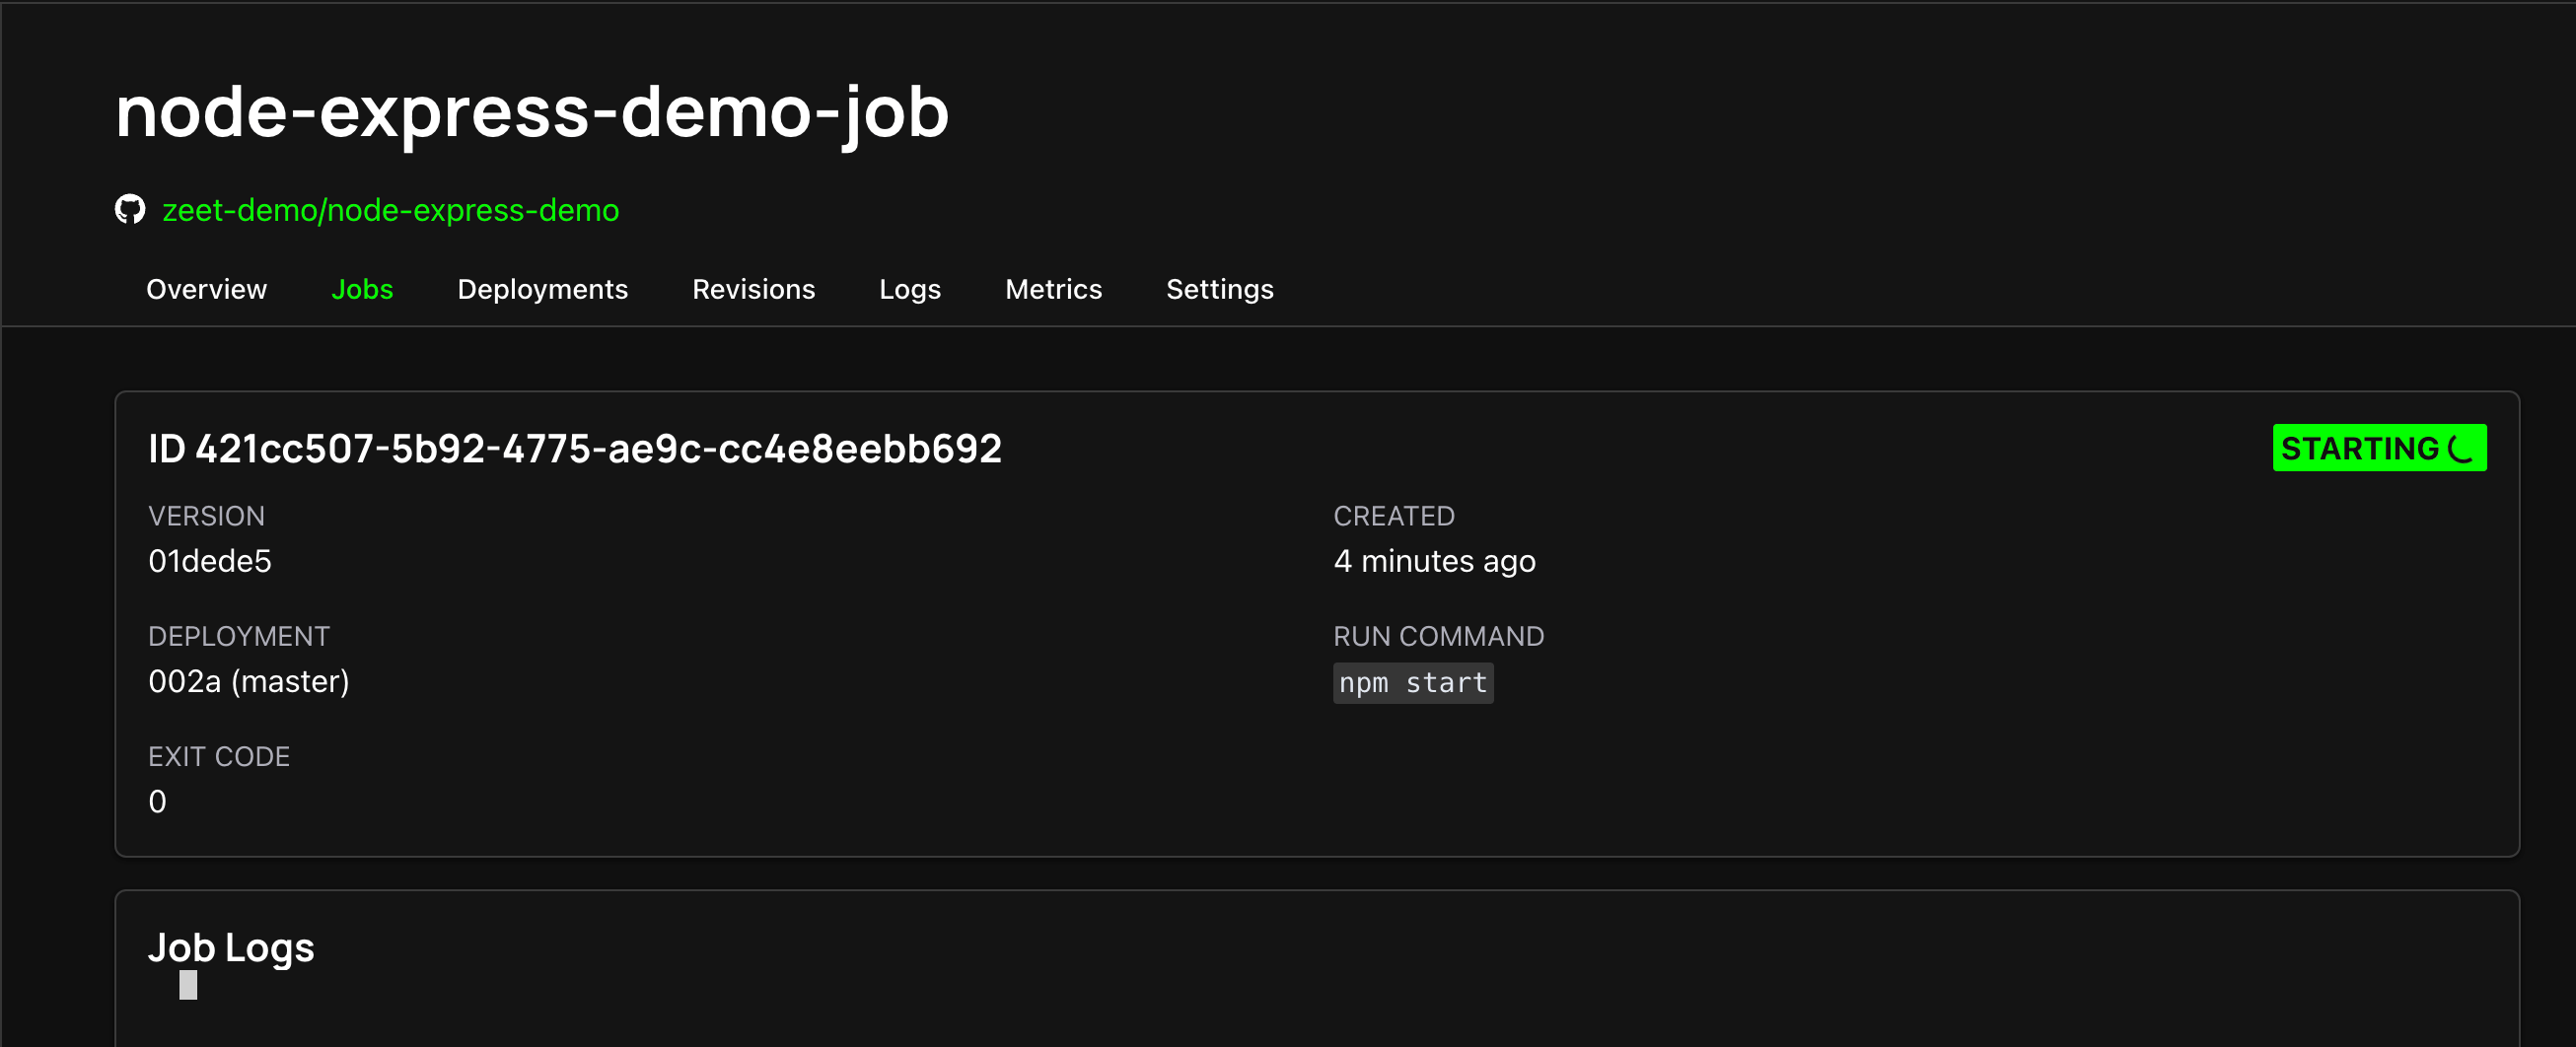
5. Trigger Job
Once built, you can trigger executions of your Job Container Project from the Jobs tab. On the Jobs tab you can see all of your historical executions - you can also trigger a new one by clicking Run Job. You can even have multiple concurrent executions in progress!
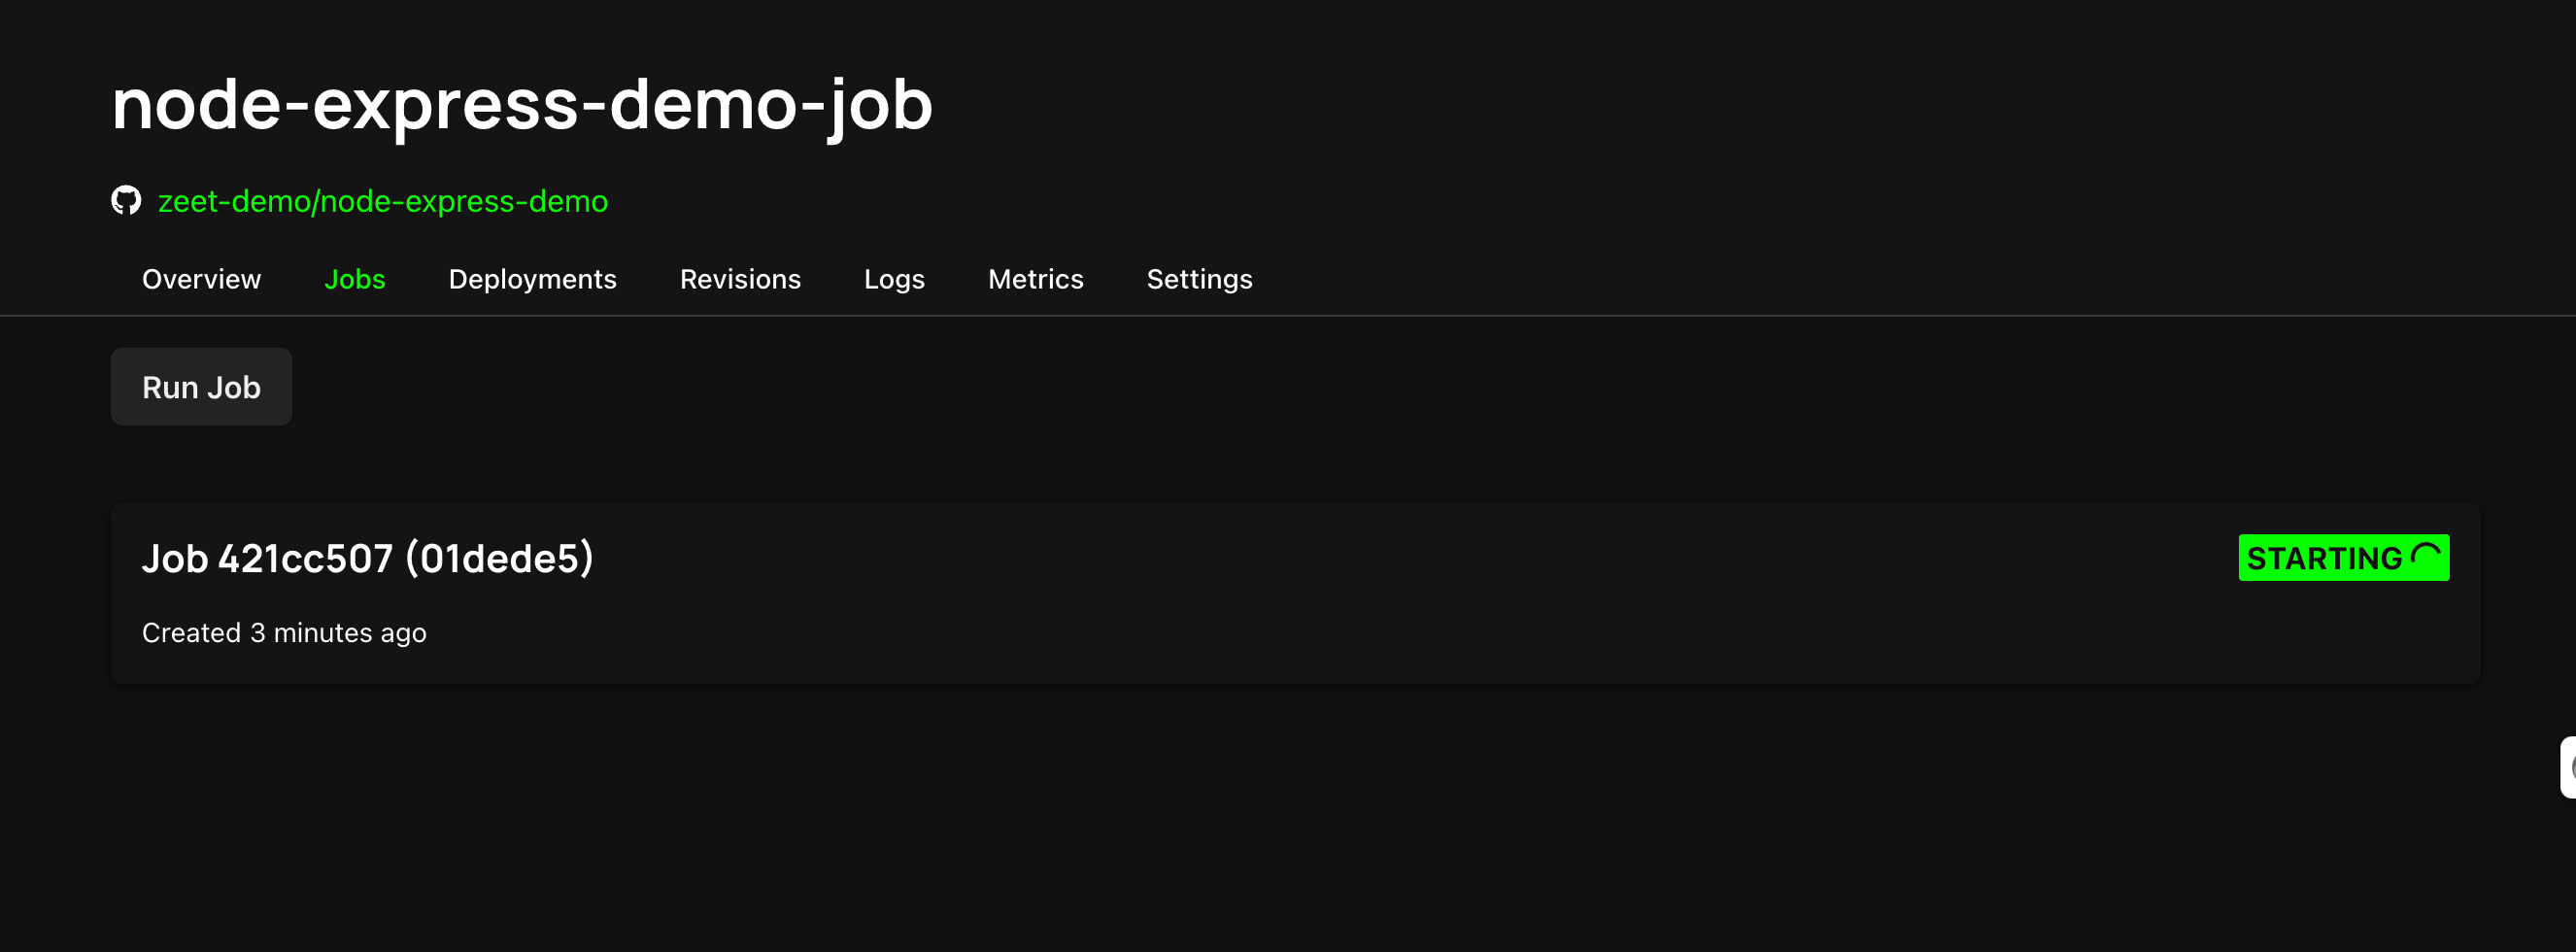
Click into an execution to see more detail, including the Exit Code, runtime logs, and Deployment that was used for this Job.