Microsoft Azure
Zeet supports the deployment of Projects to Azure's AKS Clusters. This guide provides instructions on how to connect your Azure cloud account, your cluster to Zeet and also how to deploy a Zeet's managed AKS cluster.
1. Connect Azure Cloud
To connect your Azure cloud account with Zeet, navigate to Zeet Cloud Console to add a new Cloud Account. From here, select Microsoft Azure.
Before inputting your Azure credentials into Zeet, ensure you have Azure service account credentials configured.
To establish a connection with your Azure account, Zeet requires specific authentication details. These details include:
- Subscription ID
- Tenant ID
- Client ID
- Client Secret
The Name here refers to the alias associated with your cloud account in Zeet - this will make it easier for you to remember and find your cloud account. For more information on where to locate the required authentication information for connecting your Azure account with Zeet, please continue reading.

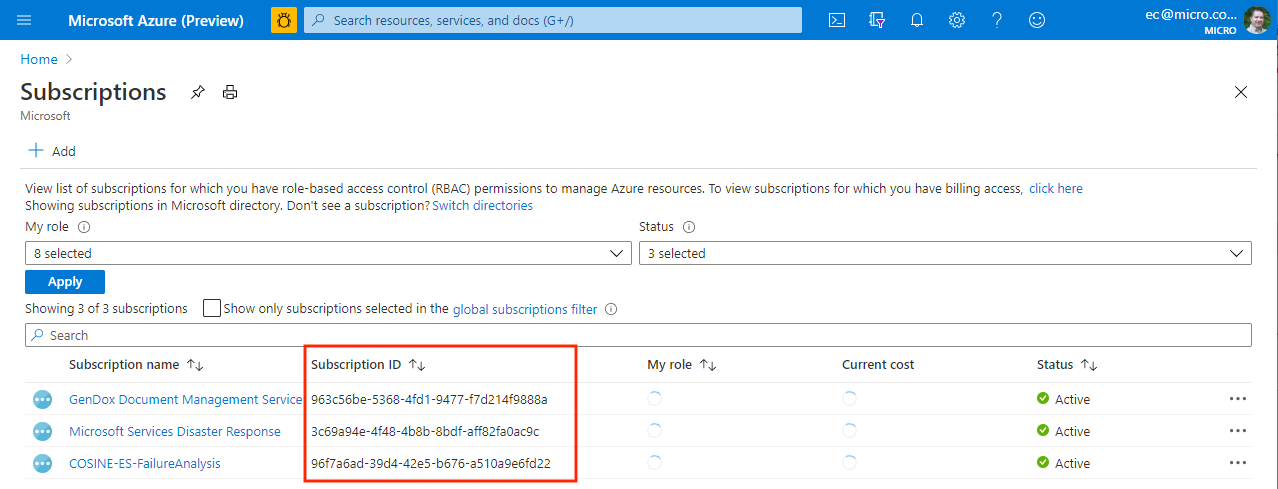
1. Subscription ID
To get the Subscription ID, navigate to the Subscriptions menu to see a list of all the subscriptions associated with your Microsoft Azure account.
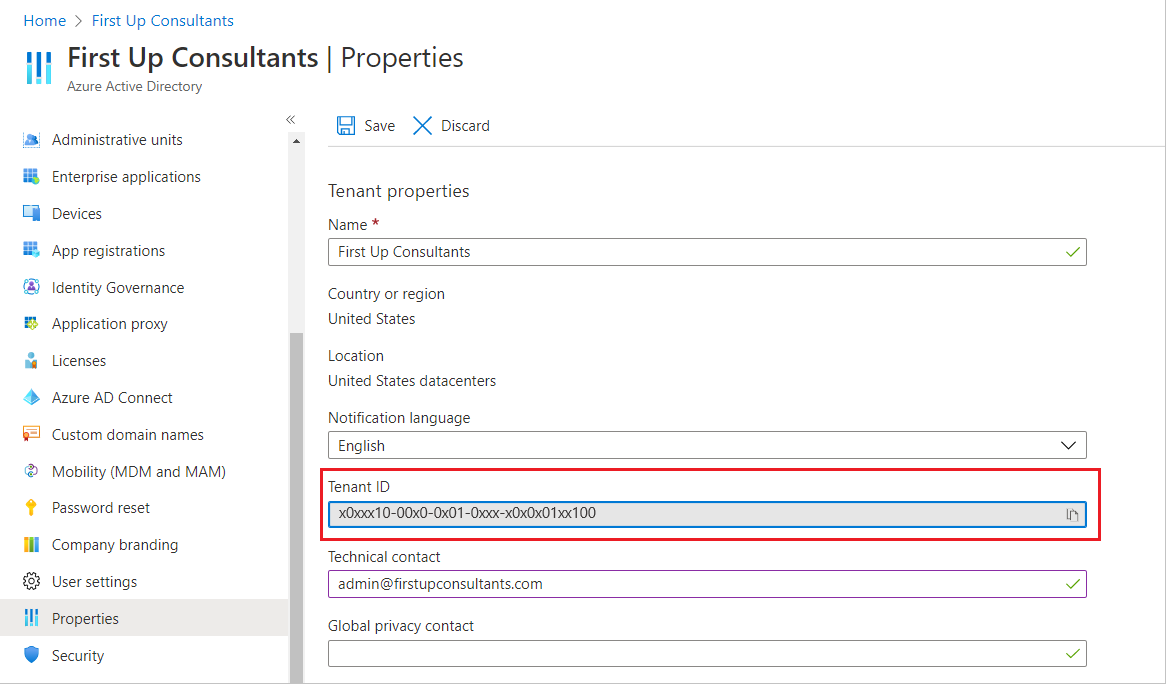
2. Tenant ID
To get the Tenant ID for your Azure Active Directory, navigate to Azure Active Directory. You can find the Tenant ID in the Properties tab here. Alternatively, you can also find the Tenant ID by searching for "Tenant Properties" in global search bar in your Azure dashboard.
Confirm that you are signed into the tenant for which you want to retrieve the ID. If not, switch directories so that you're working in the right tenant.
3. Client ID and Client Secret
Azure Client ID, also known as the Application ID, is a UUID for an application registered in Azure Active Directory. It is used to establish the identity of the application when accessing Azure resources. On the other hand, the client secret is a confidential key associated with the client ID, providing a means of secure authentication between the application and Azure AD.
To connect Zeet with Azure, you are going to have to create a new Service Principal with the correct role associated to the subscription scope. For reference, please check this guide from Azure's official Documentation to register a new application with your Azure AD and create a new Client ID and Secret.
Use the following commands to do that:
# launches the browser to login into the Azure account
az login

# creates a new service account with the Contributor role associated to your subscription
az ad sp create-for-rbac --role Contributor --scopes /subscriptions/{replace_with_your_subscription_id}
The output of the command should be similar to:
{
  "appId": "my client/app id",
  "displayName": "azure-cli-xxxxxx",
  "password": "my client secret",
  "tenant": "my tenant id"
}
Copy the appId value for the Client ID input and the password for the Client Secret input.
The password only shows at the creation of the application. Save it right away to avoid needing to reset the access in order to get a new Client Secret.
2. Successful Cloud Linking
If properly authenticated, you should now see your azure account in your Zeet cloud console. You can now proceed to connect your AKS cluster to Zeet.
3. Azure Cluster
1. Provision New Cluster
Navigate to new cluster page to Zeet Cluster Page to provision a new AKS Cluster.
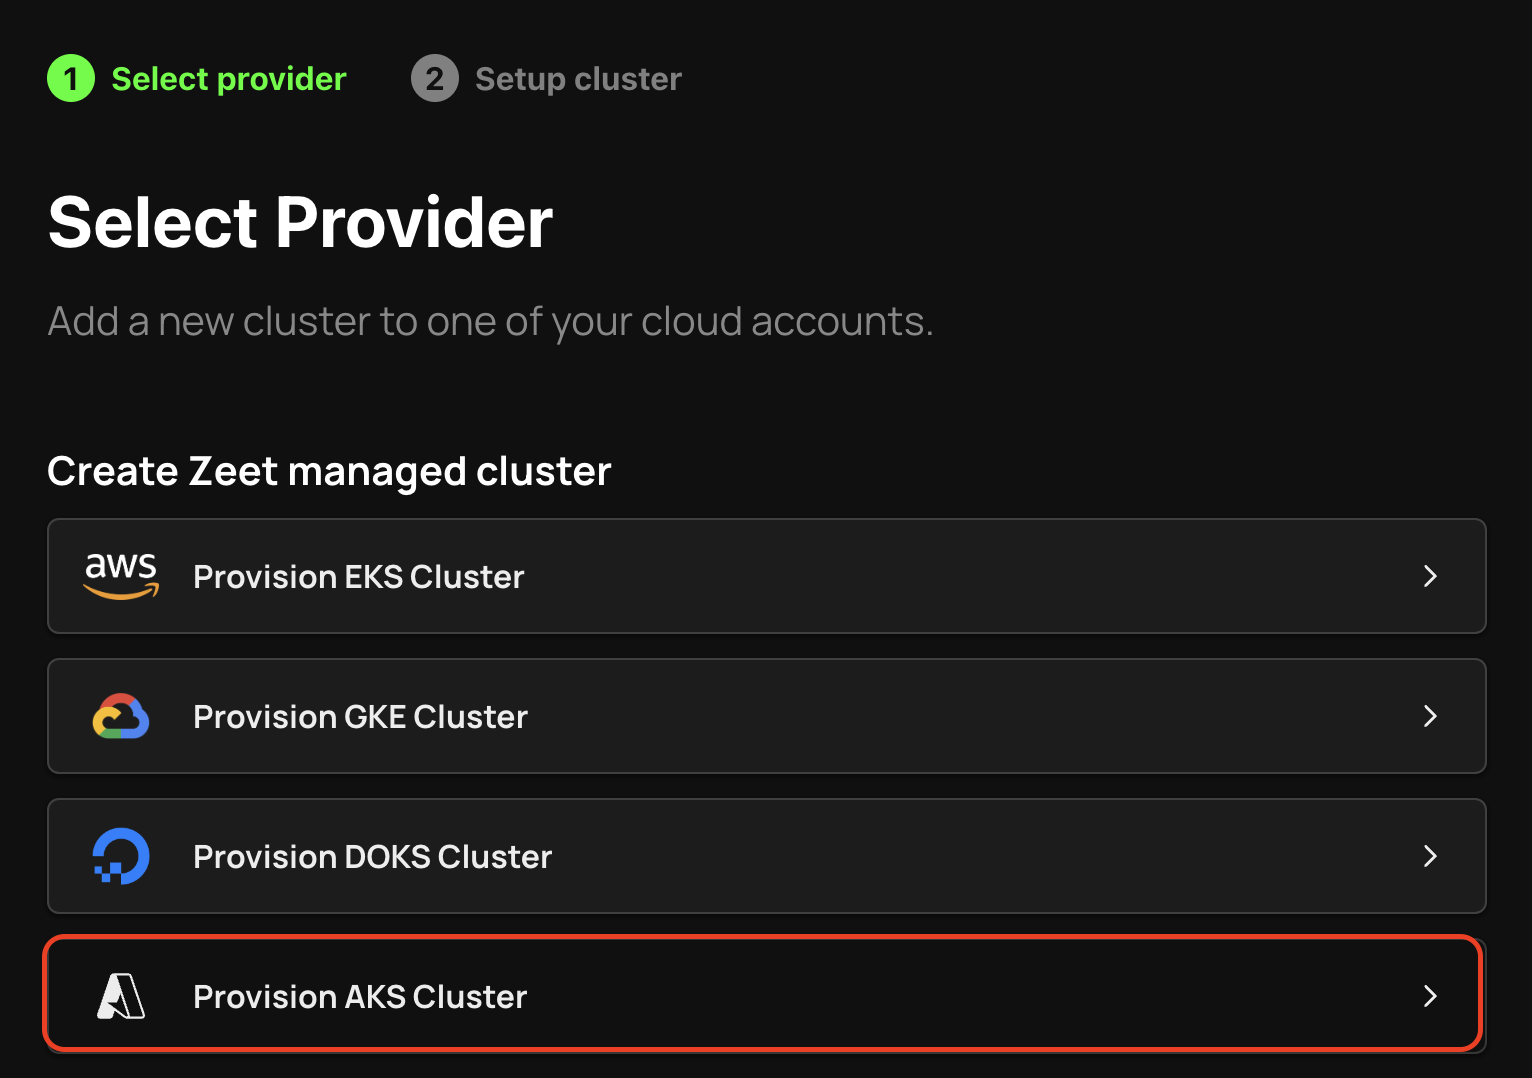
Select the cloud that you connected before, choose a name, select the region and click Create Cluster.
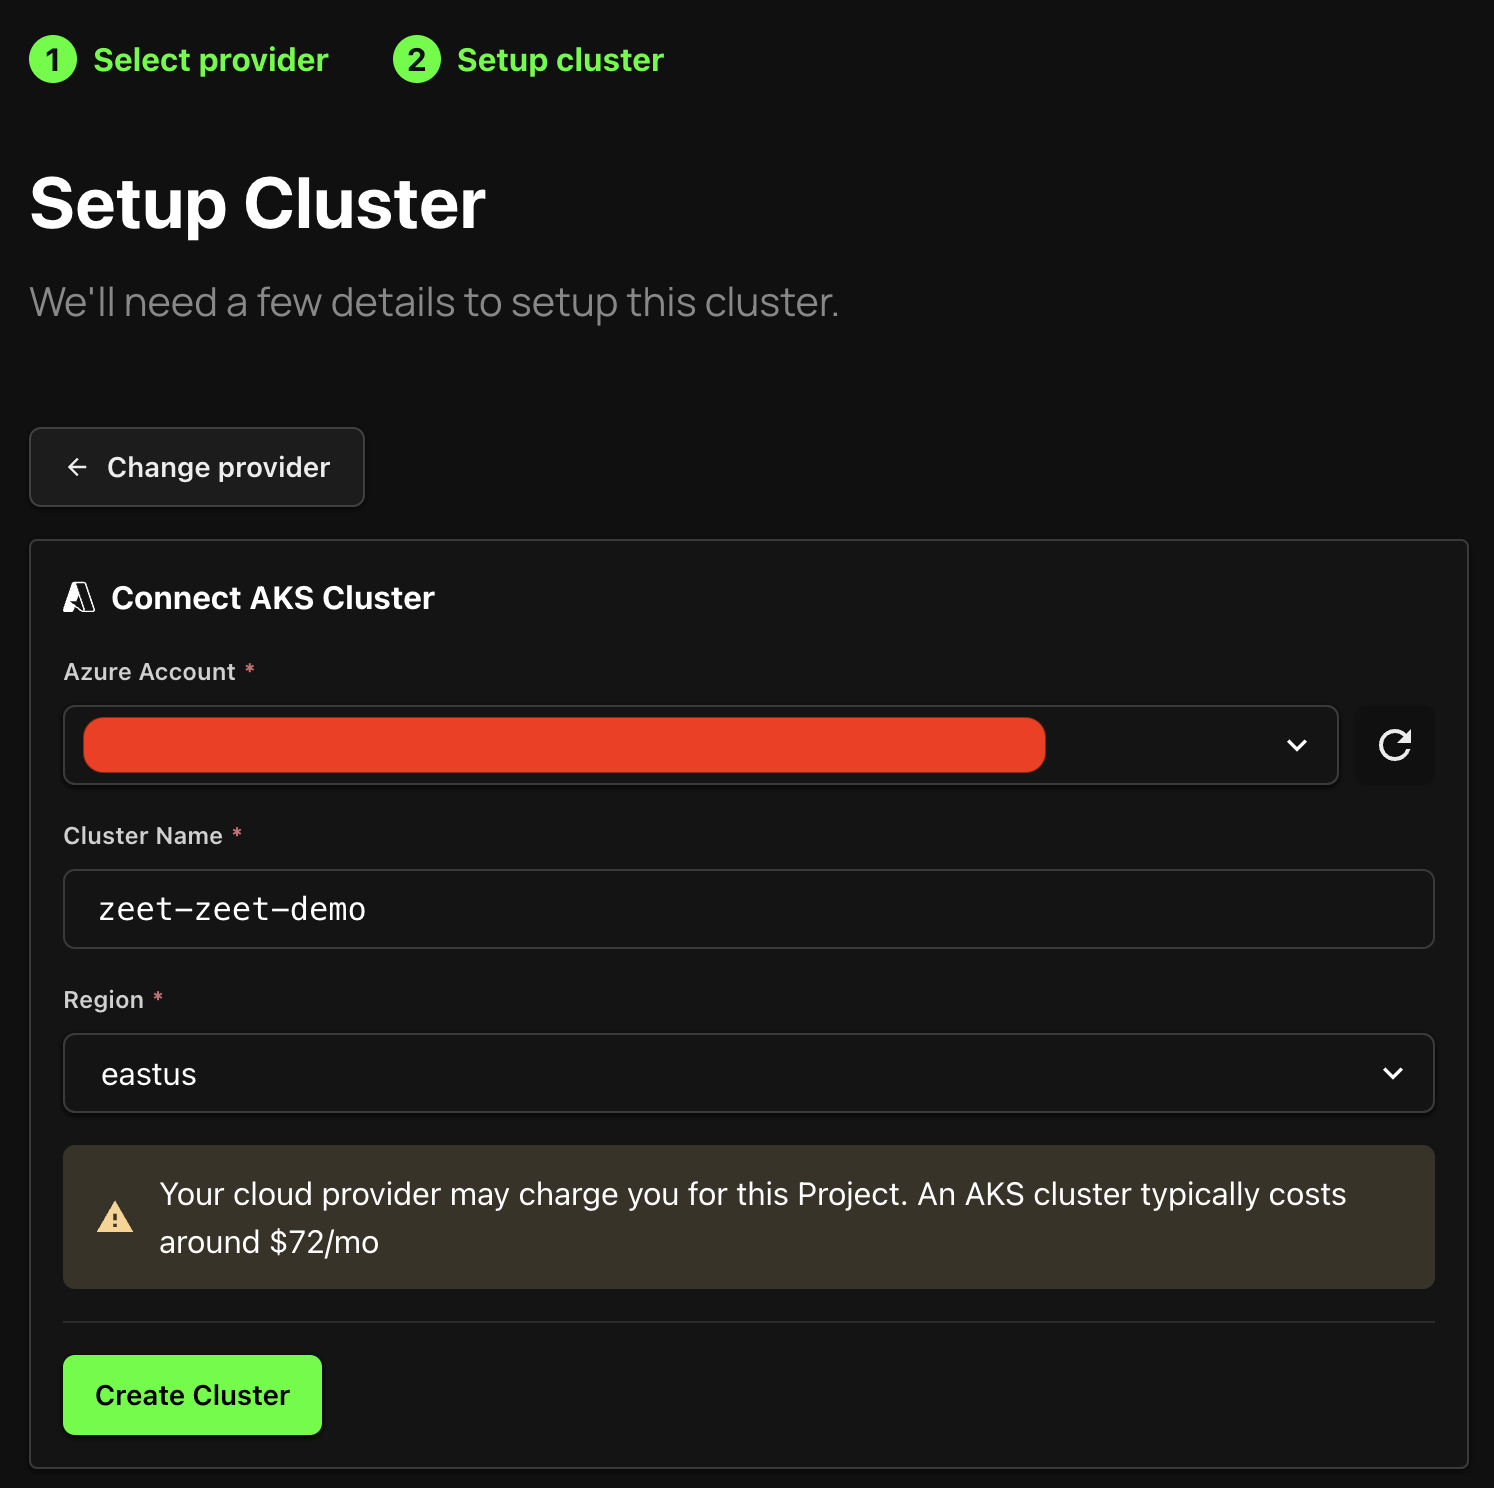
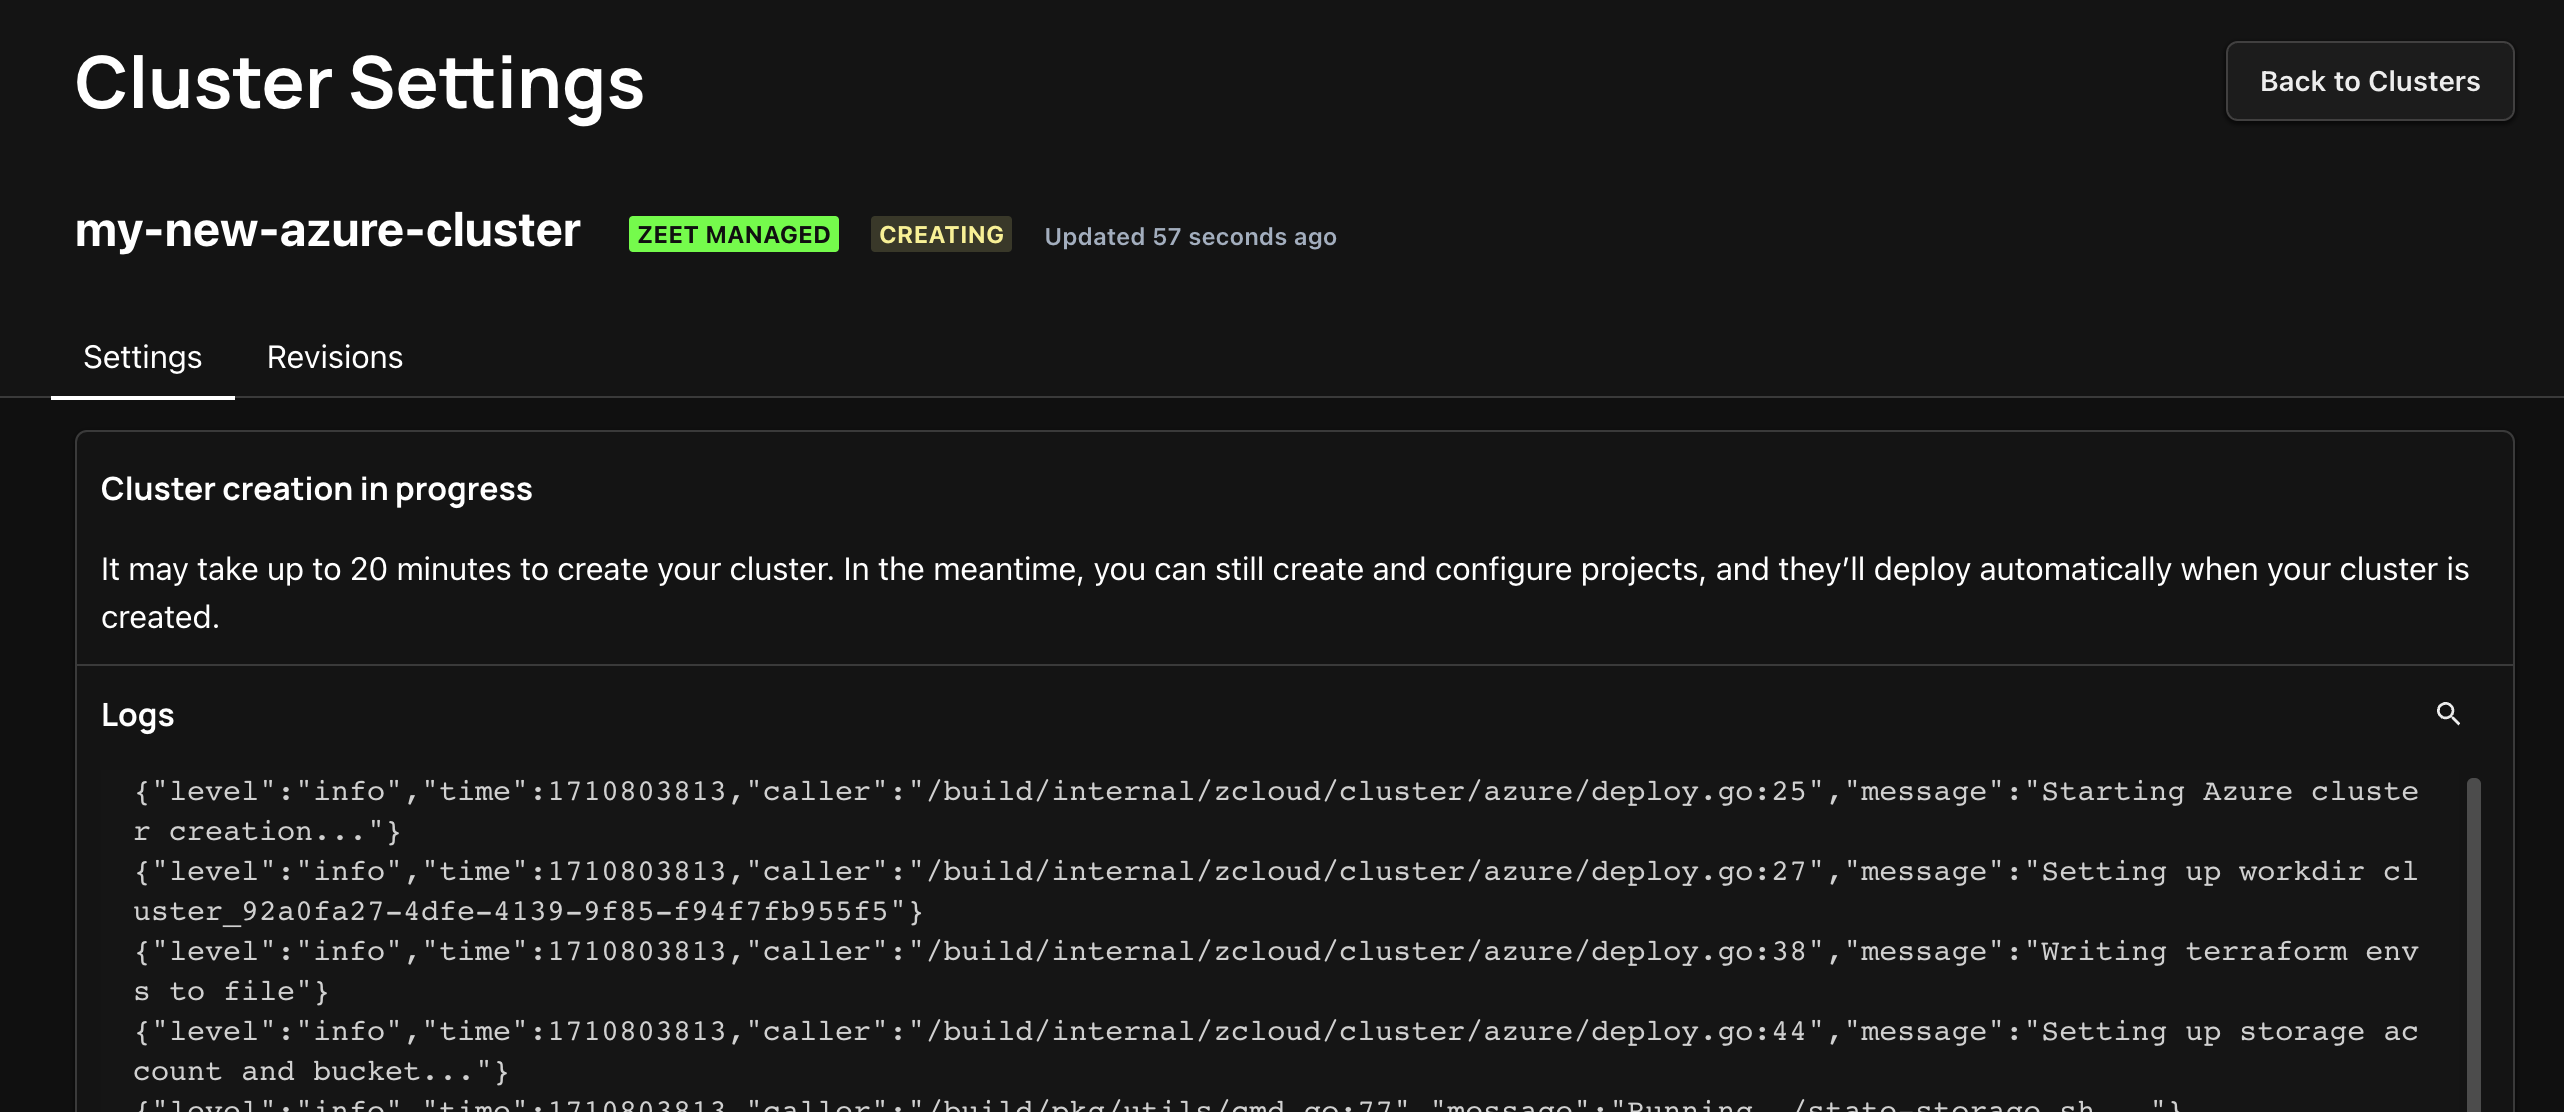
The creation process can take up to 20 minutes. During this process, Zeet makes sure that all the required components are created and installed for a seamless experience.
When the process is completed, the cluster is created and you can jump to 4. Link Container Registry section to add a container Registry if you want to deploy Container Apps.
1. Artifacts Repository
You can check the GitHub Repository with all the manifests and terraform files used to provision the Azure Kubernetes Cluster.
2. Connect Existing Cluster
1. Generate Kubeconfig
To connect your Azure AKS cluster with Zeet, you will need a kubeconfig for your cluster. You can generate the kubeconfig for your cluster by running:
az aks get-credentials --resource-group myResourceGroup --name myAKSCluster --admin
You can then use the kubectl config view command to view and verify the config for your cluster. If you do not already have a cluster, refer to Azure's official docs on deploying a new AKS cluster.
2. Upload Kubeconfig
Once you have the kubeconfig for your cluster, head back to the Zeet Clusters Console and select the "Connect an existing Kubernetes cluster" option. This will prompt you to upload a kubeconfig.yaml file.

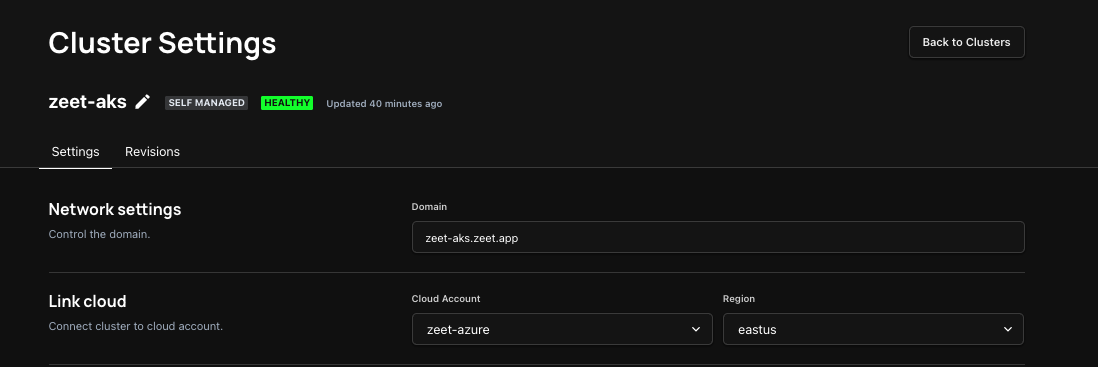
3. Link Cluster to Azure Account
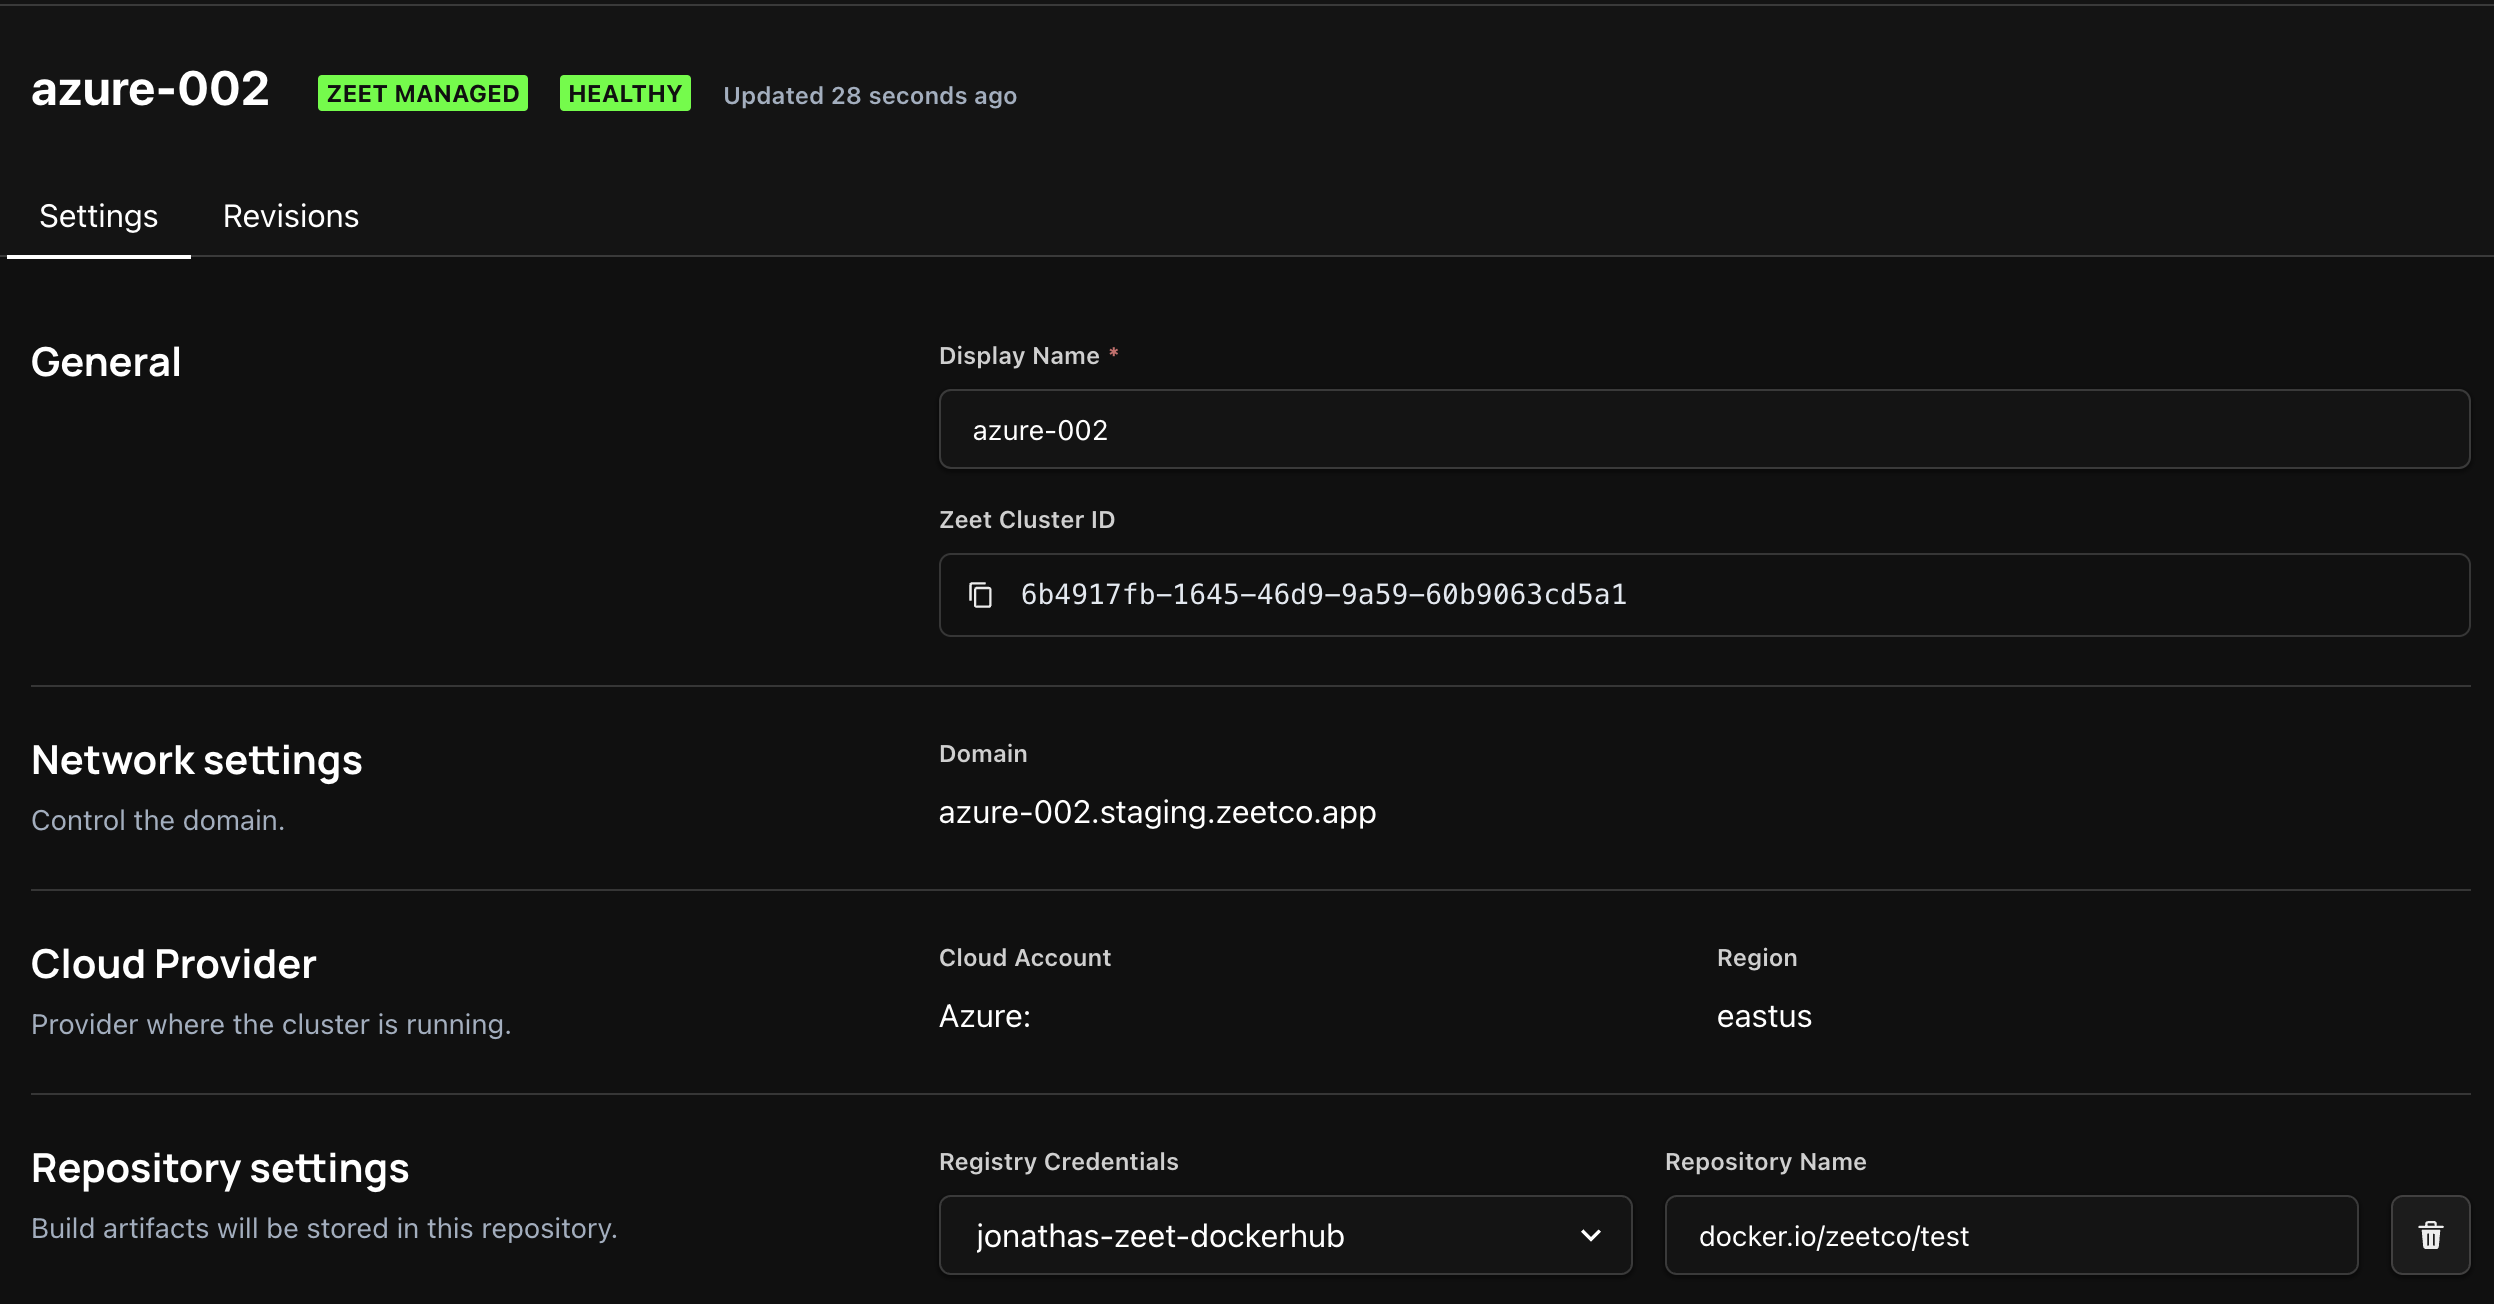
Once the cluster has been added to Zeet, you need to link it to the Azure Cloud Account you had previously added. You can do this in the Link Cloud section of your Cluster Detail page.
4. Link Container Registry (required for building and deploying containers)
In order to deploy a container to a cluster, you need a container registry to store the container image. When deploying a container to a cluster, the image must be pulled from the registry and deployed to the cluster. You can find more information regarding Container Registries on Zeet here.
For multi-cloud/cluster projects, you can add the same registry used in other clusters. Then your Azure cluster will be able to share the same image built in other clusters.
4. Deploy to AKS cluster
You're all set to deploy your first Project to Azure! Navigate to the New Project Menu in Zeet to deploy your favorite Zeet Blueprint.
Troubleshooting
In case of any problem connecting to the Azure cluster, please refer to this Azure Connection Troubleshooting guide.