Custom Domains for Serverless Projects
After you deploy your Project, you will be issued a default production endpoint which will look something like: https://ds7dsfs.execute-api.us-west-2.amazonaws.com. You can add a Custom Domain to your Project to convert this URL into a human-readable URL.
For Resources deployed using the GCP Cloud Run, you can use GCP Cloud Console to add a Custom Domain Name.
This guide explains how you can add a Custom Domain Name to your Project deployed using AWS Lambda.
1. Activate Load Balancing
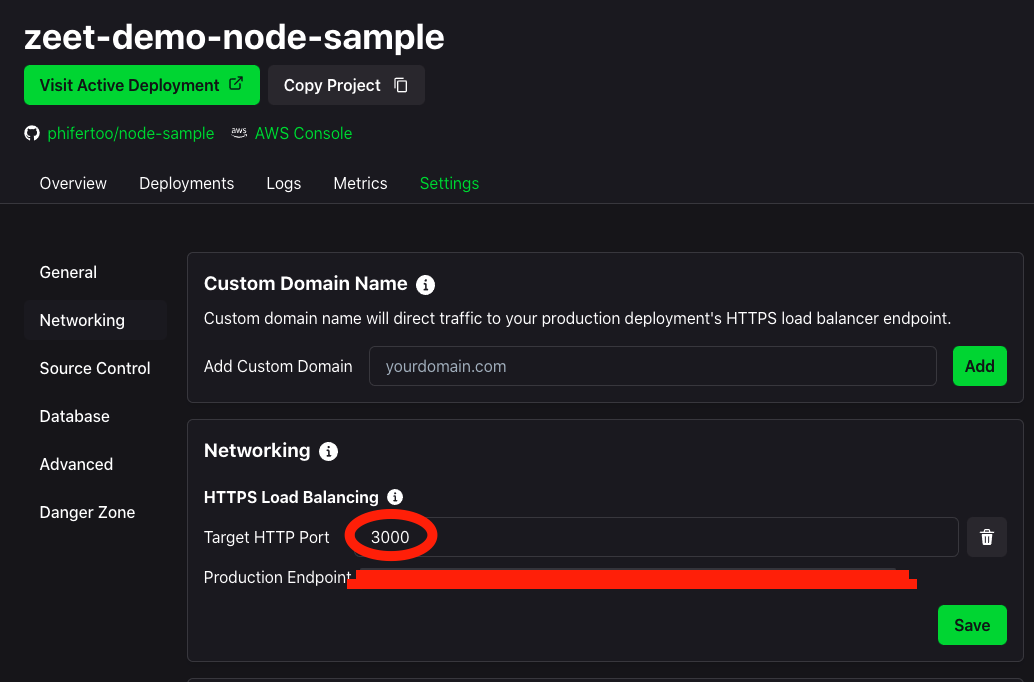
To add a Custom Domain name, you first have to activate a Load Balancer for your Project. A Load Balancer helps distribute traffic across multiple target.
Navigate to the Networking tab under your Project Settings and enter the Port Number which your app listens on. If you had already configured this while creating your Project, you can skip this step!
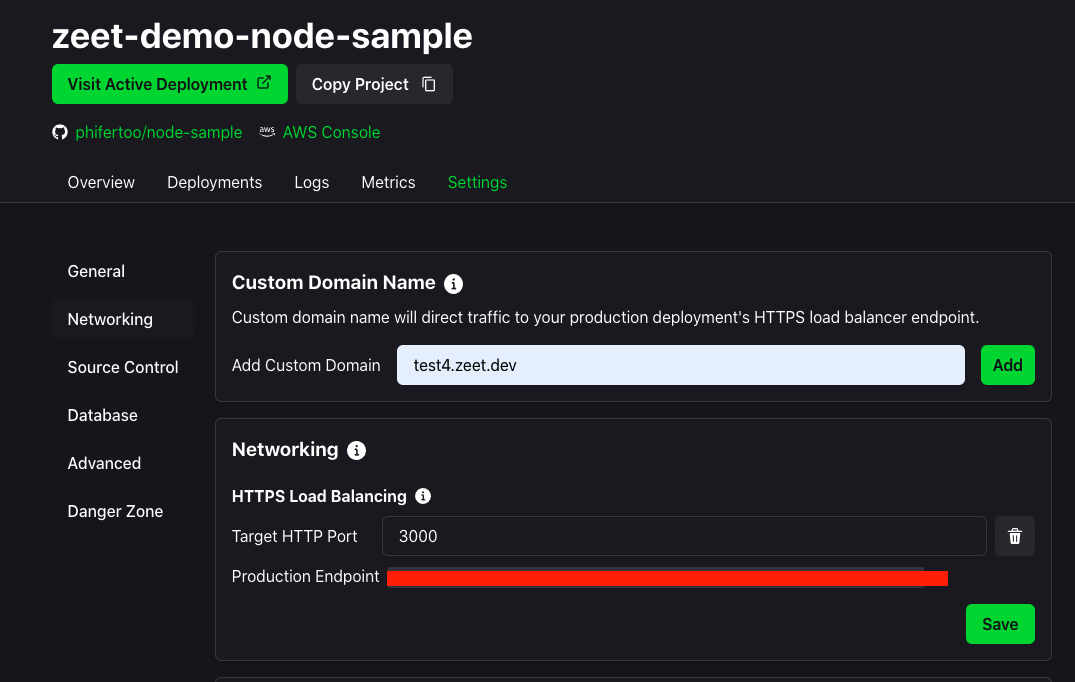
2. Enter your Custom Domain
Now that your Load Balancer is up, you can add a new Custom Domain in the Networking tab.
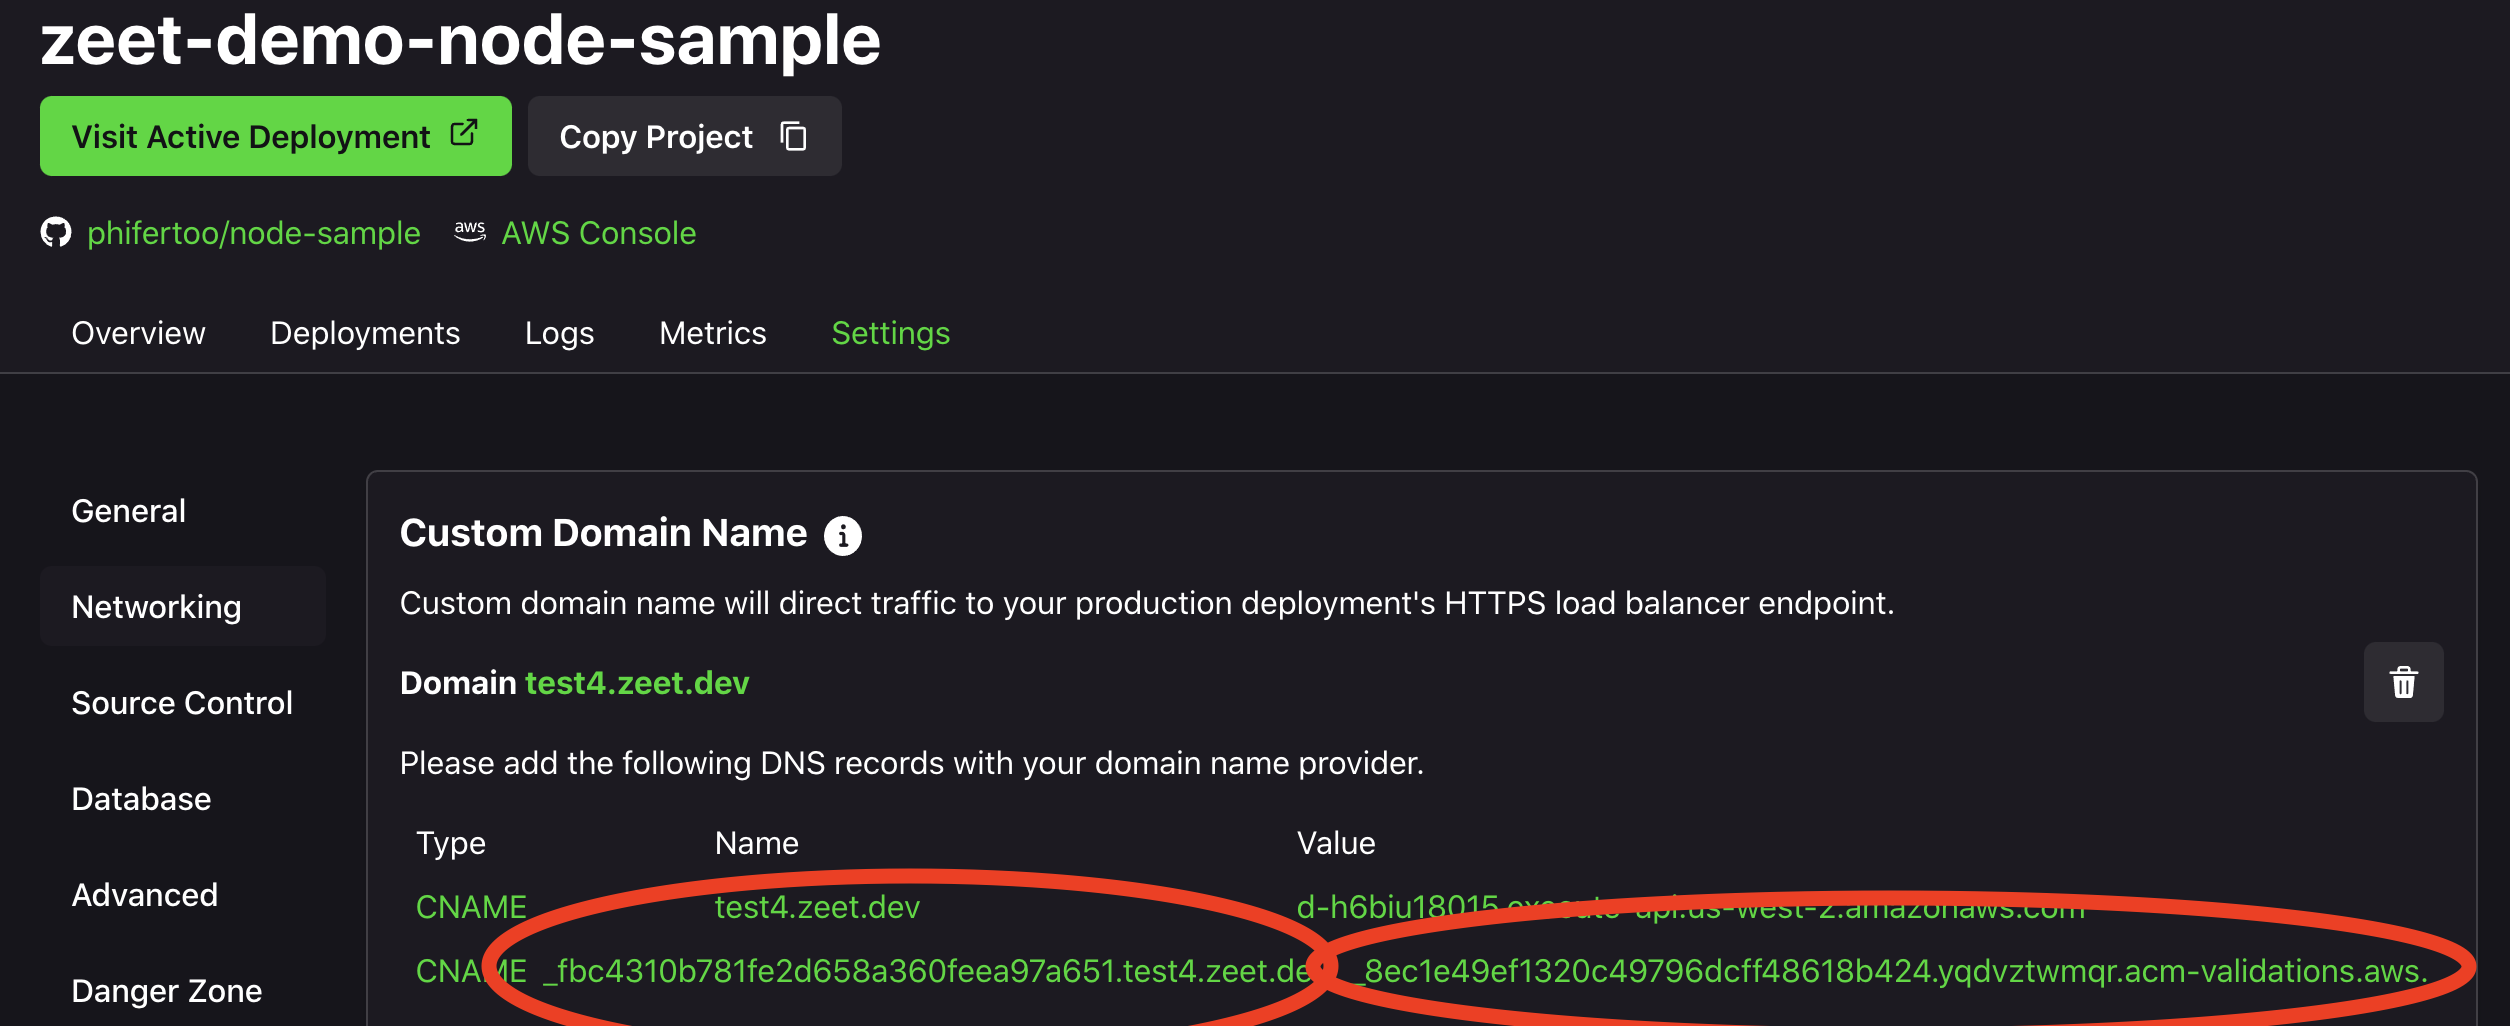
3. Enter the acm-validation instructions into your DNS
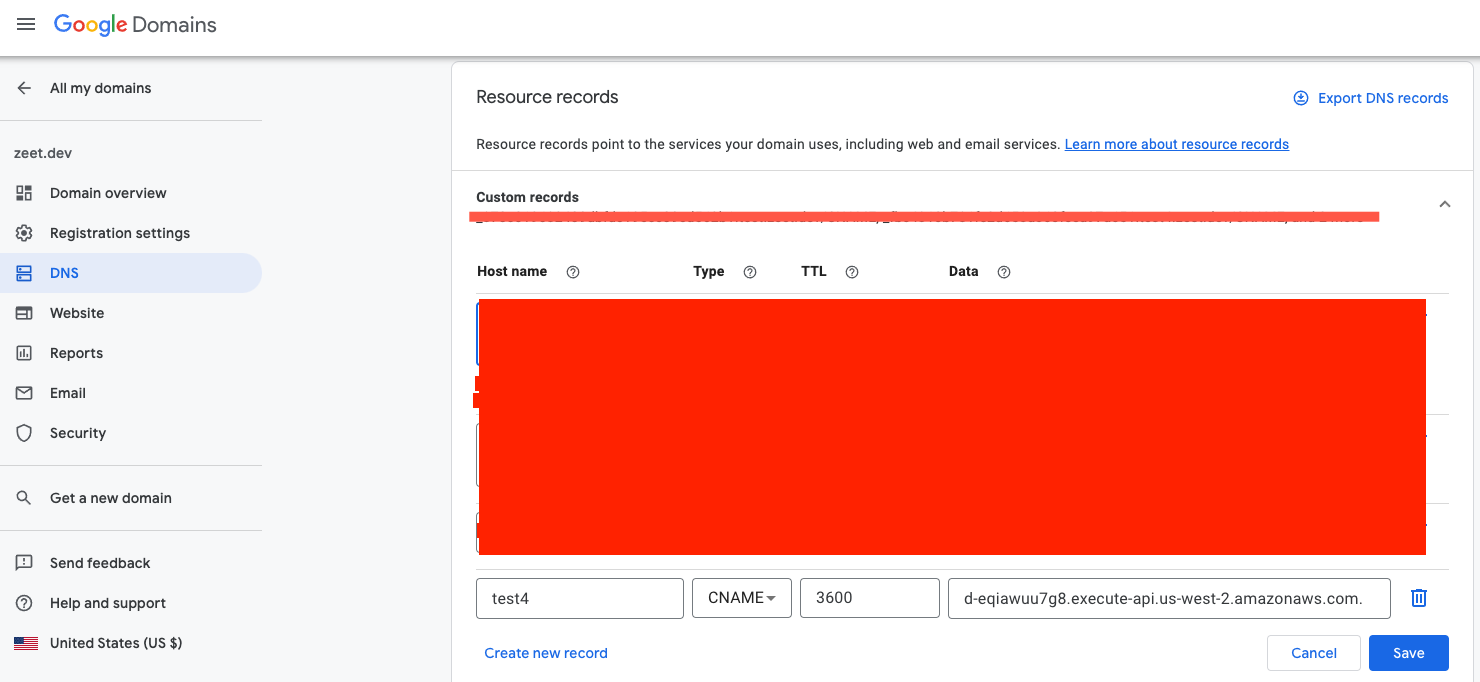
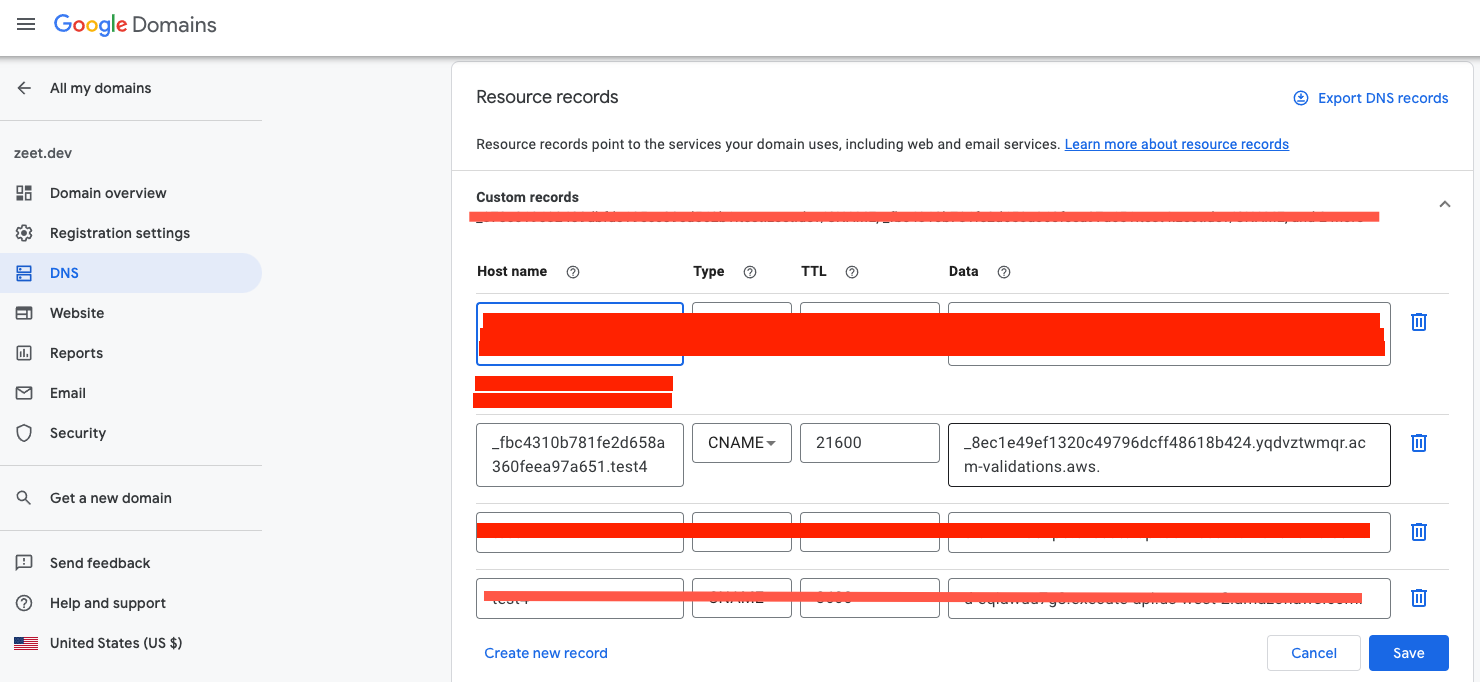
After you enter your custom domain, wait until you see the acm-validations.aws as shown below. If it doesn't appear after a few minutes, you may need to reload the page. In the example below, we are using Google for our DNS.
- Copy and paste the host name and value. As shown below, exclude the domain name ("zeet.dev.") from the host name.
- Select "CNAME" as the type.
- Choose your desired TTL ("Time to Live" in seconds).
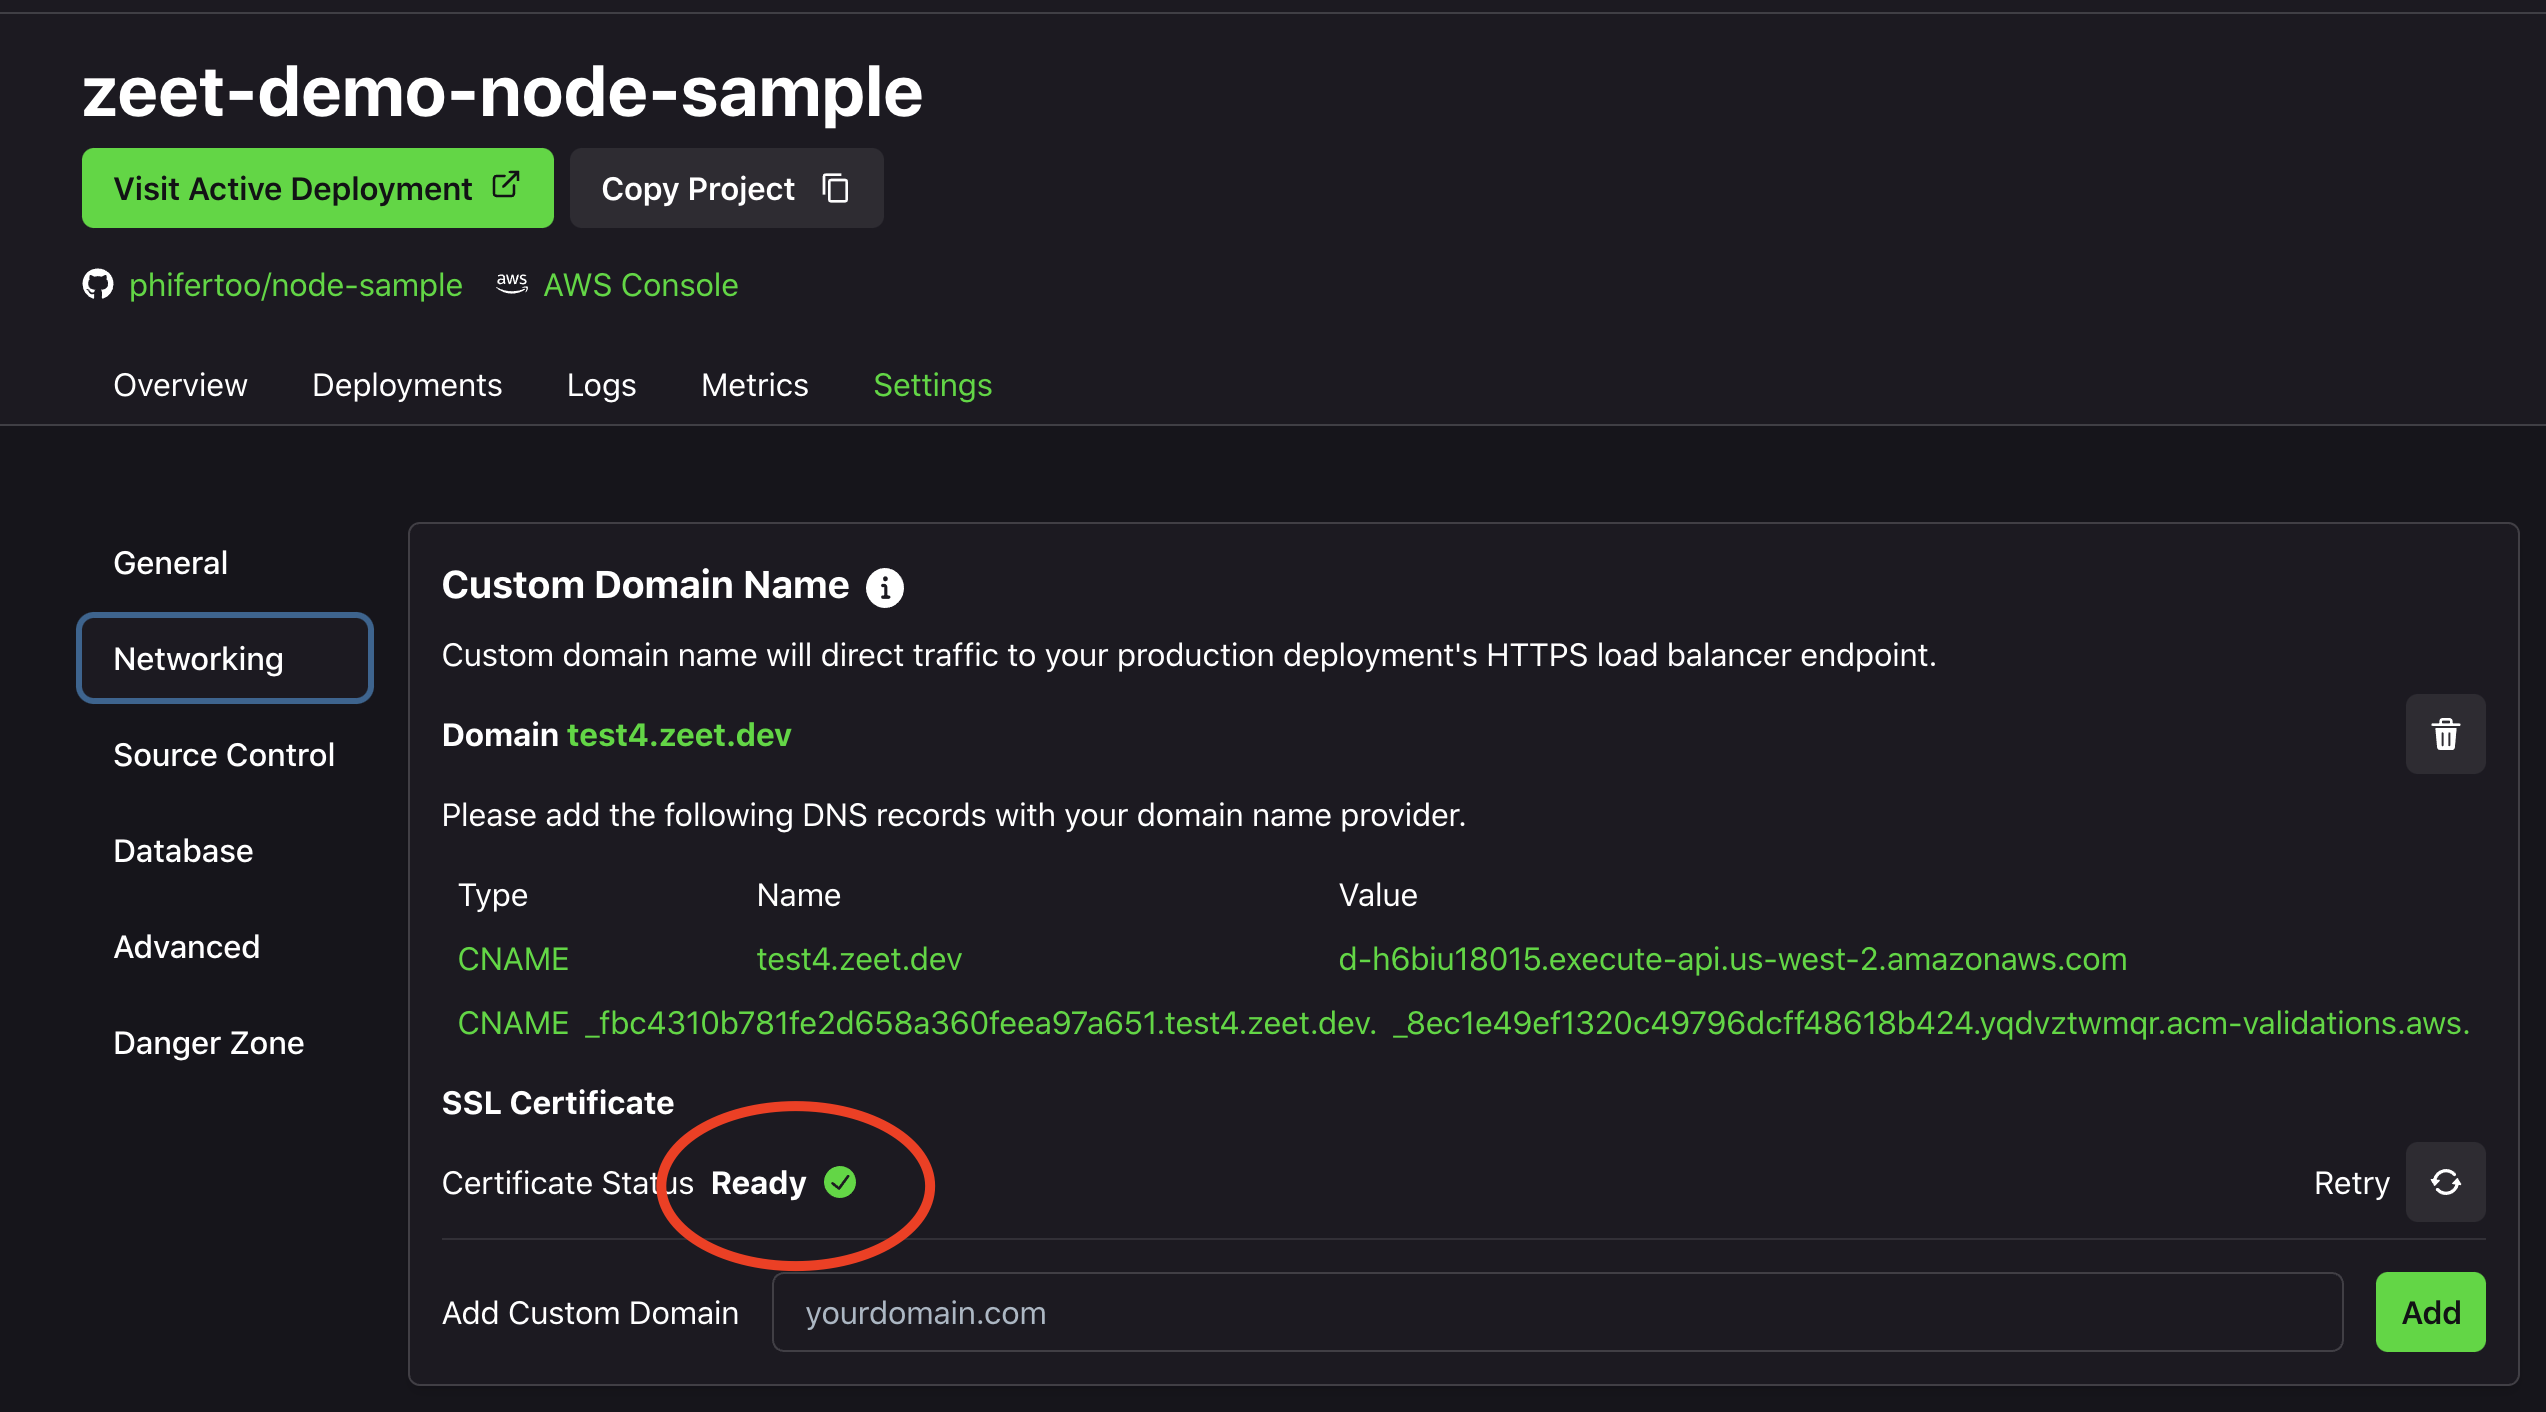
4. Wait for the SSL certificate to be ready
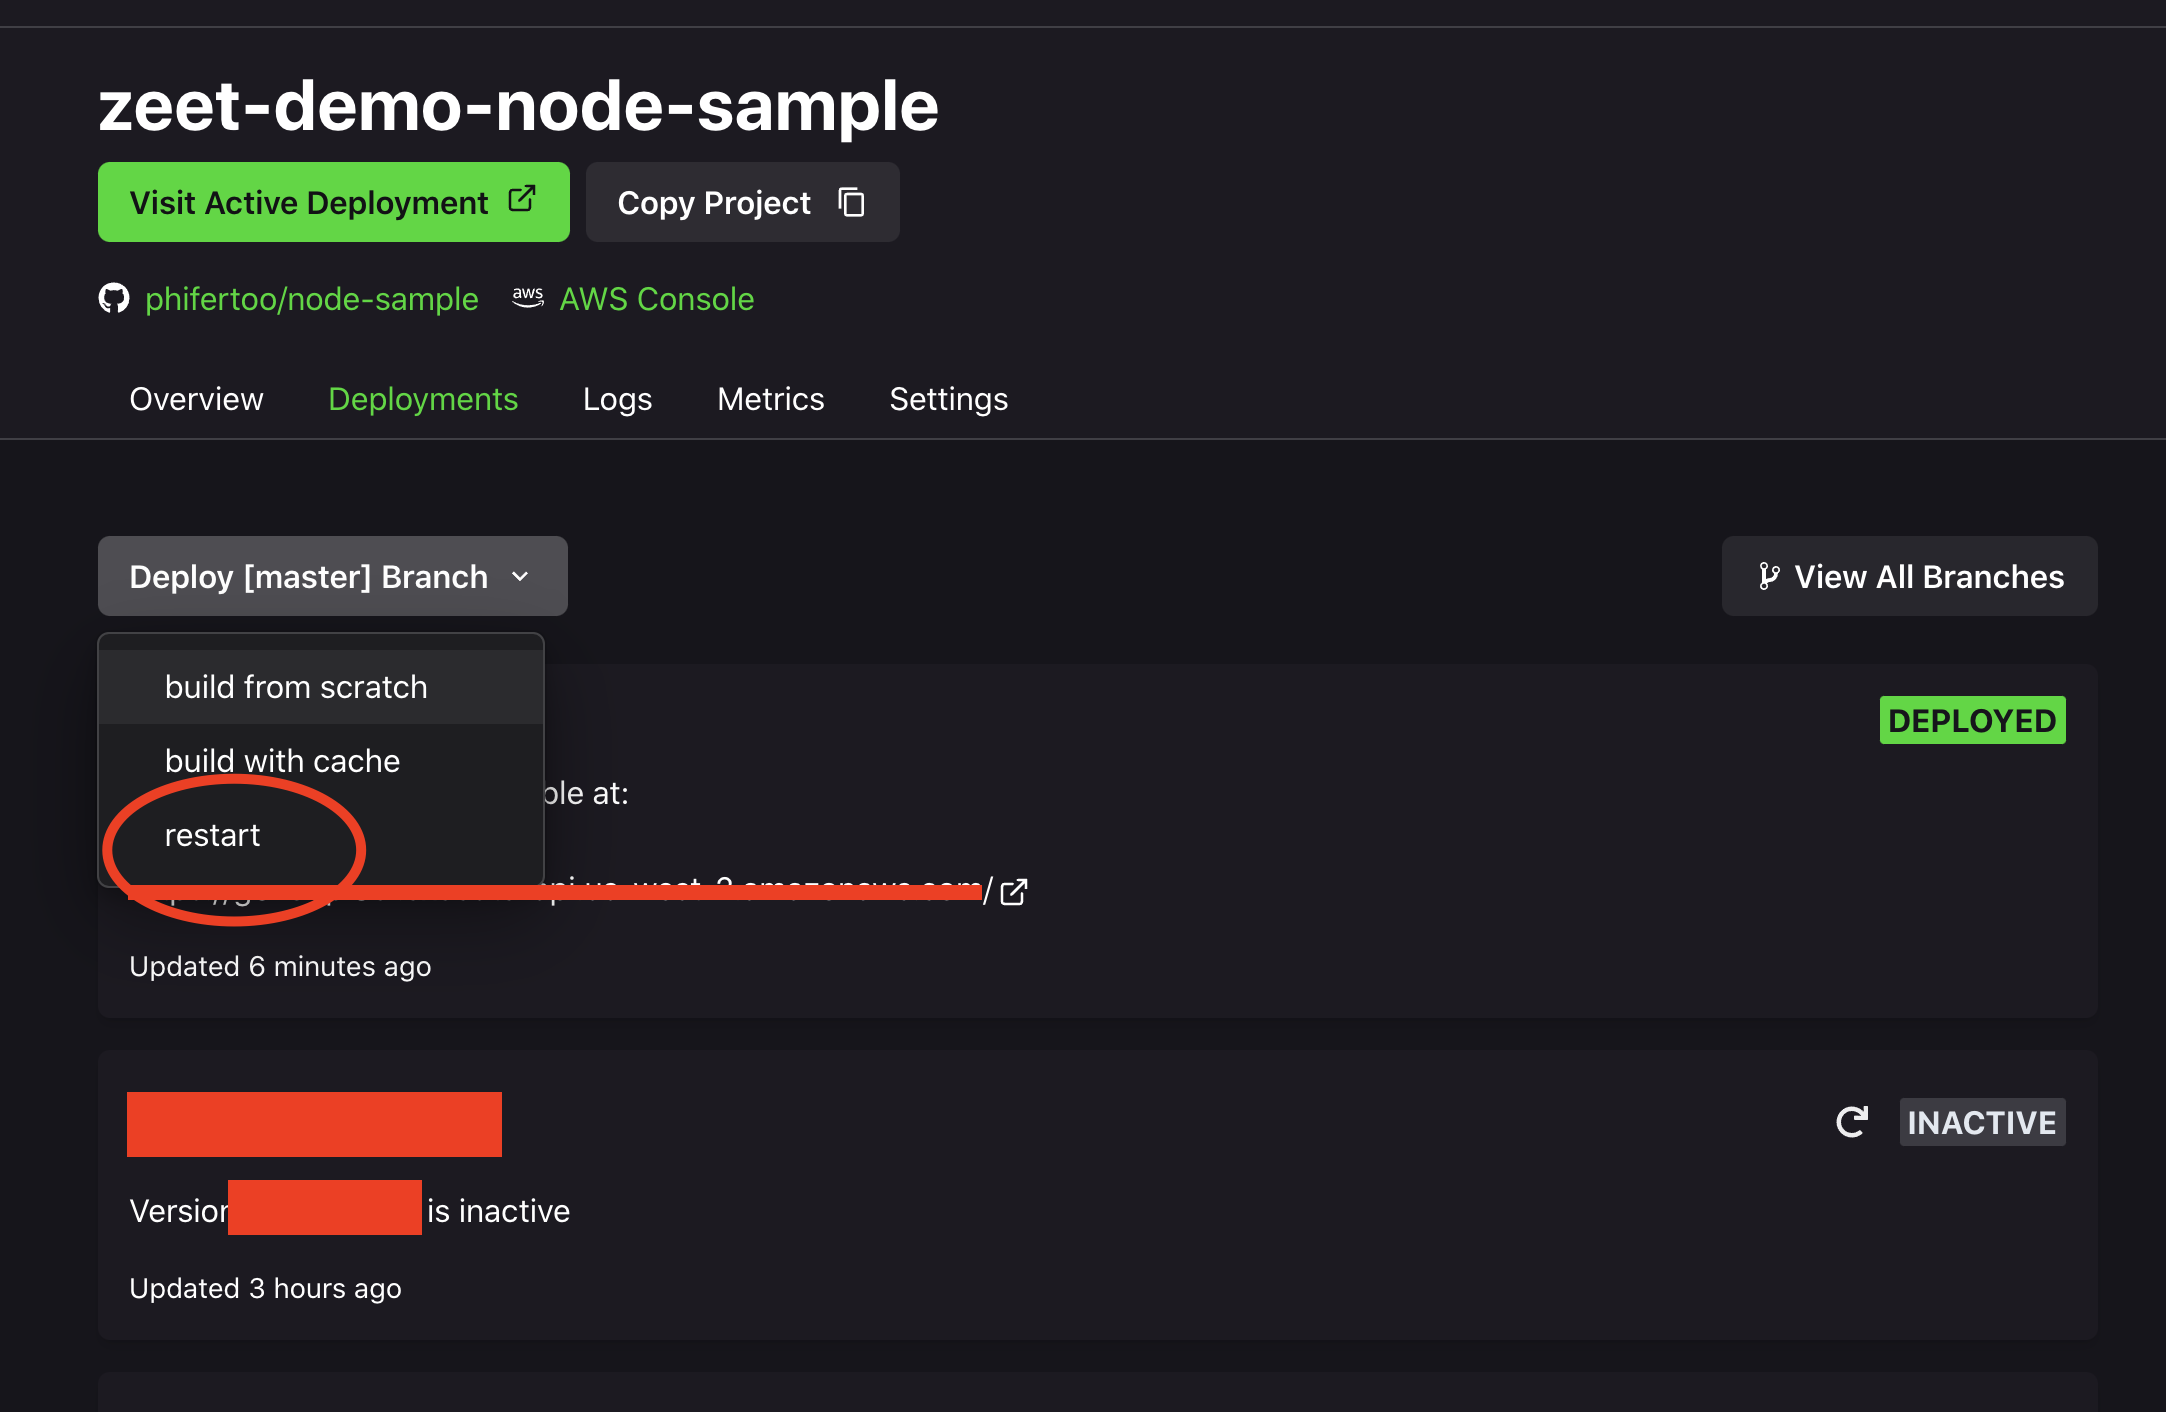
5. Redeploy Project
Navigate to the Deployments tab of your Project Settings. Click the "restart" button from the button shown below.
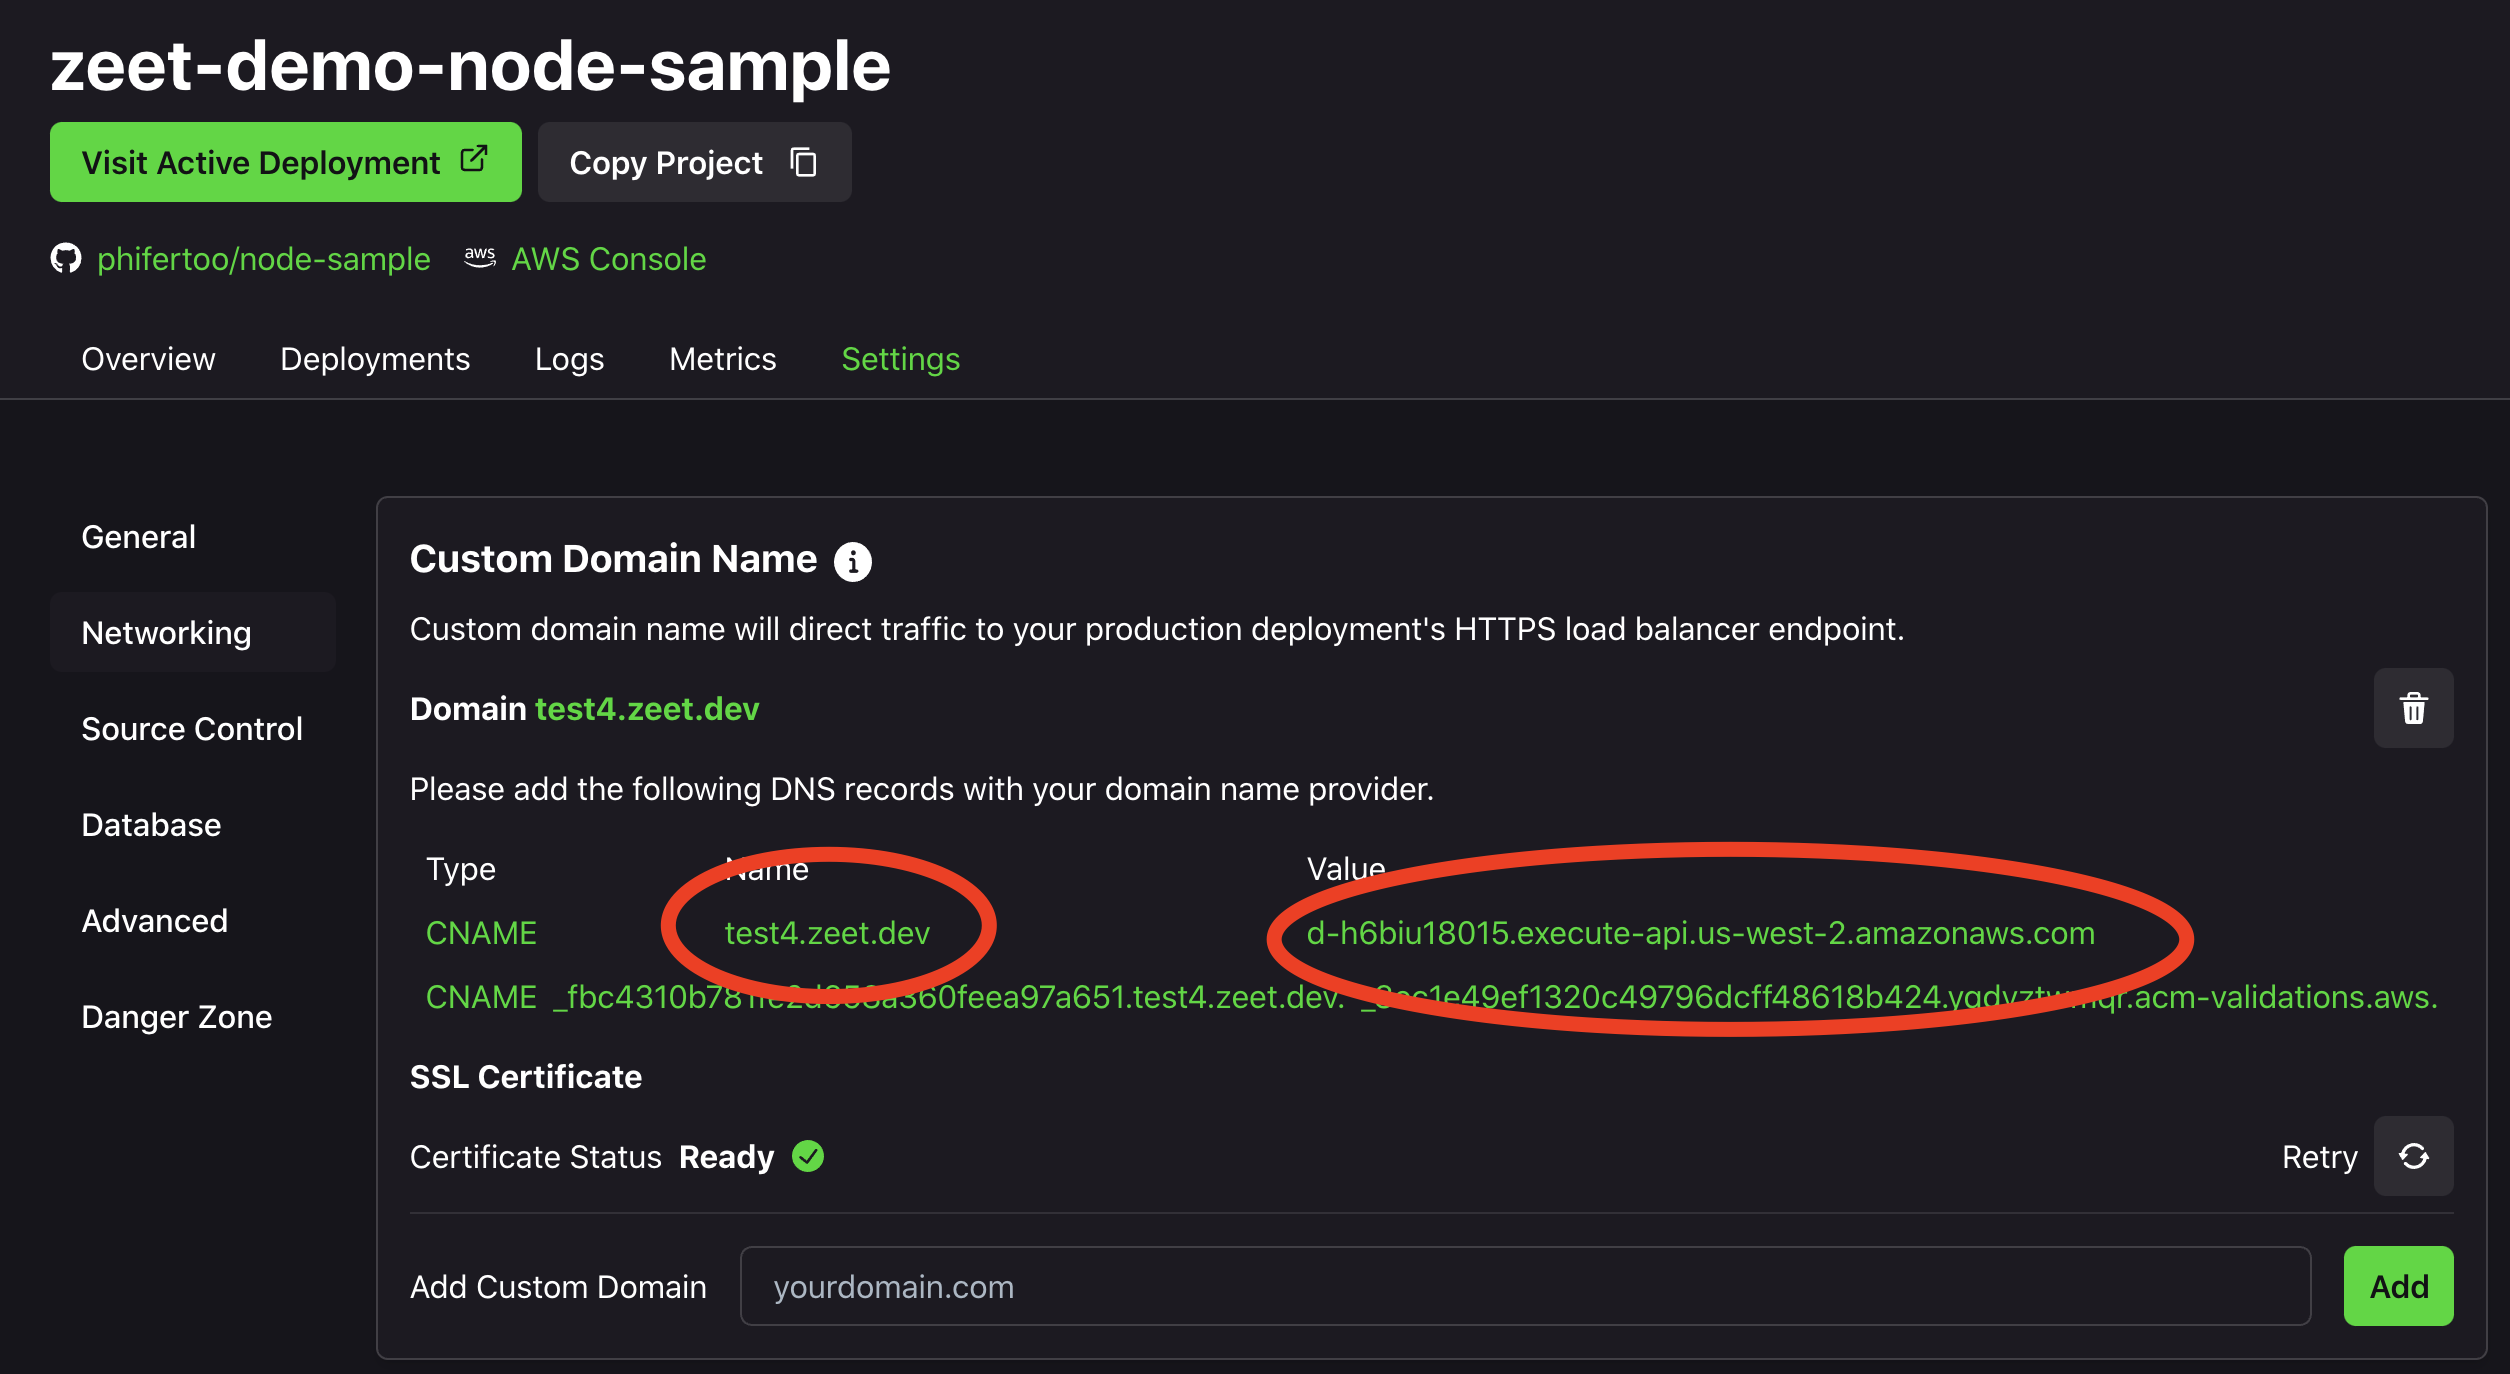
6. Enter the new host name and value into your DNS
Navigate back to the Settings => Network
- Copy and paste your new host name (excluding the domain: i.e. "zeet.dev") and value into your DNS
- Note, the corresponding value for the custom domain (test4.zeet.dev) is a different endpoint than the Invoke URL
- Select "CNAME" as the type.
- Choose your desired TTL ("Time to Live" in seconds).