Deploying a new Project using Serverless
Serverless refers to a cloud computing model where computing resources are managed by the cloud provider on-demand, meaning they are spun up dynamically to handle a request. This can result in reduced operational costs and increased scalability. AWS and GCP have free-tiers for their Serverless offerings, allowing for 1 million requests free every month.
Zeet provides pre-configured Blueprints for AWS Lambda and GCP Cloud Run. This guide explains how to deploy your first Project using these Blueprints.
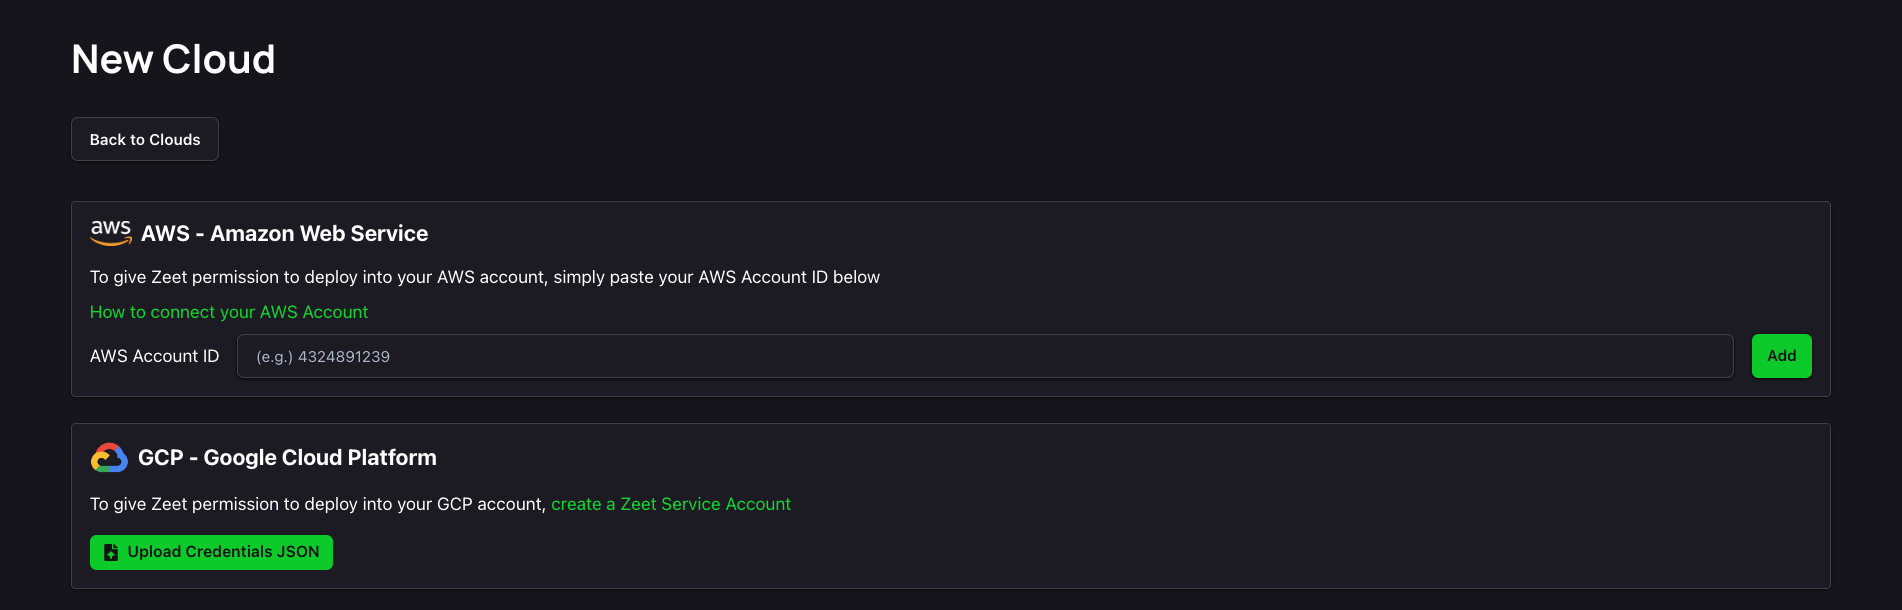
1. Connect Cloud
The first order of business is to connect your AWS or GCP account to Zeet. Navigate to the New Cloud page from your Dashboard and connect your AWS or GCP account if you haven't already.
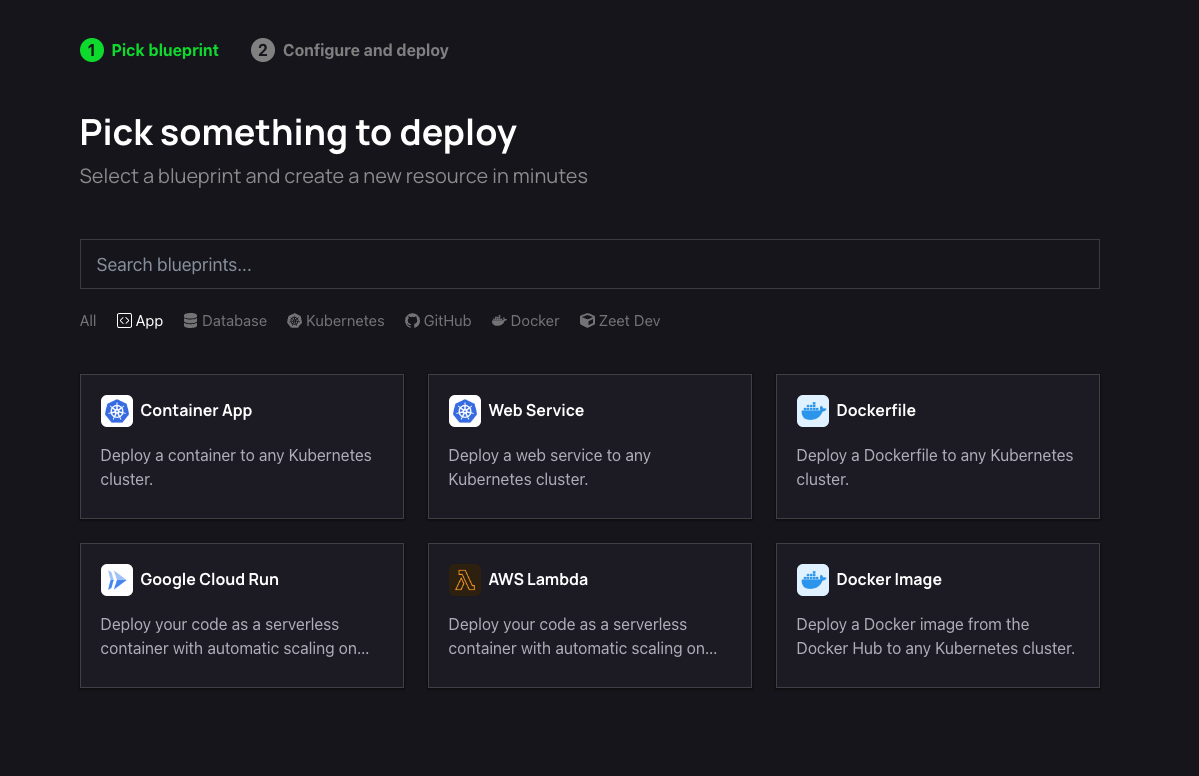
2. Pick a Serverless Blueprints
Zeet provides Blueprints for AWS Lambda and GCP Cloud Run. Navigate to https://zeet.co/new?tags=App to see all available Blueprints available to your team. Here, you can pick either the AWS Lambda or the Cloud Run Blueprints based on your Cloud Provider.
3. Configure Deployment
Once you have picked your Serverless Blueprints, you need to configure your deployment.
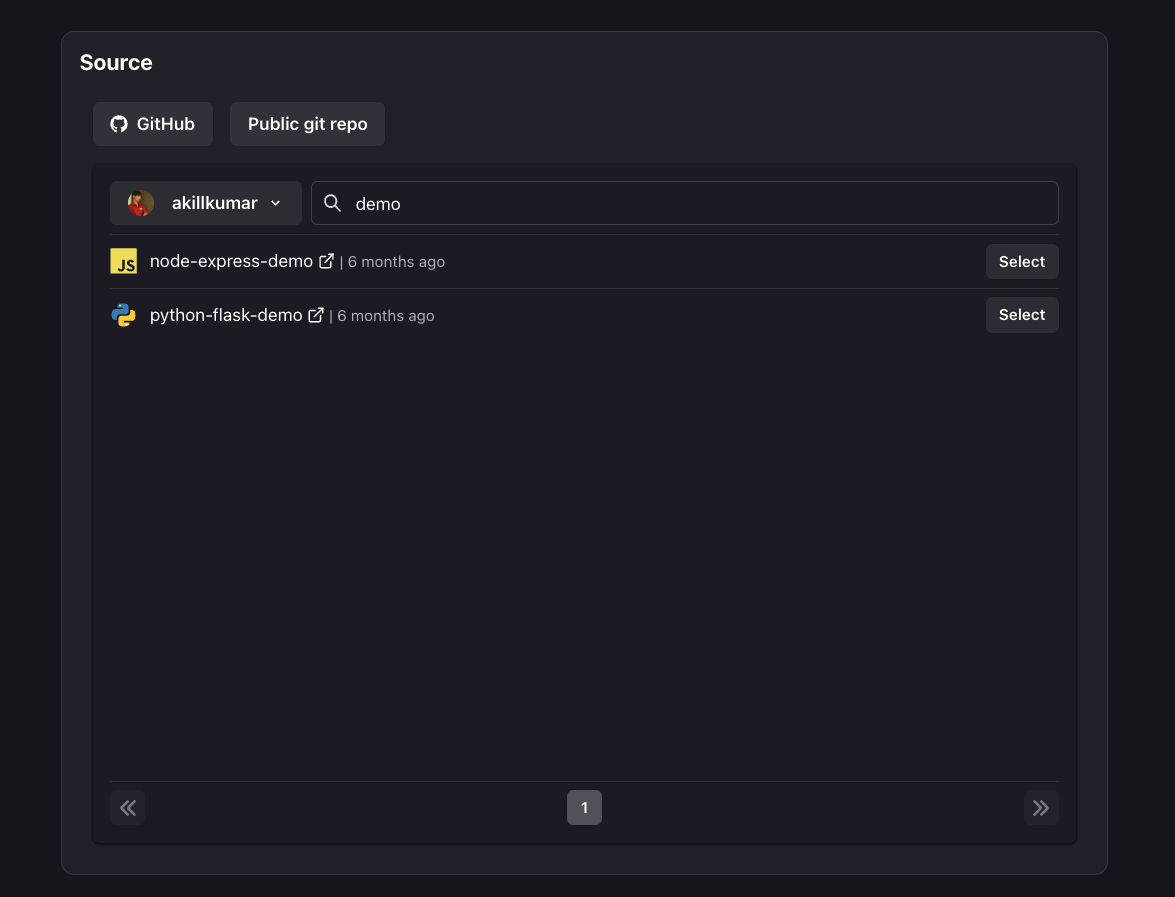
1. Pick your Source
The first step in configuring your deployment is to select your source. You can choose to either select a repository from your connected GitHub account(s) or deploy directly from any public Git repository.
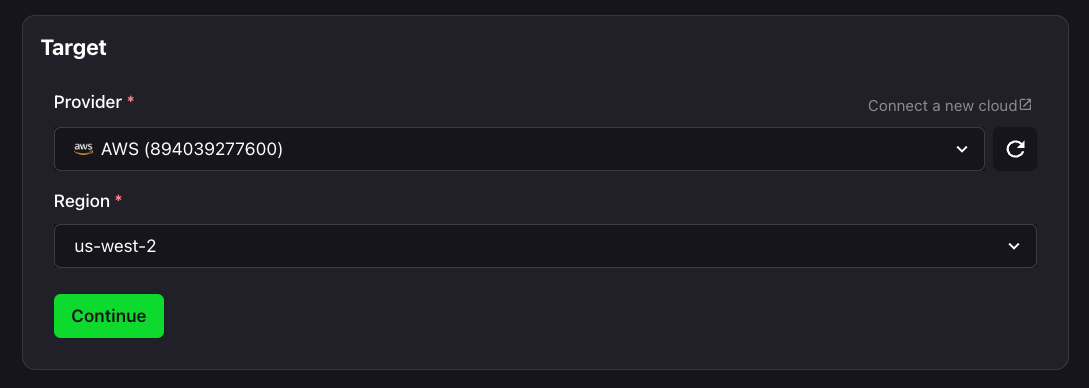
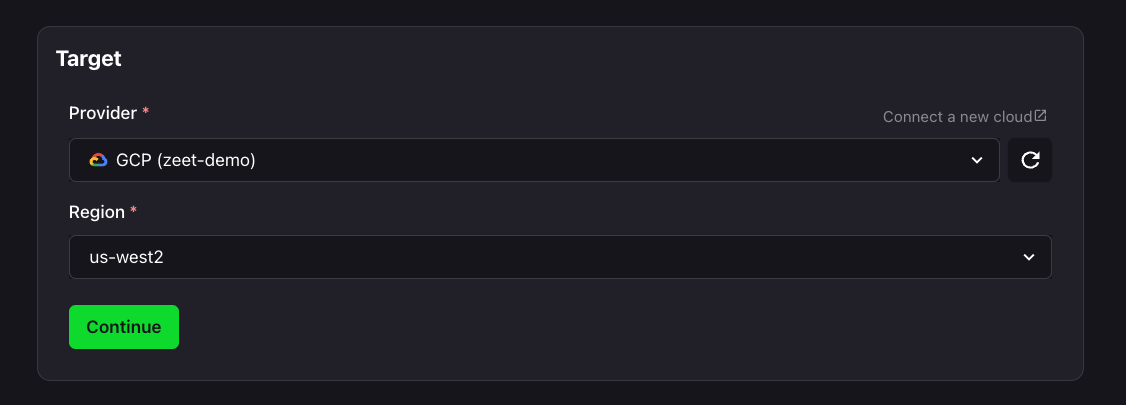
2. Select Target
The next step is selecting your Deploy target. For Serverless Blueprints, this would mean selecting your AWS or GCP accounts, and the region you wish to deploy to.
For AWS Lambda:
For GCP Cloud Run:
3. Configure Inputs
Now that we have your Source and Target, it's time to configure your inputs to get your app running smoothly.
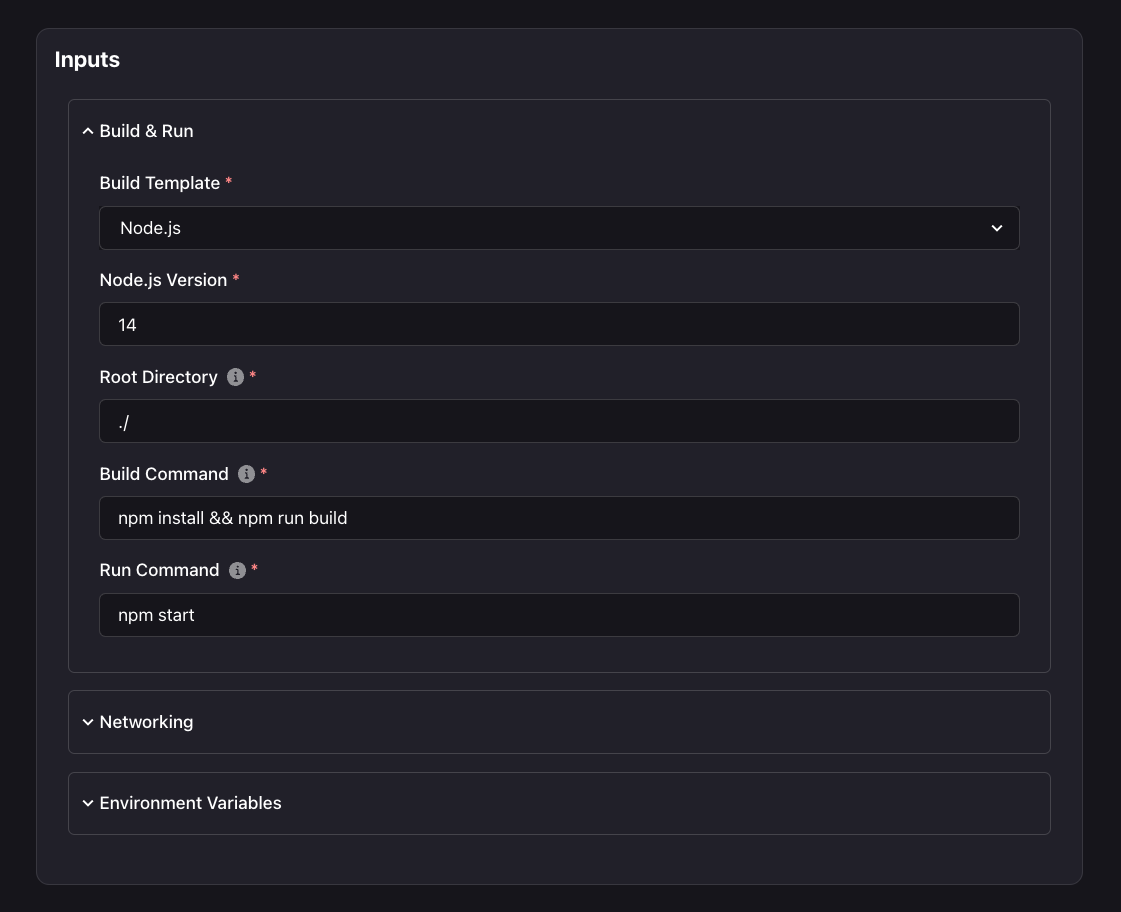
Here, you can configure your Build & Run settings, including your Build Type, Build and Run commands, and your working directory.
Under the Networking tab, you can expose the port that your Serverless app listens on.
You can also add any Environment variables that your app would require during build-time and run-time.
4. Organize and Deploy!
You're (almost) good to go! Final step here is to give your Project a name and a place to belong. Select the Group and Sub-Group your Project should live in, or create new ones here.
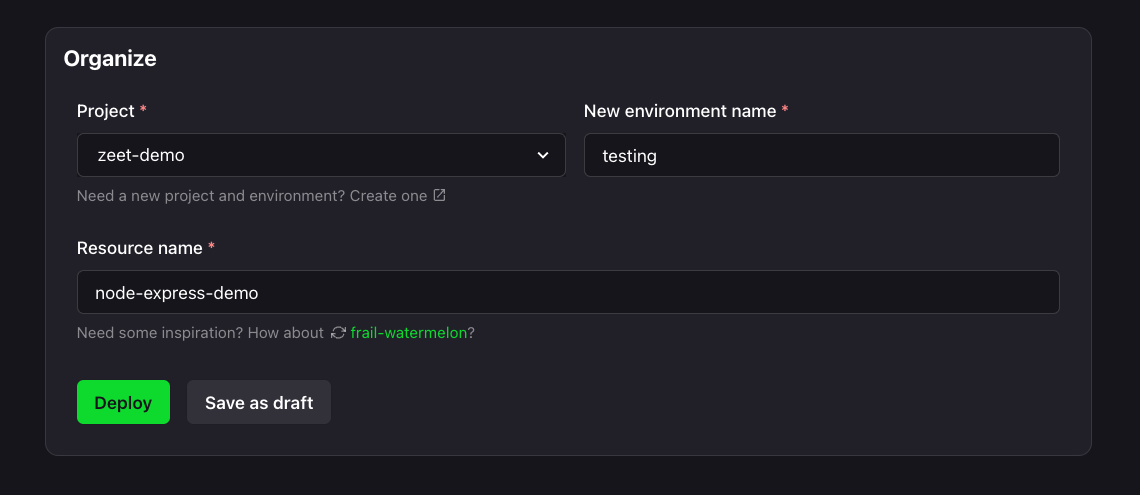
After your new Project has a name and a home, you can Deploy it, or save it as a draft to come back and Deploy when the time is right!
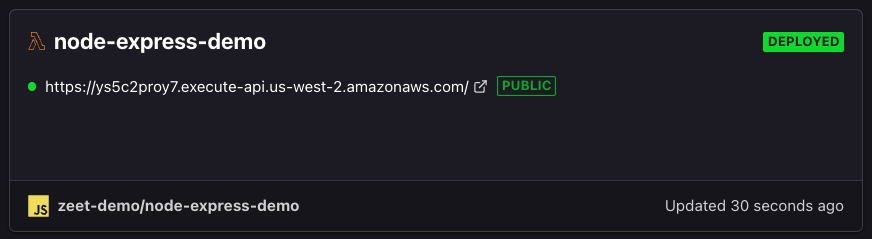
Deployed!
Your Serverless Project should now be deployed. If you go back to the Projects tab of your dashboard, you should be able to see your new Serverless Project!