Helm Charts
Helm Charts are a package manager for Kubernetes that simplify the deployment and management of complex applications by defining, installing, and upgrading Kubernetes resources in a customizable and reusable way.
This guide covers how to deploy a Helm Chart into your Kubernetes cluster using Zeet.
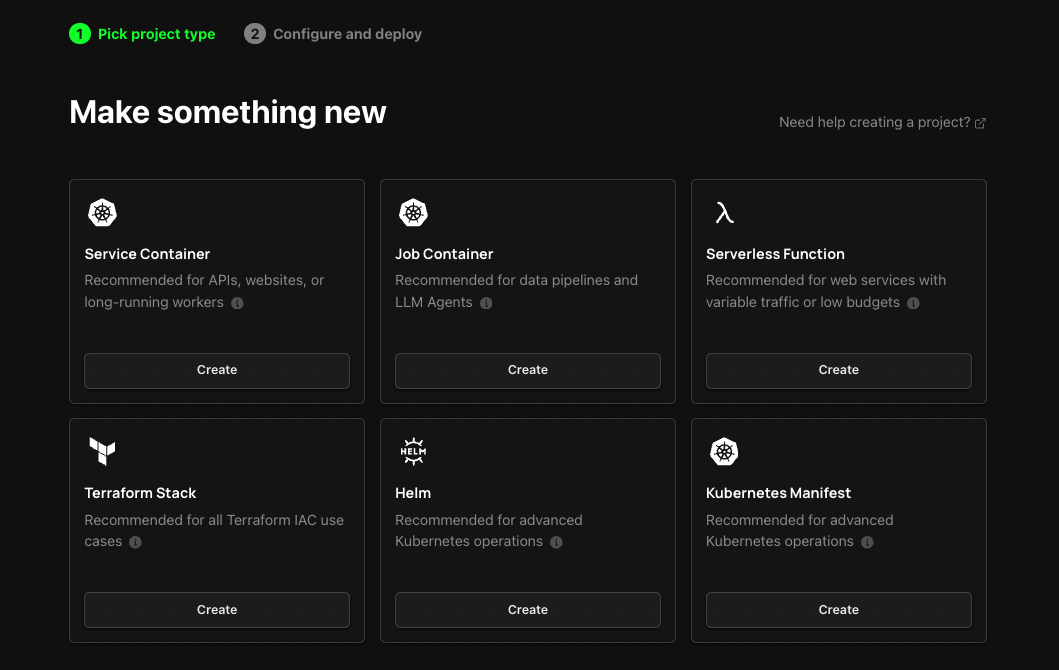
1. Select Helm Project Type
To get started, head over to the Zeet dashboard and navigate to the Create New menu. Here, select the Helm Project Type.
2. Configure Project
After selecting the Helm Project Type, you'll need to configure your chart. For this guide, we will deploy a Grafana Helm Chart. However, you can also use Helm Charts to deploy countless apps. Check out some of our guides on self-hosted apps using Helm charts!
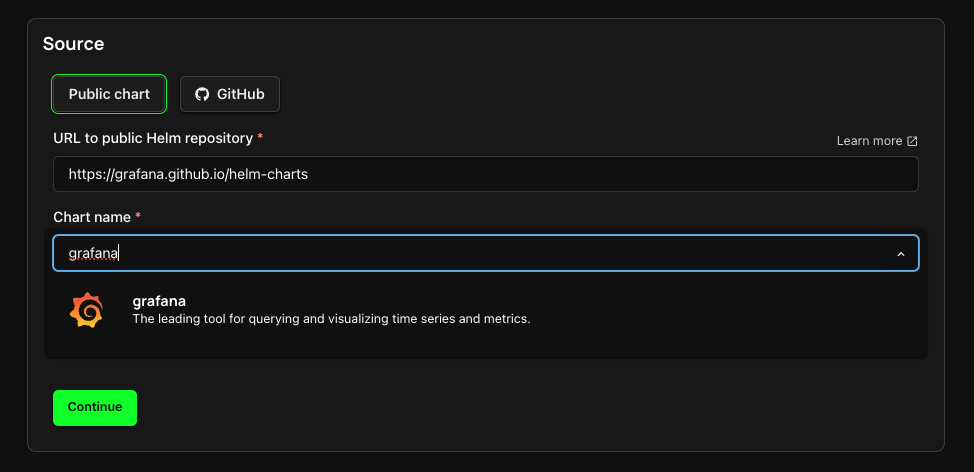
1. Pick your Source
The first step in configuring your deployment is to select your source. A Helm Chart repo is a centralized location for hosting and sharing Helm Charts, which simplifies the deployment of Kubernetes applications. Enter in the repo and the chart that you want to use. If you are following along with this guide, you can use this link to pre-fill these values for you!
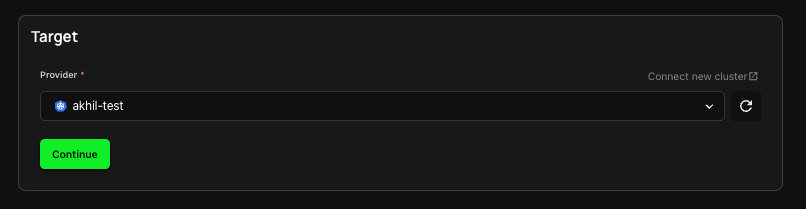
2. Select Target
The next step is selecting your Deploy Target. Helm Charts are deployed into your Cluster. If you don't already have a Cluster connected, follow the link here to create or link a new Cluster.
3. Configure Inputs
Source? Check. Target? Check. Now it's time to configure your Helm Chart to get your Project running!
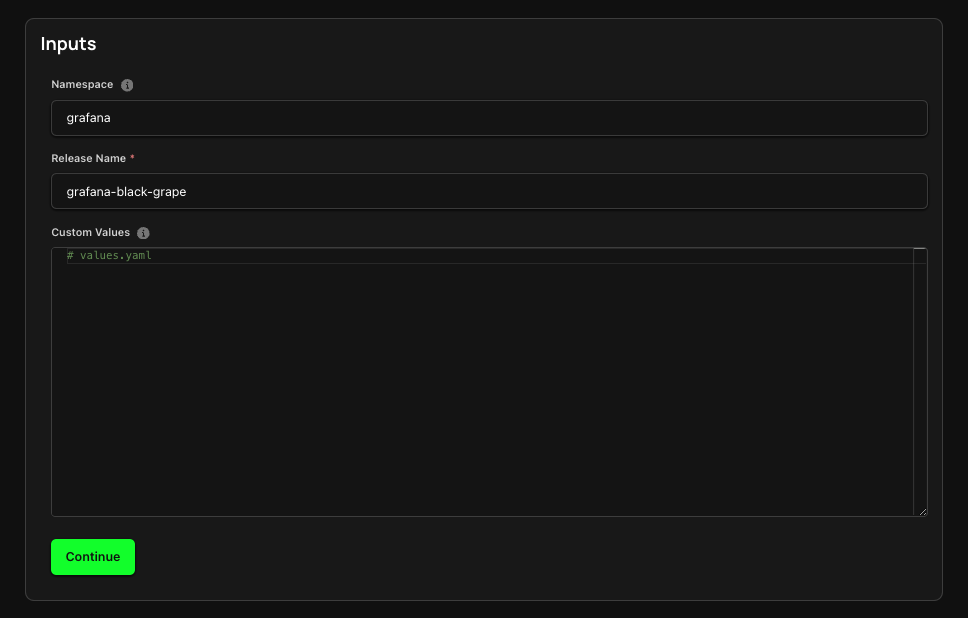
- A Namespace is a Kubernetes object that allows you to organize and isolate resources within a cluster. You can leave this field empty, or assign a custom namespace value.
- A Helm Release Name is a unique identifier used to manage and upgrade individual instances of a Helm chart.
- Helm Chart Custom Values are variables that allow you to customize the configuration of your Helm chart.
- Helm Version
To specify the Chart Version of the Helm chart you are deploying, you can add the
versionvalue with the required chart version. Here is an example:{
"source": {
"helmRepository": {
"chart": "my-chart",
"version": "4.0.21",
"repositoryURL": "https://my-chart.github.io/my-helm-chart/"
}
}
}
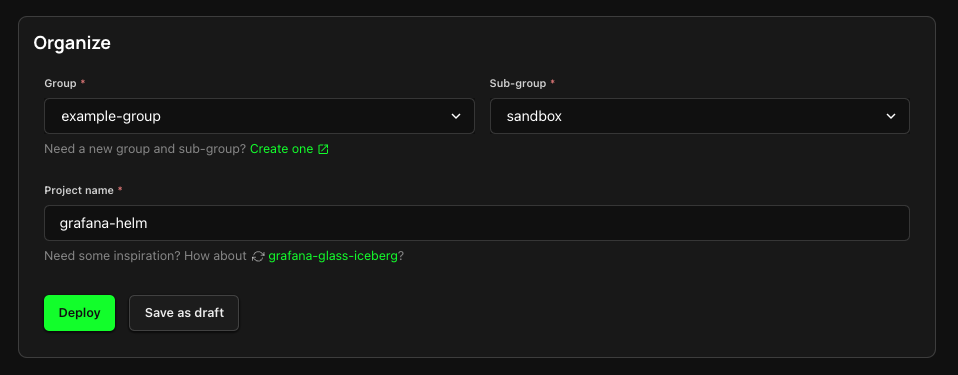
4. Organize and Deploy!
The final step is to name your Project and select the Group and Sub-Group. You can then deploy your Project or save it as a draft to be deployed at a later time.
Resources
- Helm: Official Docs
- Grafana Helm: Grafana Docs