Tailscale Integration
1. Setup Tailscale Auth
If you don't already have a tailscale account you can sign up here https://login.tailscale.com/login
Go to Settings > Personal Settings > Keys > Generate Auth Key https://login.tailscale.com/admin/settings/keys
Make sure to check Ephemeral and Reusable
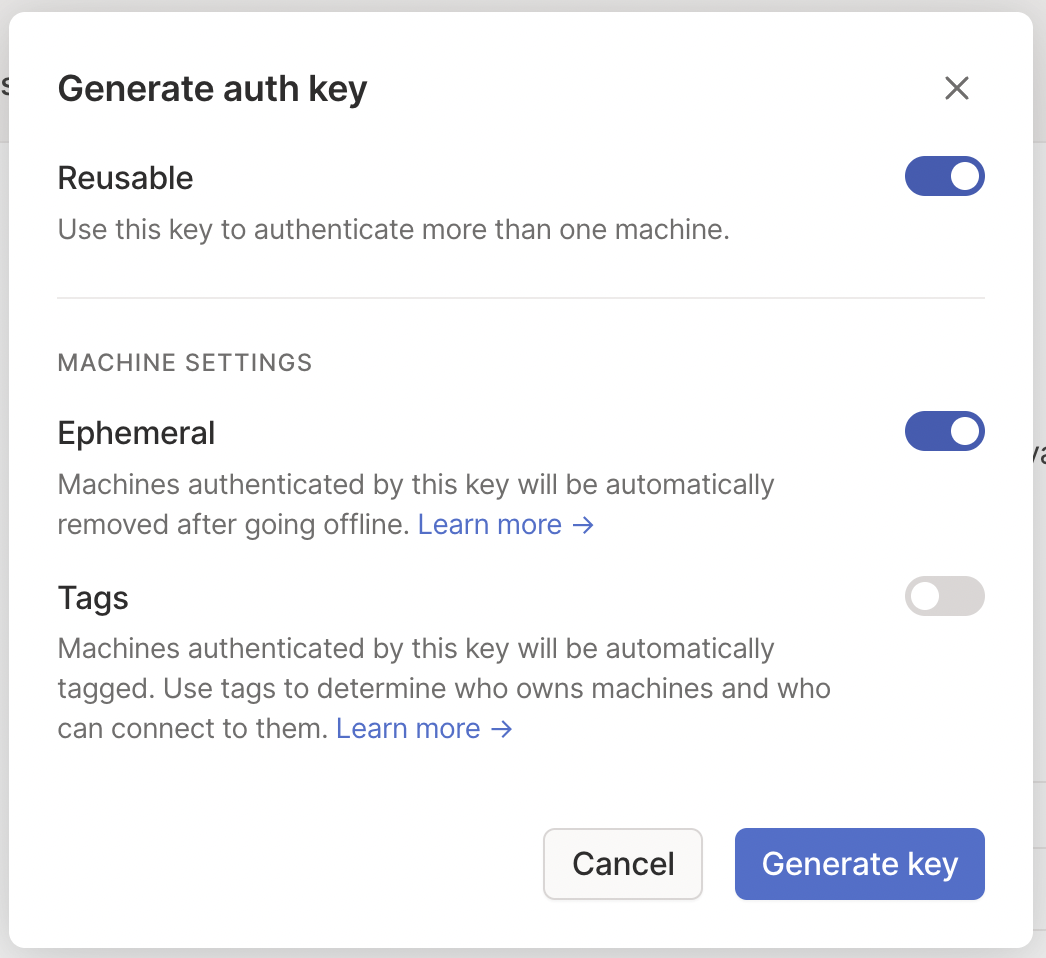
Copy the API Key they give you
2. Deploy Tailscale
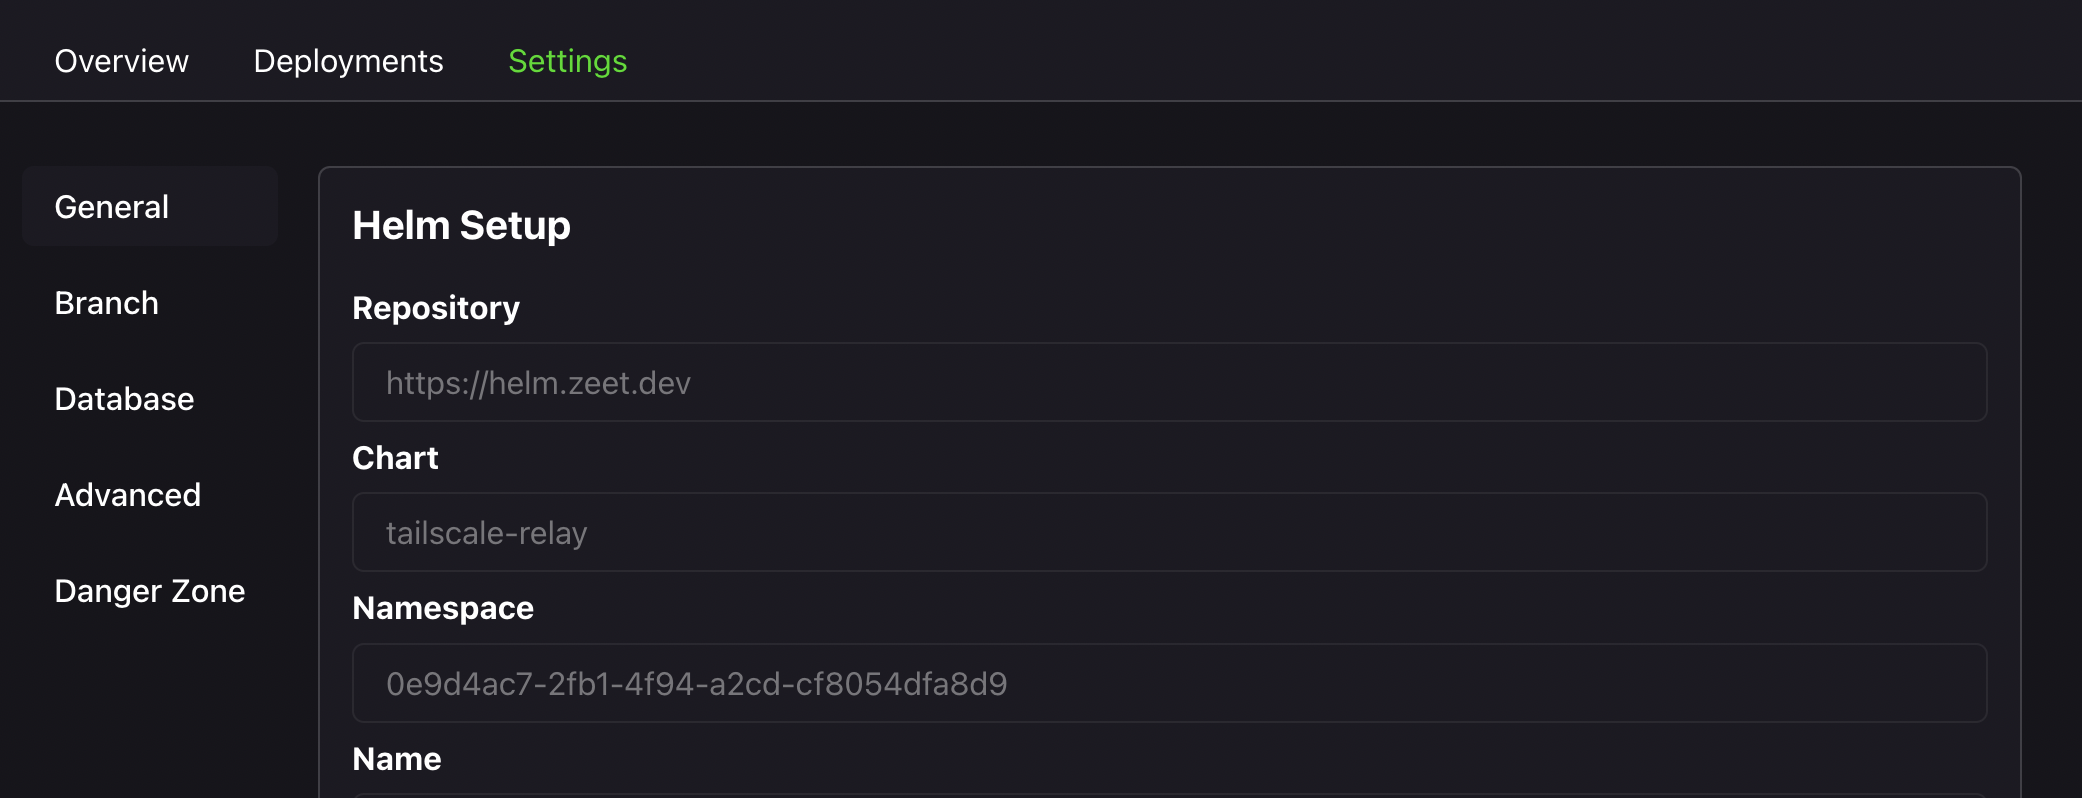
1. Helm Blueprint for Tailscale
Head over to the Zeet dashboard, navigate to the Create New menu and pick the Helm and configure the Source as follows:
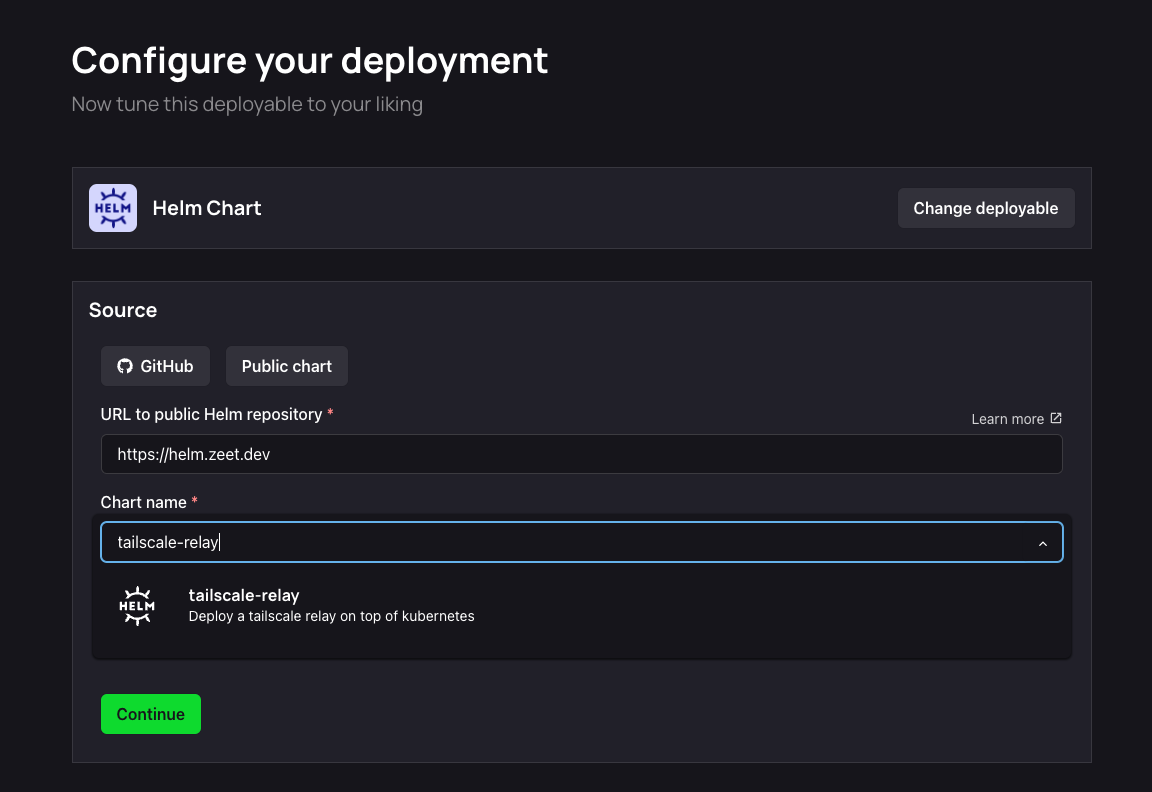
Alternatively, you can use this link to pre-fill these values.
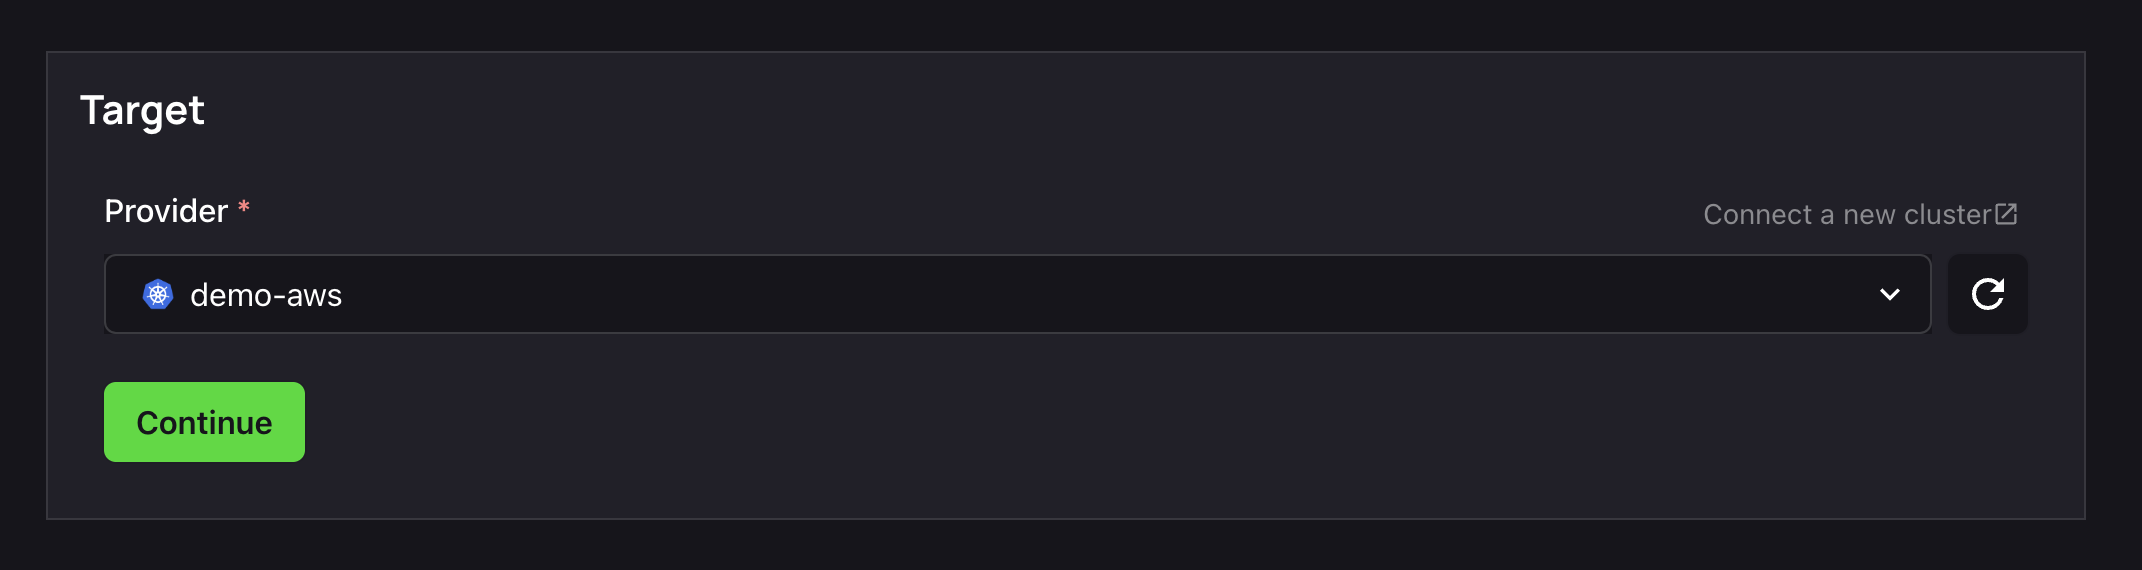
2. Select Target
The next step is to select your Deploy Target. Helm charts are deployed to your cluster. If you don't already have a cluster, you can use the Link in this step to create/ link a new cluster.
3. Configure Inputs
Source, check. Target, check.
It's now time to configure the inputs for your chart to get it running.
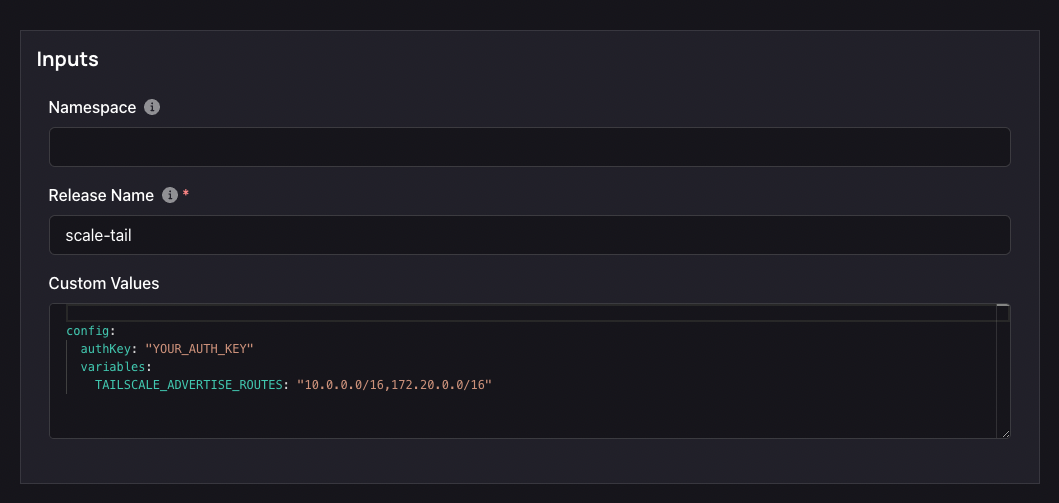
- A Namespace is a Kubernetes object that allows you to organize and isolate resources within a cluster. You can leave this field empty, or assign a custom namespace value.
- Helm Chart Values are variables that allow you to customize the configuration of your Helm chart. Here is the minimal required configuration to get Tailscale instance running.
config:
  authKey: "YOUR_AUTH_KEY"
  variables:
    TAILSCALE_ADVERTISE_ROUTES: "10.0.0.0/16,172.20.0.0/16"
10.0.0.0 is the default value for Zeet managed VPC.
172.20.0.0 is the default value for Zeet-managed cluster.
If you have custom VPC or Cluster configuration you can replace them with your own values. You can also contact support to confirm the values for advertise routes.
4. Finalize and Deploy!
Once configured, give your new Helm Project a name and a place to belong. Select the Group and Sub-Group your Project should live in, or create new ones here.
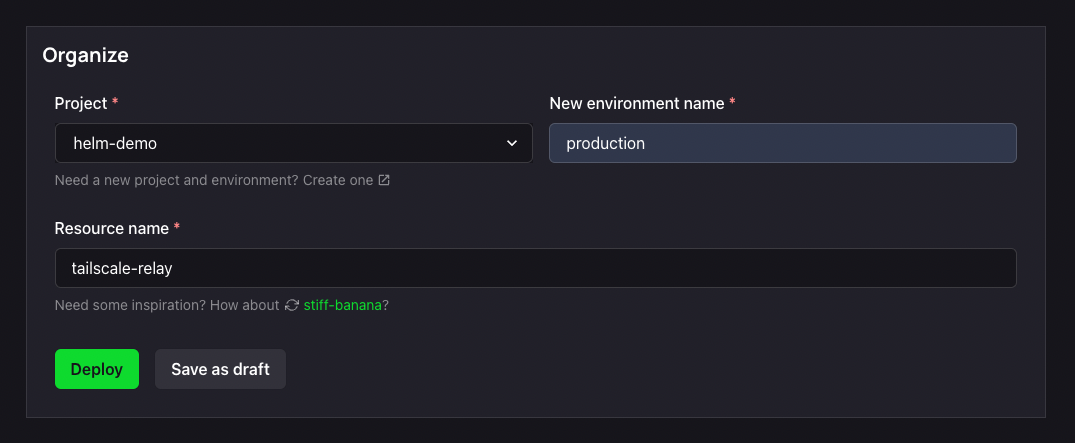
After giving it a name and a home, you can Deploy it, or save it as a draft to come back and deploy later. Your Tailscale Project will take up to 5-10 minutes to finish initializing on the first deploy.
You can now continue to setup Tailscale!
3. Configure Tailscale
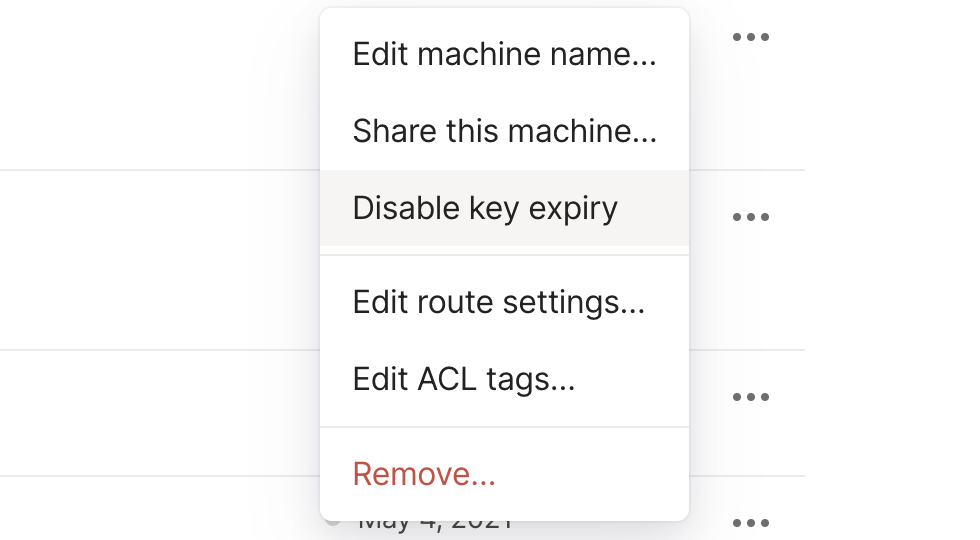
- Approve Routes in Tailscale Go back to tailscale.com > Machines https://login.tailscale.com/admin/machines
You should now see a new entry that looks like "name-tailscale-relay-0"

Click the 3 dots on that machine > Review Route Settings
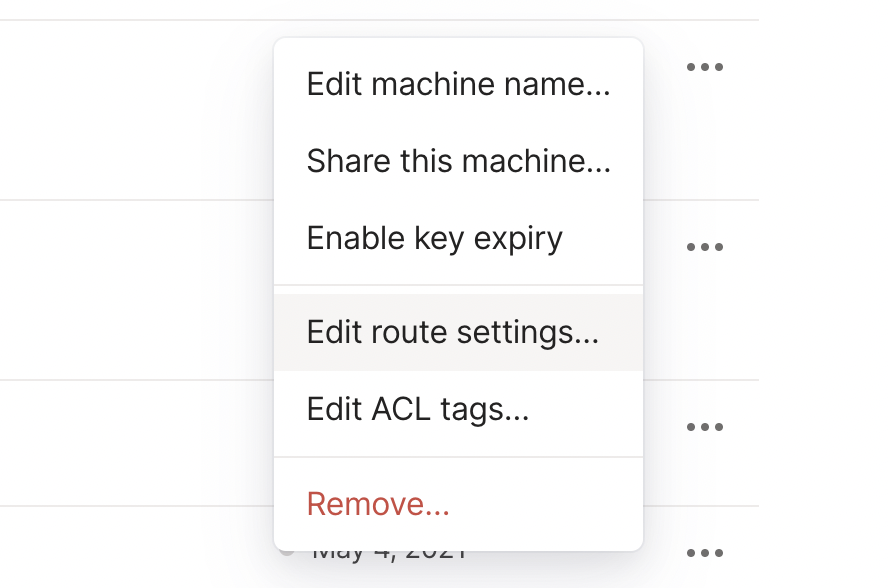
Approve "10.0.0.0/16" and "172.0.0.0/16" by clicking individual routes or approve all routes
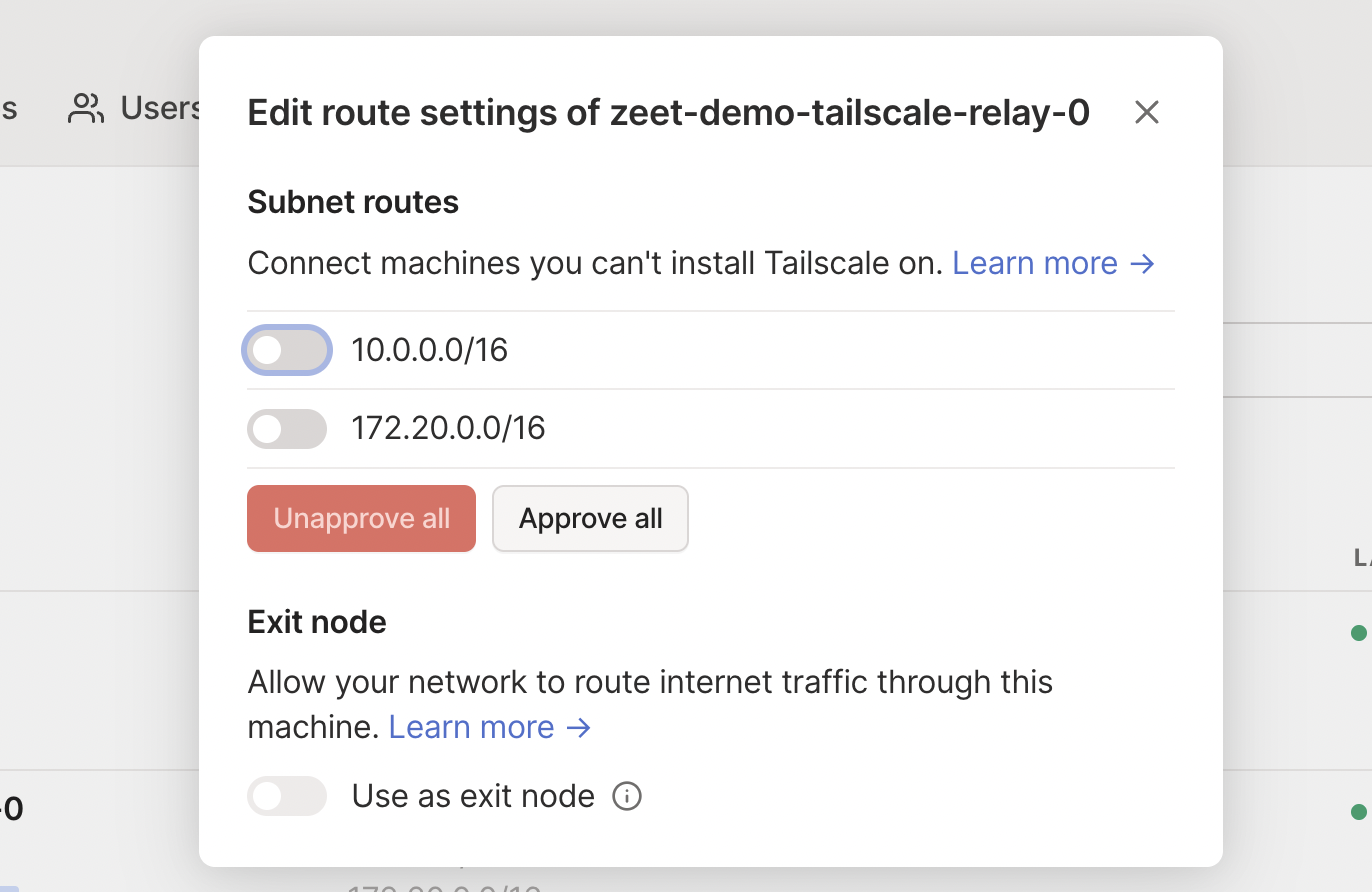
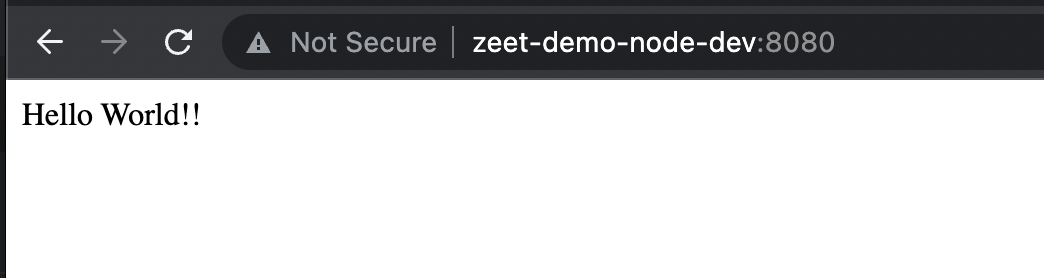
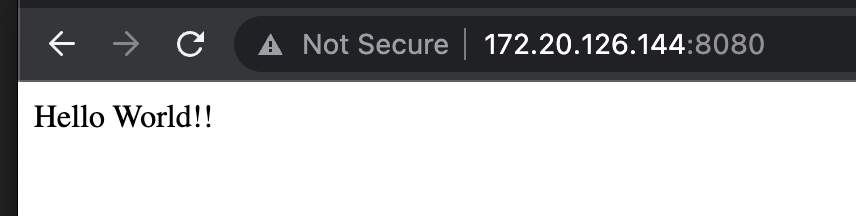
Now you should be able to access zeet services with internal IP using tailscale
- (optional) Disable Key Expiry on that machine as well - if you don't do this, you'll have to refresh the key in a few months
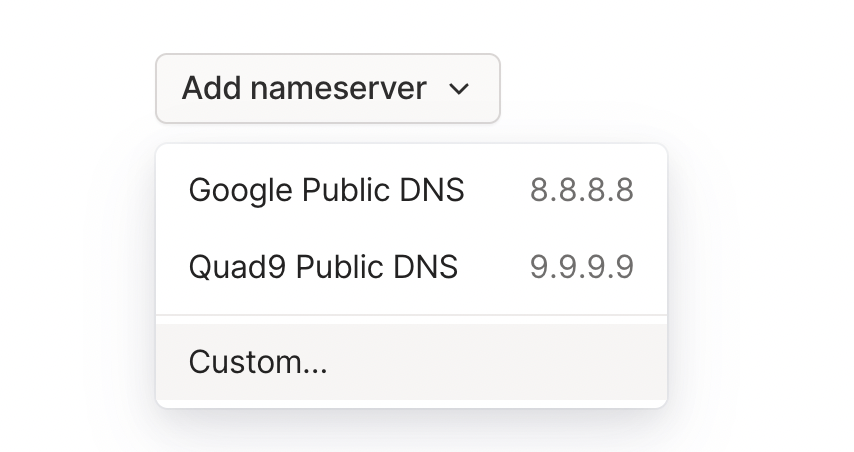
- (optional) Configure Tailscale Magic DNS
https://login.tailscale.com/admin/dns
Go to DNS settings and click "Add nameserver" with the Custom... option
Put in 172.20.0.10 for Name Server and then enable split DNS and input NAMESPACE.svc.cluster.local as the Search Domain
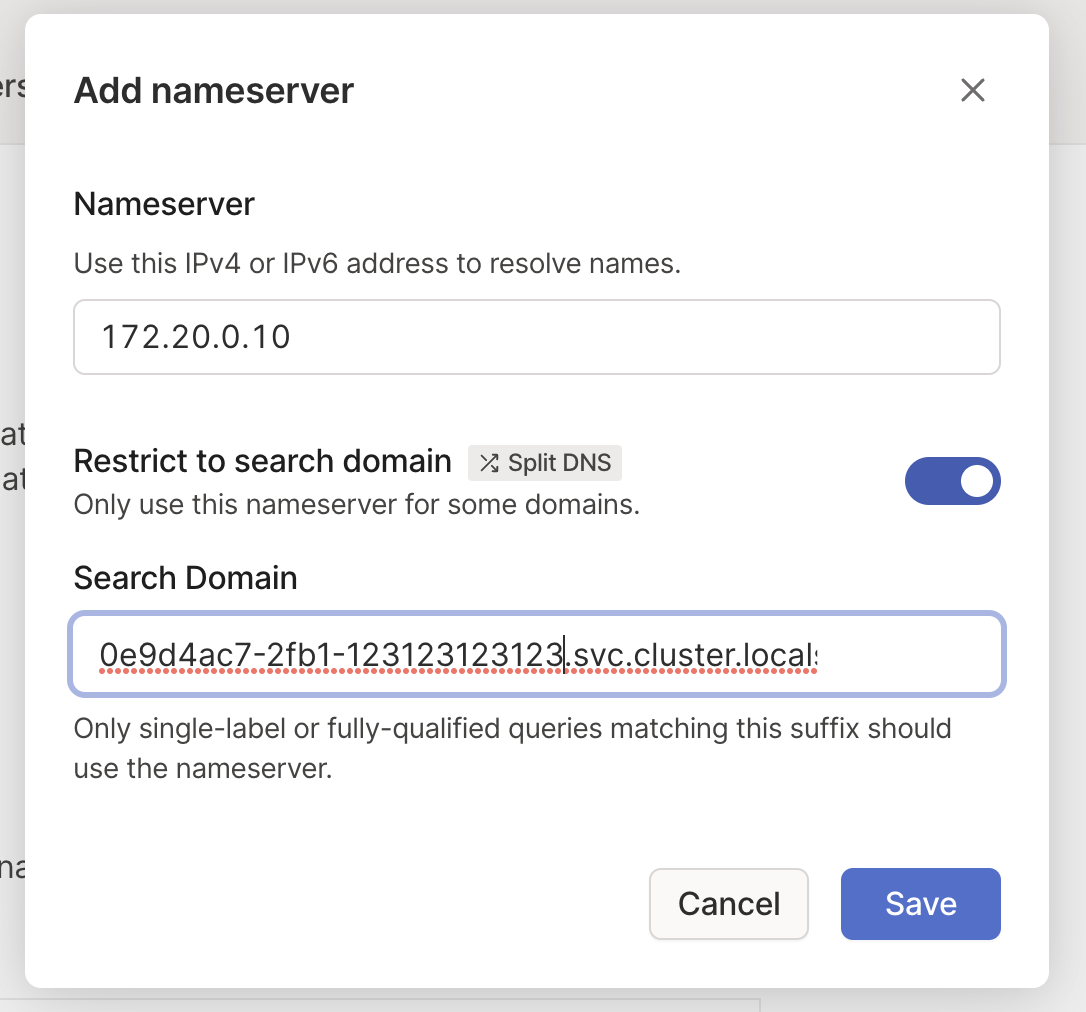
127.20.0.10 is the default DNS address for Zeet-managed clusters. You can replace it with your own custom values
You can find the value for NAMESPACE in the project settings tab for the tailscale relay project in Zeet
Now you should be able to access internal services using Magic DNS powered domain routing