Docker Image
A Docker image is a lightweight and portable package that includes all the necessary components for running an application, such as code, runtime, system tools, system libraries, and settings. It can be used to create Docker containers, which are isolated environments that run the application consistently across different infrastructure.
Docker Hub is a public repository for storing, sharing, and managing Docker images, allowing users to easily access and distribute containerized applications.
This guide covers how you can use Zeet's official Docker Image Blueprint to deploy an Image from Dockerhub as a container in your cluster!
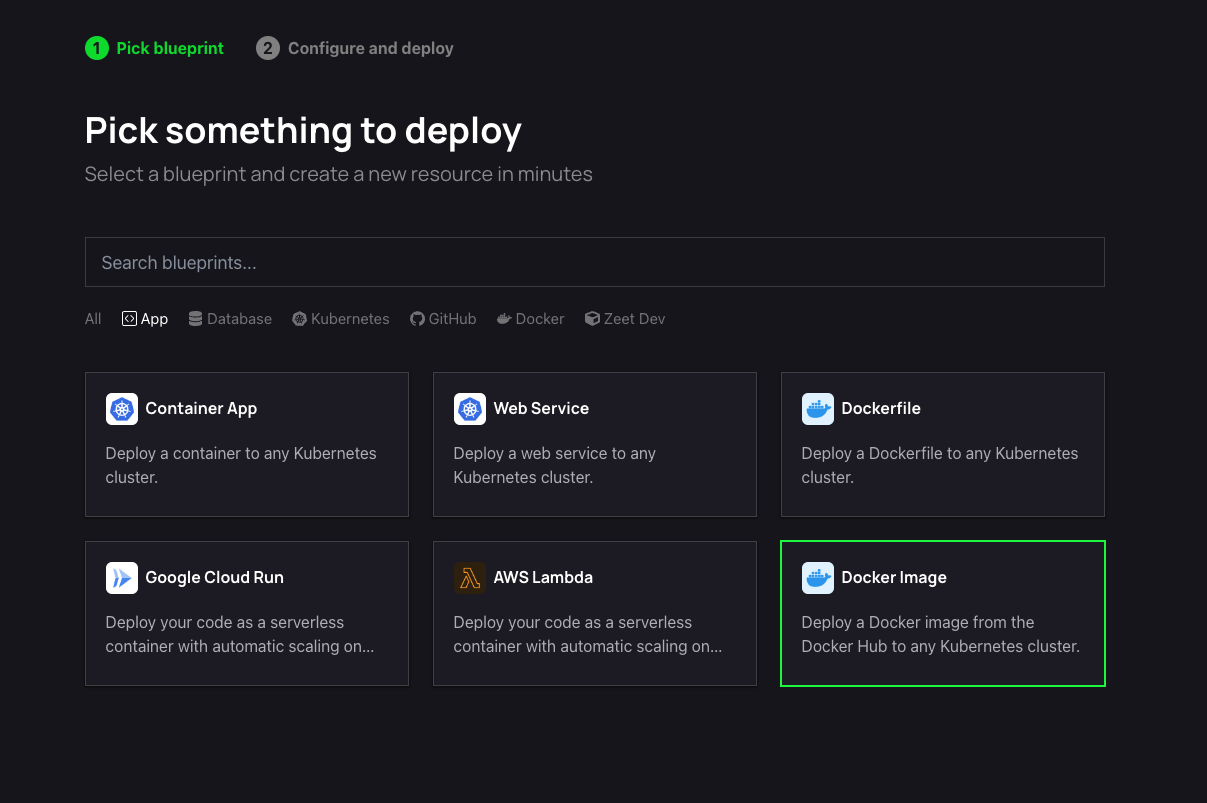
1. Select Docker Image Blueprint
To get started, head over to the Zeet dashboard and navigate to the Create New menu. Here, select the Docker Image Blueprint.
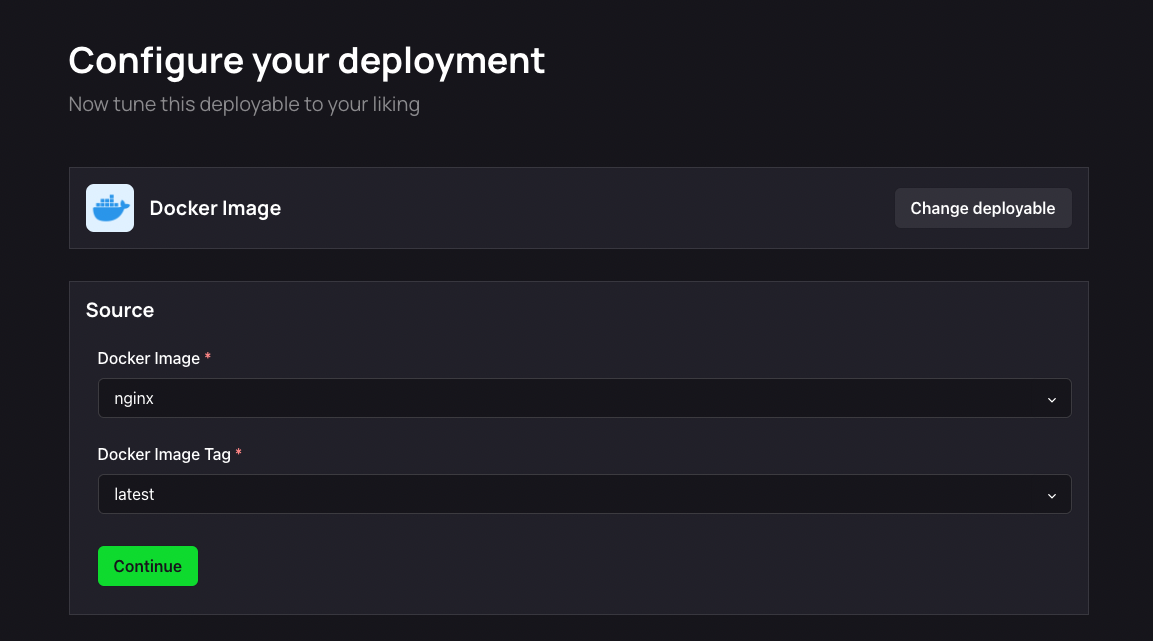
2. Configure Blueprint
After selecting your Docker Image Blueprint, you'll need to configure your deployment. For this guide, we will go over deploying an nginx instance from Dockerhub. However, you can also deploy any publicly available image from Dockerhub. Check out some of our other guides on self-hosted apps that use Docker Images!
1. Pick your Source
The first step in configuring your deployment is to select your source. In the Docker Image input, you can search for any image on Dockerhub. Let's search for and select the official nginx image with the latest tag.
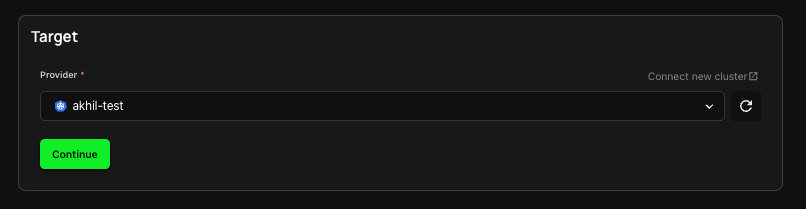
2. Select Target
The next step is selecting your Deploy target. You will be deploying this Docker Image as a Container in your cluster. If you don't already have a cluster connected, follow the link here to create or link a new Cluster.
3. Configure Inputs
With your source and target squared away, it's time to configure your inputs and unleash your Project.
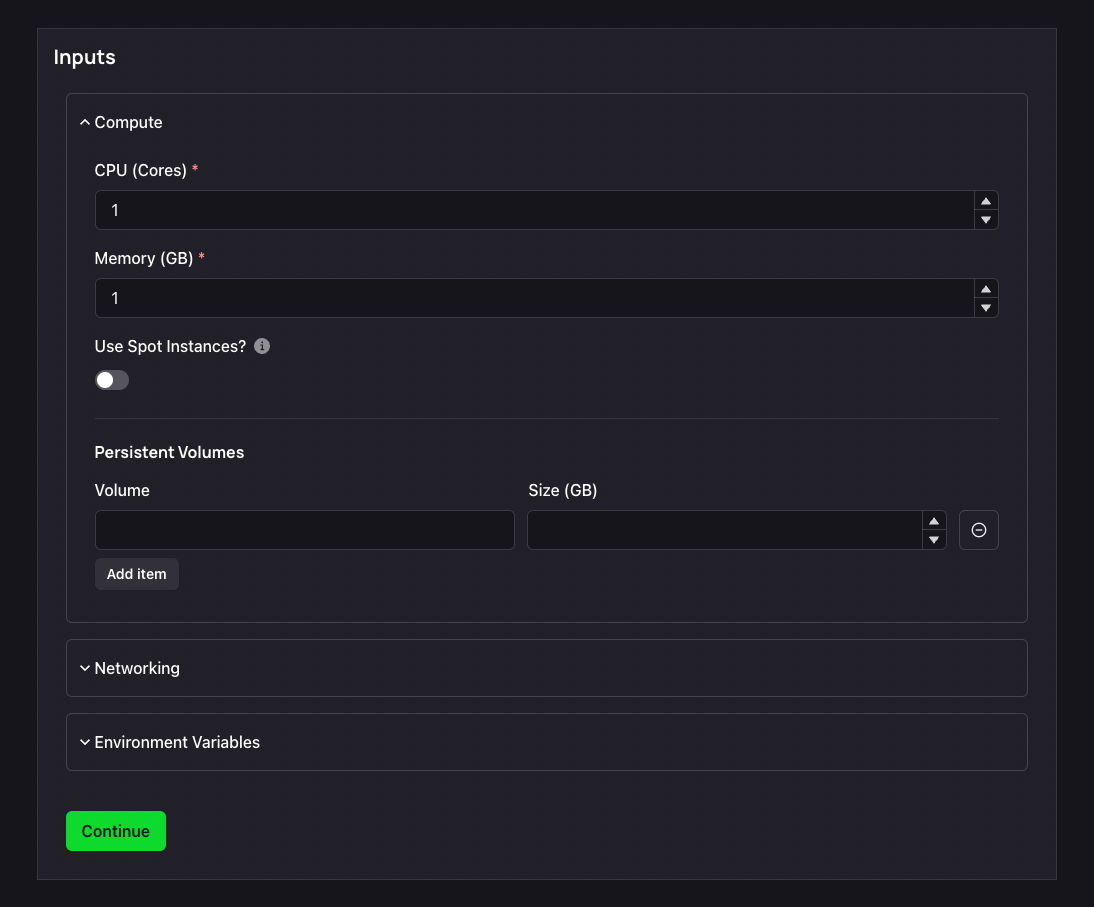
- The Compute section allows you to configure the CPU/ Memory you require for your container. You can also elect to use spot instances here.
- Under the Networking tab, you can expose the port that your Serverless app listens on.
- You can also add any Environment variables that your app would require during build-time and run-time.
4. Organize and Deploy!
The finish line is in sight! Your Project is almost ready to go, but first, you need to give it a name and a place to belong. Select the Group and Sub-Group, or create new ones, to get it done. Read our docs on Organization to learn more about Groups and Sub-Groups.
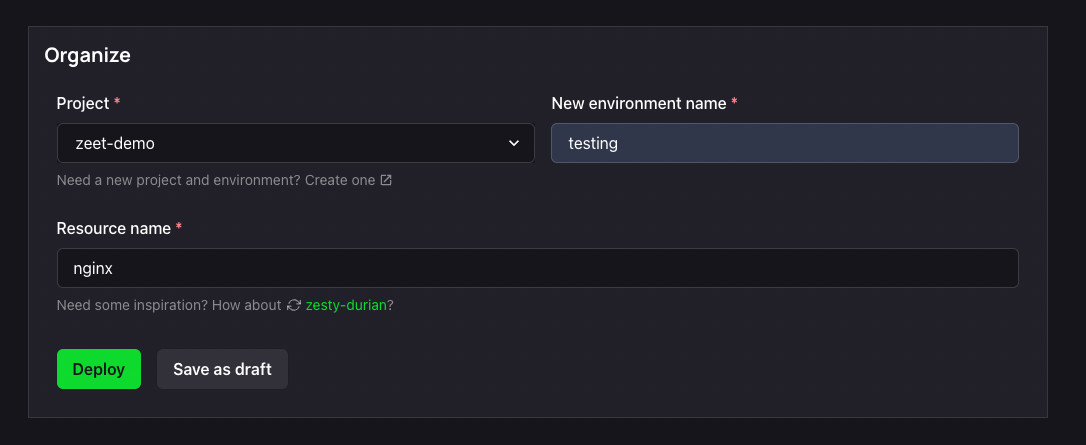
After naming and placing your new Project, the final step is to either Deploy it immediately or save it as a draft for later use.
Resources
- Docker Hub: Official Docker Hub page
- Nginx: Docker Hub page